5 Landscape Photography Tips that are Actually Useful
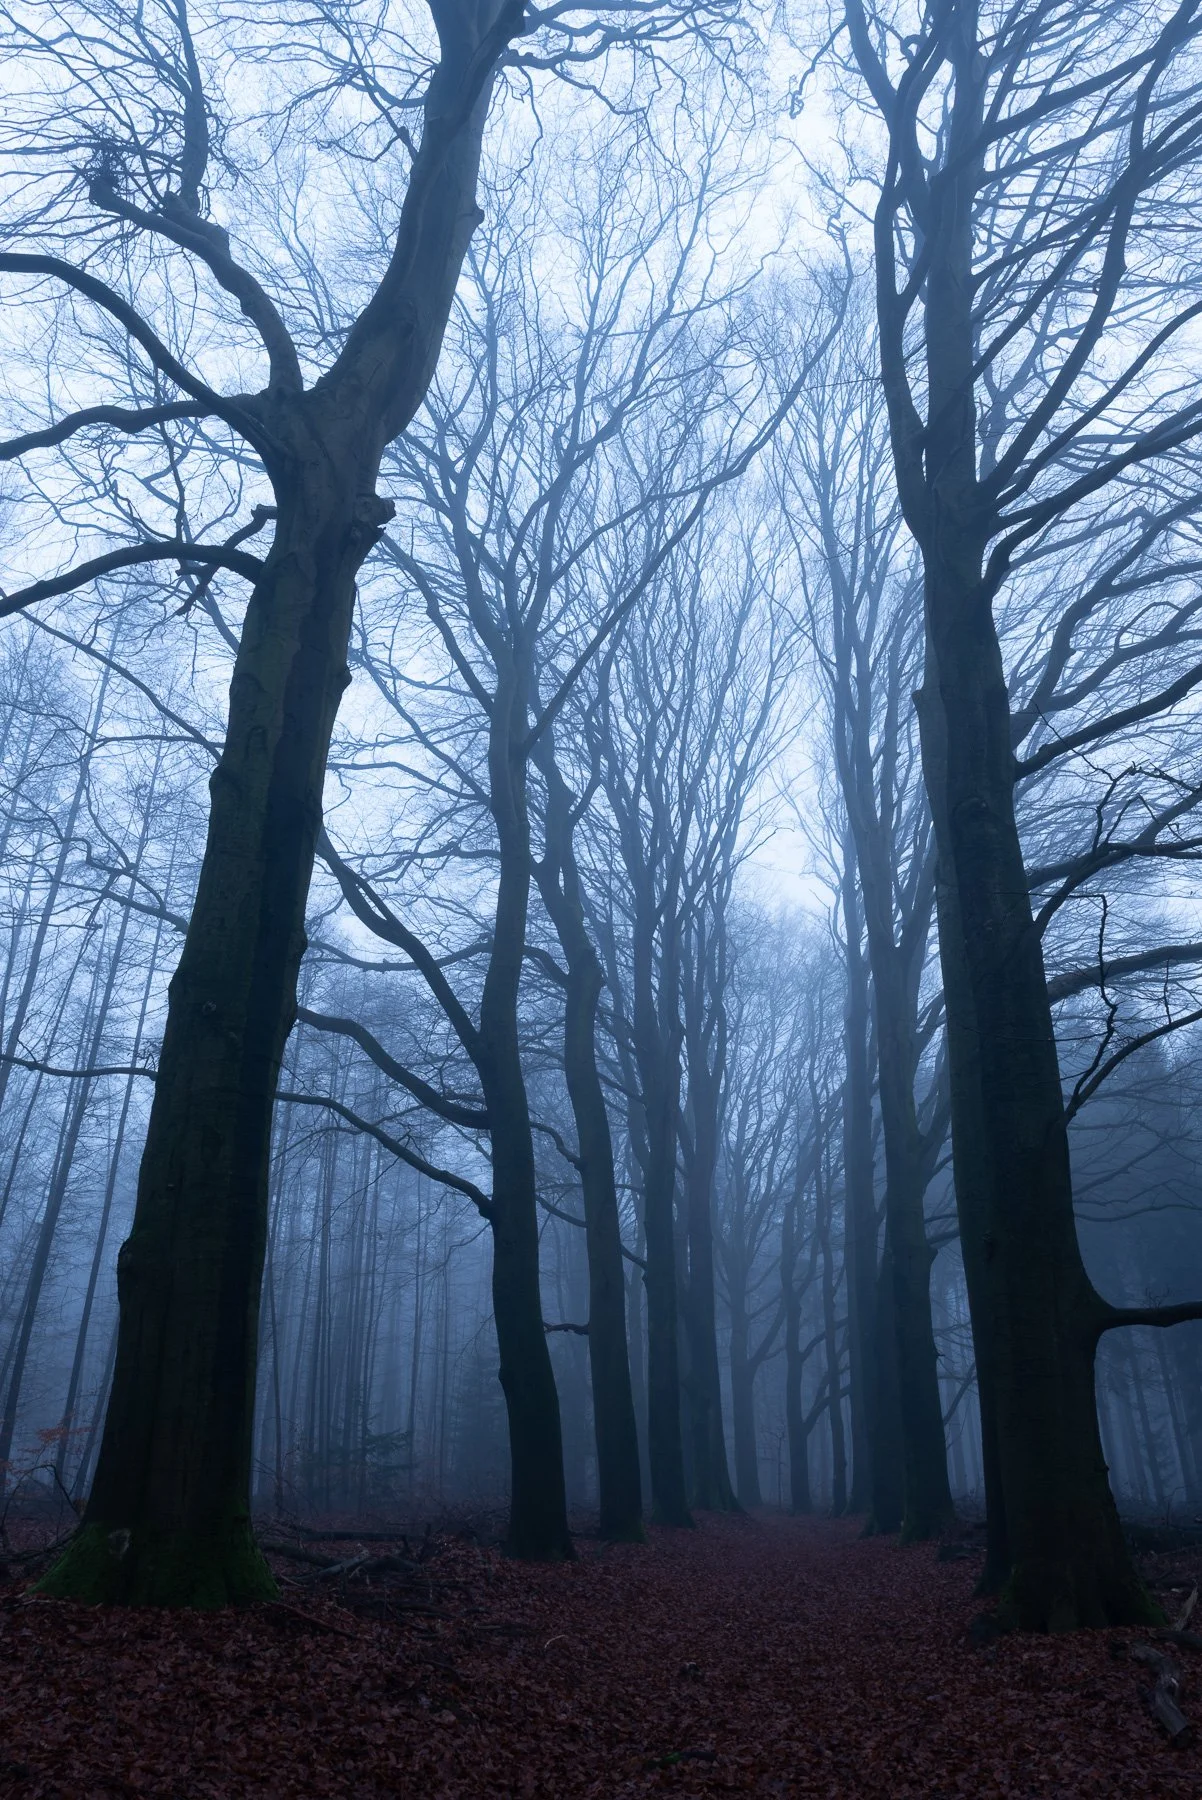
1. Get rid of clutter (simplify)
There’s a tendency, especially early on, to treat a landscape like a checklist. Foreground, midground, background, dramatic sky. Everything goes in. The result often feels underwhelming, even if each individual element is interesting on its own. The issue is not a lack of subject matter, but a lack of hierarchy.
A photograph needs structure. Not in the sense of rules, but in the sense that something has to take the lead. When multiple elements compete for that role, the viewer has no clear entry point. Their attention drifts, and the image loses impact. Simplifying composition is the process of establishing that hierarchy with intent.
In practice, this means you have to be selective to a degree that can feel counterintuitive. You might be standing in front of an expansive vista, yet the strongest image could come from isolating a small section of it. A single ridge catching light. A curve in a river. A pattern in the sand. By narrowing your focus, you give the viewer something to hold onto.
This is where restraint becomes more valuable than ambition. It’s easy to be impressed by a scene and try to capture all of it. It’s much harder to identify what actually makes that scene compelling and commit to just that. The discipline lies in recognizing when additional elements stop contributing and start distracting.
Negative space
Aside from the obvious statement that lens choice plays a big role in getting rid of clutter, spatial relationships play a key role here. Elements in a frame are not just subjects, they interact. Their position, spacing, and overlap determine how the image is read. When those relationships are unclear or overly dense, the composition feels chaotic. By simplifying, you create separation where needed and alignment where it strengthens the image.
Negative space is often misunderstood in this context. It’s not empty for the sake of being empty. It’s functional. It gives your subject room to exist without interference. It directs attention by contrast. A lone tree against an open sky carries more presence than that same tree surrounded by competing detail. The absence of information becomes a compositional tool in itself.
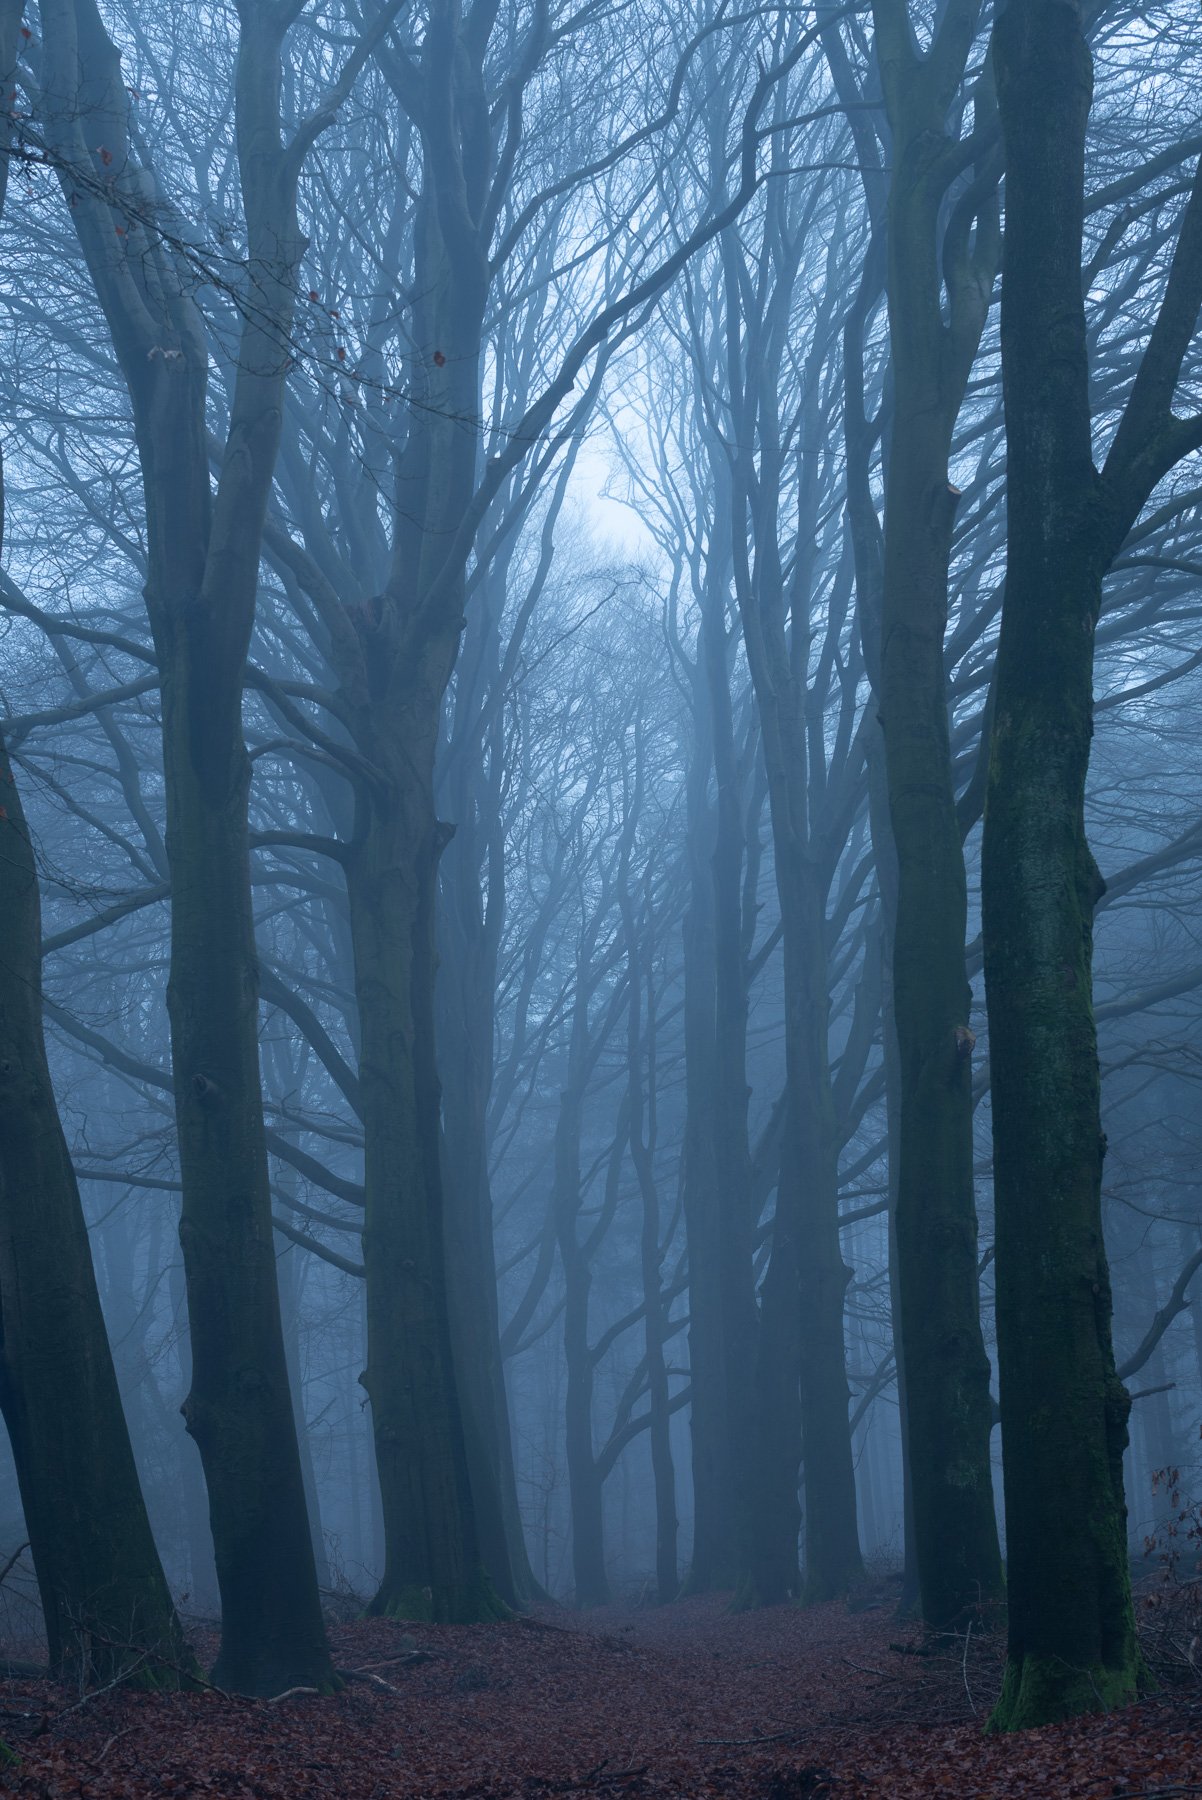
Kairos: the sense of time
Timing can simplify just as effectively as framing. Light changes the balance of a scene. A cluttered landscape at midday can become even more chaotic by a play of harsh shadow and light, but as soon as the sun sets, order is brought to exactly the same subject and composition when all that harshness magically fades away.
But be aware that light can also make your images simpler. Highlights isolate shapes. Shadows conceal detail. Waiting for that alignment often does more for simplification than any compositional adjustment.
Simplification is more important than you realize
There’s also a mental shift involved. Instead of asking “what can I add to improve this image,” the more useful question becomes “what can I remove without weakening it.” That question tends to reveal the core of the composition. Once you identify that core, everything else becomes optional.
Over time, this approach leads to a more deliberate way of seeing. You begin to recognize that complexity in nature doesn’t have to translate into complexity in a photograph. The camera is not obligated to mirror reality in full. Its strength lies in interpretation.
A simplified composition doesn’t mean a simplistic image. It means that every element has a purpose, and that purpose is immediately clear. One photography artist who is exceptional at this is Benjamin Everett. His images are often so… to the point that they look like screenshots from a Wes Anderson movie.
For me and my 20 years as a photographer, simplification is the most important change in my landscape photography that got me from “here’s a pretty average photo of another sunset” to “here’s an award-winning piece of art”.
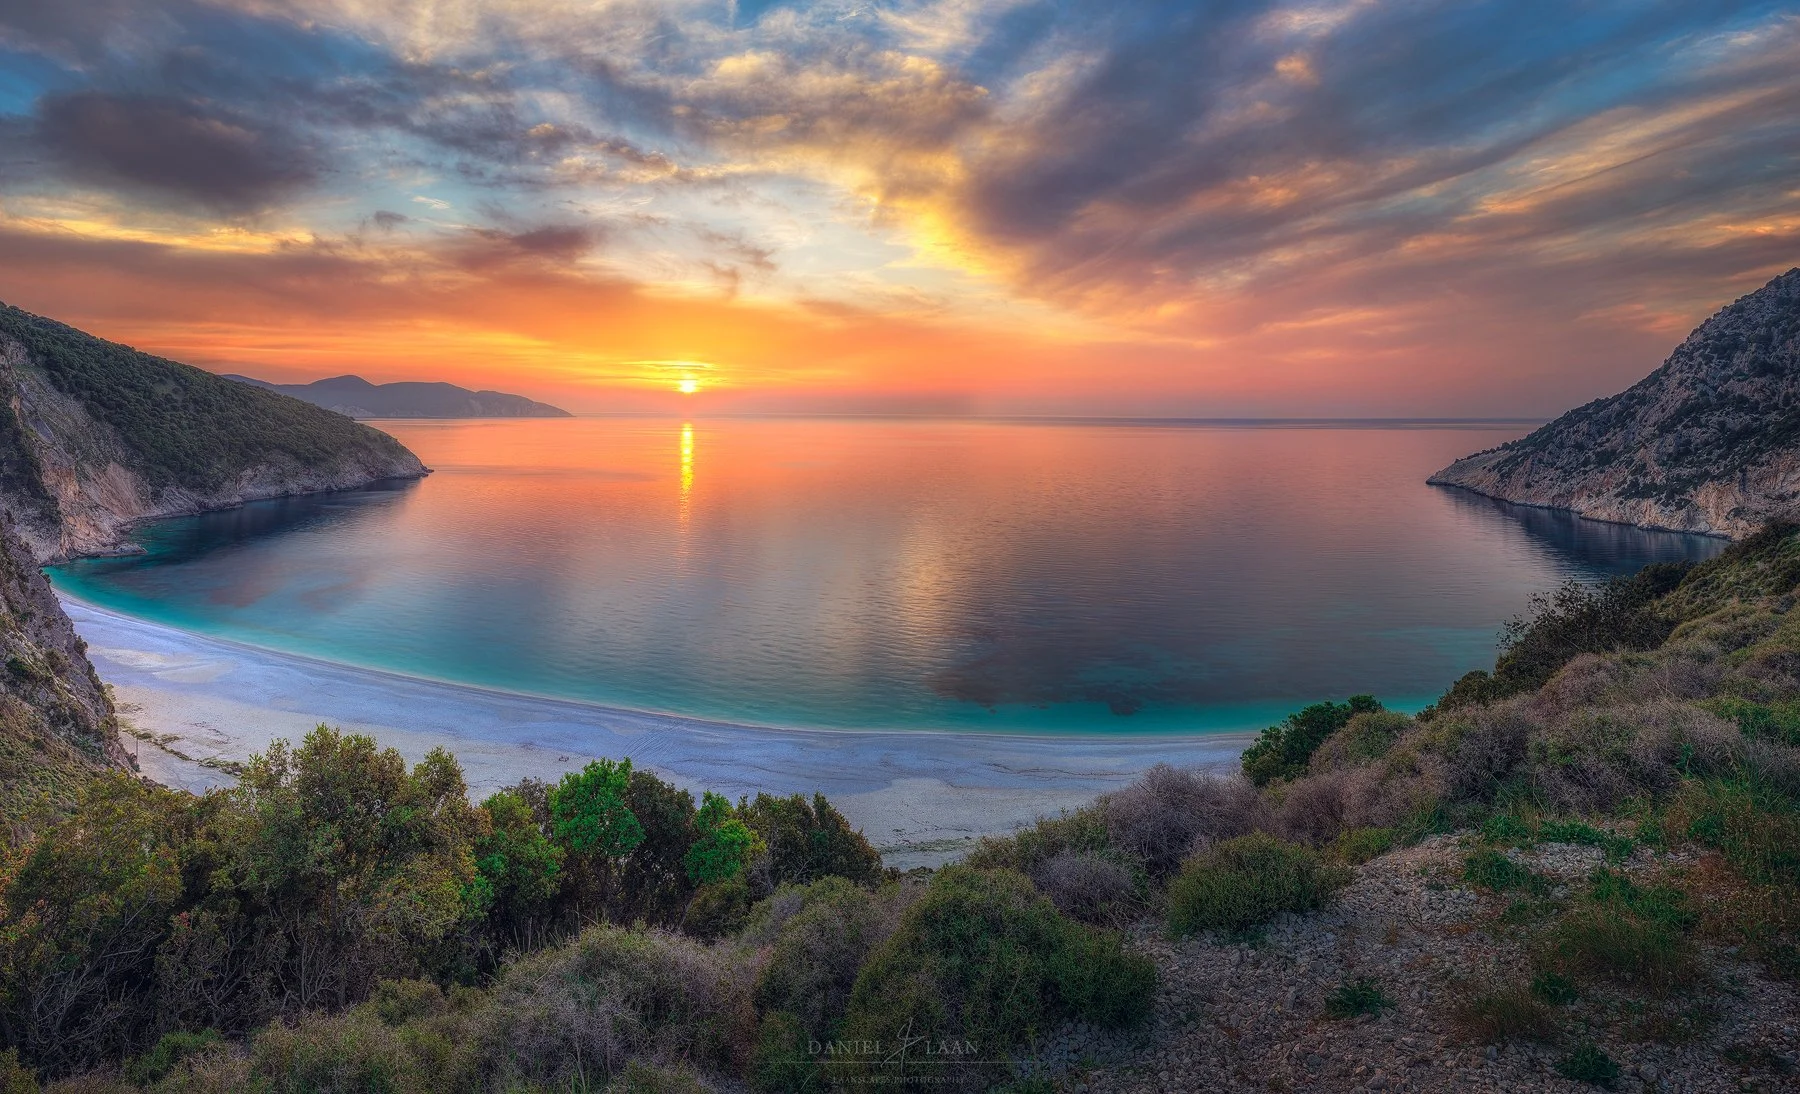
One of my earlier photos. It’s not that I dislike the image, but there’s something mundane about it that has me scrolling straight past it when I would be judging a photo contest. Shot with a Canon EFS 10-22mm f/3.5-4.5 USM at 12mm, which is about 19mm on full-frame.

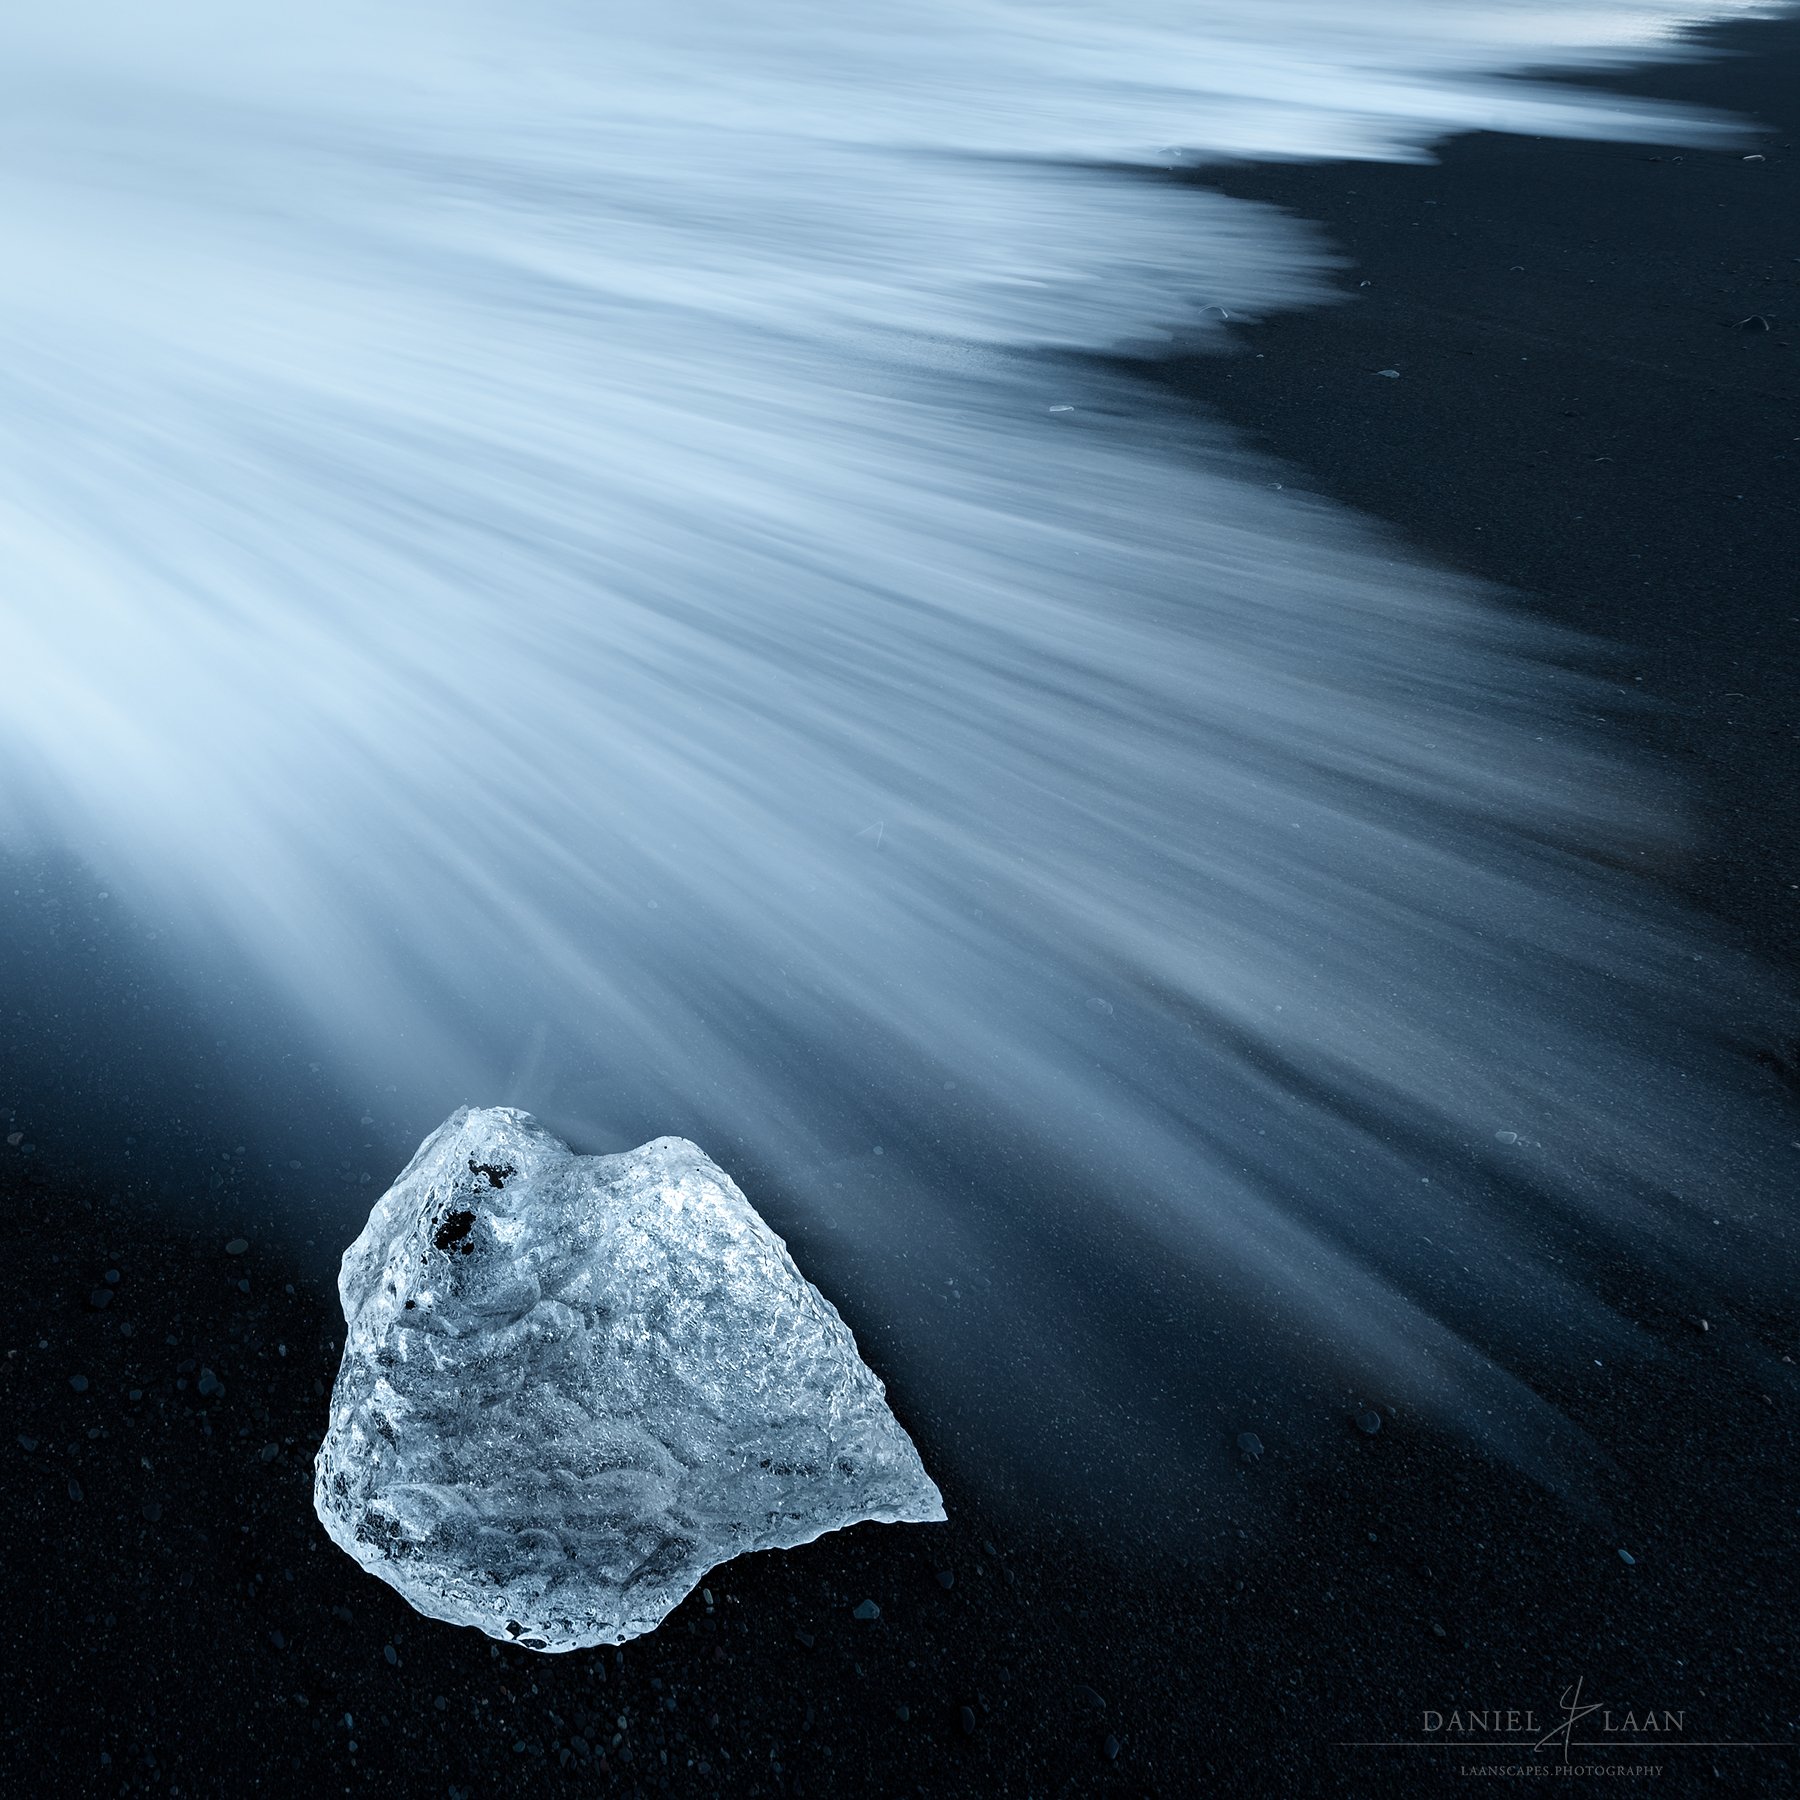
Comparing the previous image to another seascape at sunset, which I shot more recently, we see a much stronger result. It’s not that the subject matter itself is simple. Not at all. The foreground is arguably more chaotic in shape and motion. But there is a certain amount of simplified use of color and contrast that makes this shot more attractive. I’m not even talking about obvious light and dark contrast, but contrast between waves in motion and stark stillness of these famous seastacks along Iceland’s south coast. Additionally, there’s contrast between jagged peaks and smooth water to strengthen the story here, made by lengthening the exposure time. We’re at about a 2 second exposure here. I wouldn’t go for a longer shutter speed, because that would remove the motion we’re seeing. This image was shot using a Nikon NIKKOR Z 100-400mm VR S at about 300mm on full-frame.
2. Learn and Embrace Post-Processing
At some point, it becomes obvious that capturing the scene is only part of the process of making art. What you bring back from the field is a foundation, not a finished piece. Every experienced landscape photographer builds on that foundation in post. The difference lies in how far they take it, and how deliberately they shape the final image. Here are a couple of examples of the amount of post-processing that could go into any image I shoot.
Before (raw) - even with fantastic conditions like this, the shot isn’t great. The dynamic range is enormous here, shooting against the light - but it does pay off if you expose correctly. The primary thing that bugged me, was the big branch in the top left. Shot using a Nikon AF-S NIKKOR 70-200mm f/2.8E FL ED VR Lens and a Nikon AF-S FX TC-17E II (1.7x) Teleconverter to get to 340mm.
After - Even though the post-processing is subtle, note that the lighter areas are considerably less demanding of our attention. Through carefully warping the image, I got rid of the dark distracting branch. It’s very tempting to raise the darks or blacks for this image, I actually slightly lowered them in the end, thereby keeping the dead leaves in the foreground dark too. Not all has to be revealed to make a photo stronger.
Compare these subtle improvements to another forest scene below. This one took more imagination and skill in post-processing to get to the result I had in mind:
The early morning did bring a minor amount of haze, although the overwhelming blue tones before sunrise made it hard to get the autumn color looking great. But at least I was the only one there at this location that’s usually overrun with tourists midday.
Using my own technique of separating autumn colors through combining hue masks with channel selections and levels, I brought out the colors that are usually only visibly in much stronger light. And to make this work, I also brought up the exposure selectively to make the scene cohesive. The dreamy look is achieved by not making the shadows too black and applying a little orton effect to the background.
The above images are the before and after of one of the photos in the post-processing tutorial “Return to The Dark Forest”. To me, this example is a conservative approach in editing. In other cases you learn to take it much further, but in the end it depends on what the image needs according to your vision, not according to the opinion of somebody else.
About that coveted “personal style”
Developing a personal style rarely happens in the moment you press the shutter. It evolves afterward, when you sit down and start interpreting what you saw. This is where your work separates from everyone else standing at the same location. Two photographers can shoot the same scene, under the same conditions, and produce entirely different images simply because of how they process them. This is often the case when me and my friend Martin go out to shoot together. He has a much more conservative touch in post than I do, resulting in images that simply do not look alike, even when we had the same camera, tripod, lens and shutter speed and stood right next to each other.
Even when I’m next to someone who could spend a similar amount of time sat tweaking in Photoshop like Isabella Tabacchi or Kai Hornung, our images look distinctly different. I cannot overstate the fact that people make the images, not cameras.
The reason is that we are different people, with different minds, preferences, memories and things in life that move us. Neither Isabella nor Kai like the music I listen to while post-processing. Martin does, but he has wildly different interpretations of what is considered to be okay, too much or too little of a particular adjustment in Lightroom or Photoshop. Which leads me to my next point.
How much is too much?
There is often resistance to the idea of using post-processing to get more out of your images than “what the camera captured”. I mean, it’s the reason we shoot raw, right?
(short tangent: I see raw written as RAW or Raw a lot. It’s not an abbreviation, nor a brand name or the start of a new sentence. English might not be my first language, but I get passionate about little things like this).
Resistance to post-processing is usually rooted in unfamiliarity. Working with editing software can feel like stepping into unknown territory and that discomfort tends to get labeled as something else. Purism, authenticity or the idea that an image should come straight out of the camera. In reality, it’s just hesitation toward a tool that hasn’t been fully understood yet. And this is usually brought to light when I teach landscape photography and processing in the field as we get familiar with each other in the field.
You should understand that images that circulate online; the ones that stand out and hold attention, are not accidental. They are shaped. Contrast is refined, color is guided, light is emphasized or subdued. This applies across the board. Famous modern landscape photographers such as Marc Adamus, Ryan Dyar, Adam Gibbs and Alex Noriega all rely on post-processing to bring their vision to completion. Tools like Adobe Photoshop are often seen as shortcuts or cheat codes. But actually, there goes great skill and refinement into honing the craft of photography. It doesn’t matter if you use Luminar, Photoshop or Capture One to develop your raw-files. As long as you do.
Even the greats like Edward Weston, Ansel Adams and Galen Rowell edited their images to the point of critique by others who failed to become as famed as these people.
A case against calling it “deception”
There is a persistent misconception that editing equates to manipulation in a deceptive sense. That if an image has been processed, it somehow loses credibility. This perspective overlooks how every form of visual art operates. Painters choose what to emphasize and what to leave out. Cinematographers, who are particularly influential on my own sense of style, control color and light in post-production. Photography is no different. The goal is not to fabricate a scene, but to translate an experience into something that communicates the feelings, hopes, dreams and sense of what reality is to an audience that does not live inside the head of the artist.
If anything, post-processing brings you closer to what you intended to show in the first place. Cameras have limitations. Dynamic range, color response, and contrast rarely match what you perceived on location. Editing bridges that gap. It allows you to guide the viewer’s attention, reinforce your composition, and create consistency across your body of work.
This is also where the earlier idea of simplification continues. A strong composition in the field gives you direction. Post-processing lets you refine it further. You can subtly darken areas that distract, enhance contrast where you want focus, or adjust color to unify the frame. These are not drastic changes. They are controlled decisions that support the image rather than overwhelm it.
Learning how to do this effectively takes time, but it’s a skill that compounds quickly once the fundamentals are clear. Instead of guessing your way through sliders, you begin to understand why certain adjustments work and others don’t. That shift is what turns editing from a chore into a creative extension of your photography.
This is exactly what my post-processing courses are built around. Not presets or quick fixes, but a structured approach to understanding light, color, and contrast in a way that directly supports your compositions. The goal is not to impose a style on your images, but to give you the tools to develop your own with consistency and intent.
At that point, the process becomes cohesive. What you see in the field informs how you shoot, and how you shoot informs how you edit. The final image stops being a compromise and starts becoming a controlled result. It’s human nature to be afraid of something you don’t know. Which is in most cases the deep-seated reason why anyone would be against using the computer to enhance your images. At any level. To me, Photoshop is as essential as my tripod. Without it, I would not be able to show you what is in my mind.
The tutorials listed below couldn’t be more different. In one, we put elements of different photos together to create entirely new images which is the most black hat way to get images looking like complete fantasy landscapes. In the other, subtle but powerful adjustments are made to lighting conditions that are already there to convey that same sense of fantasy. Either of these tutorials will get you results that seemed impossible before.
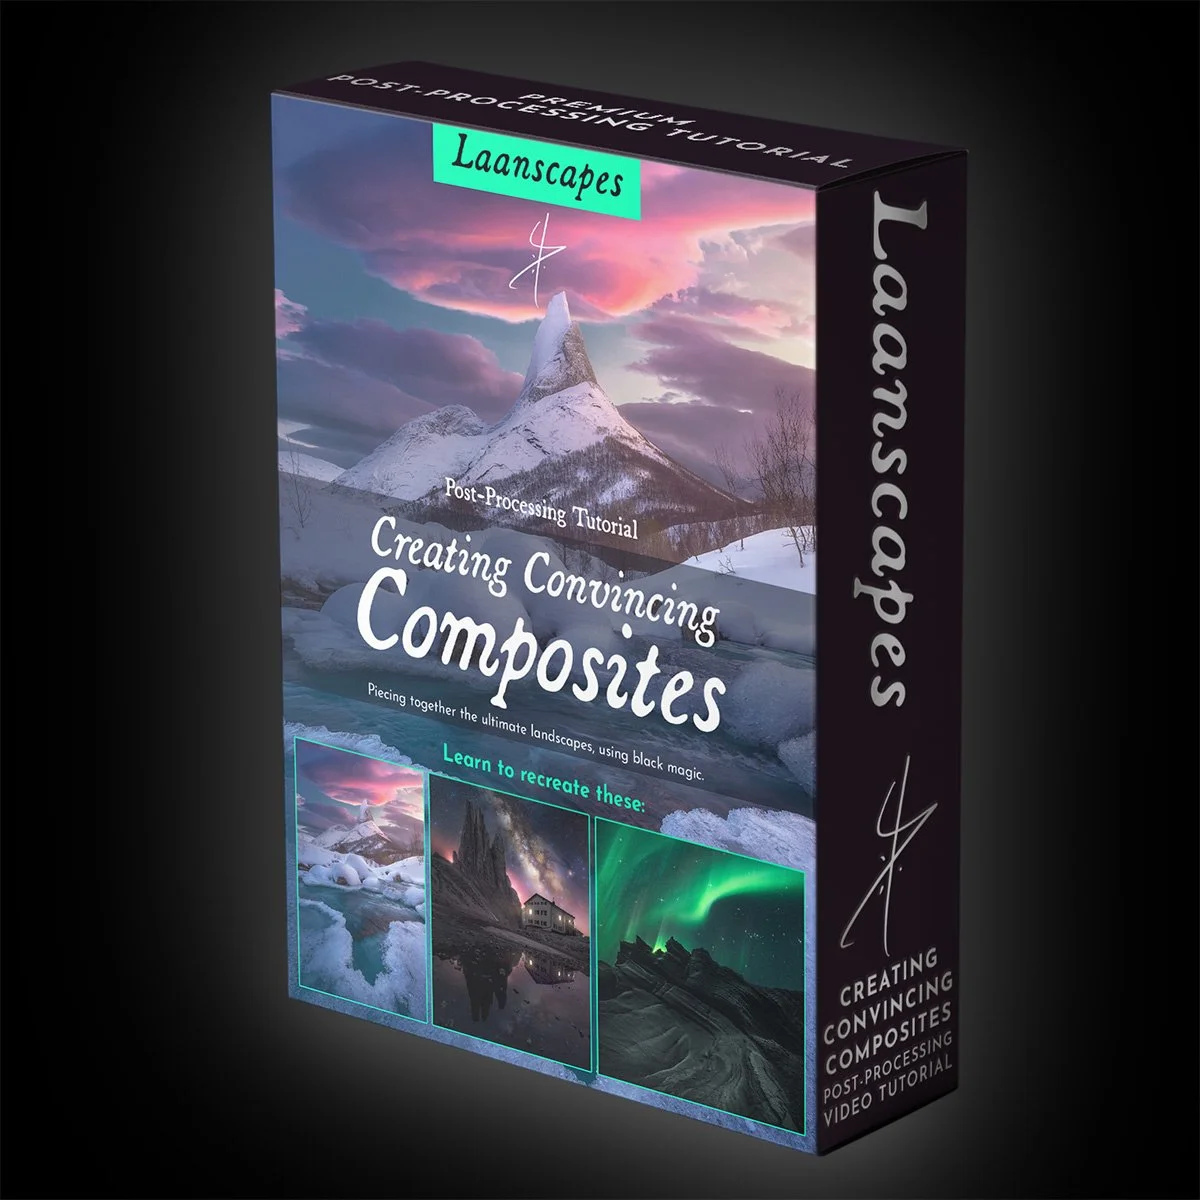
Create the very best scenes in Photoshop, but create them well. In this enormous tutorial, you will learn to awe your audience and inspire other photographers.
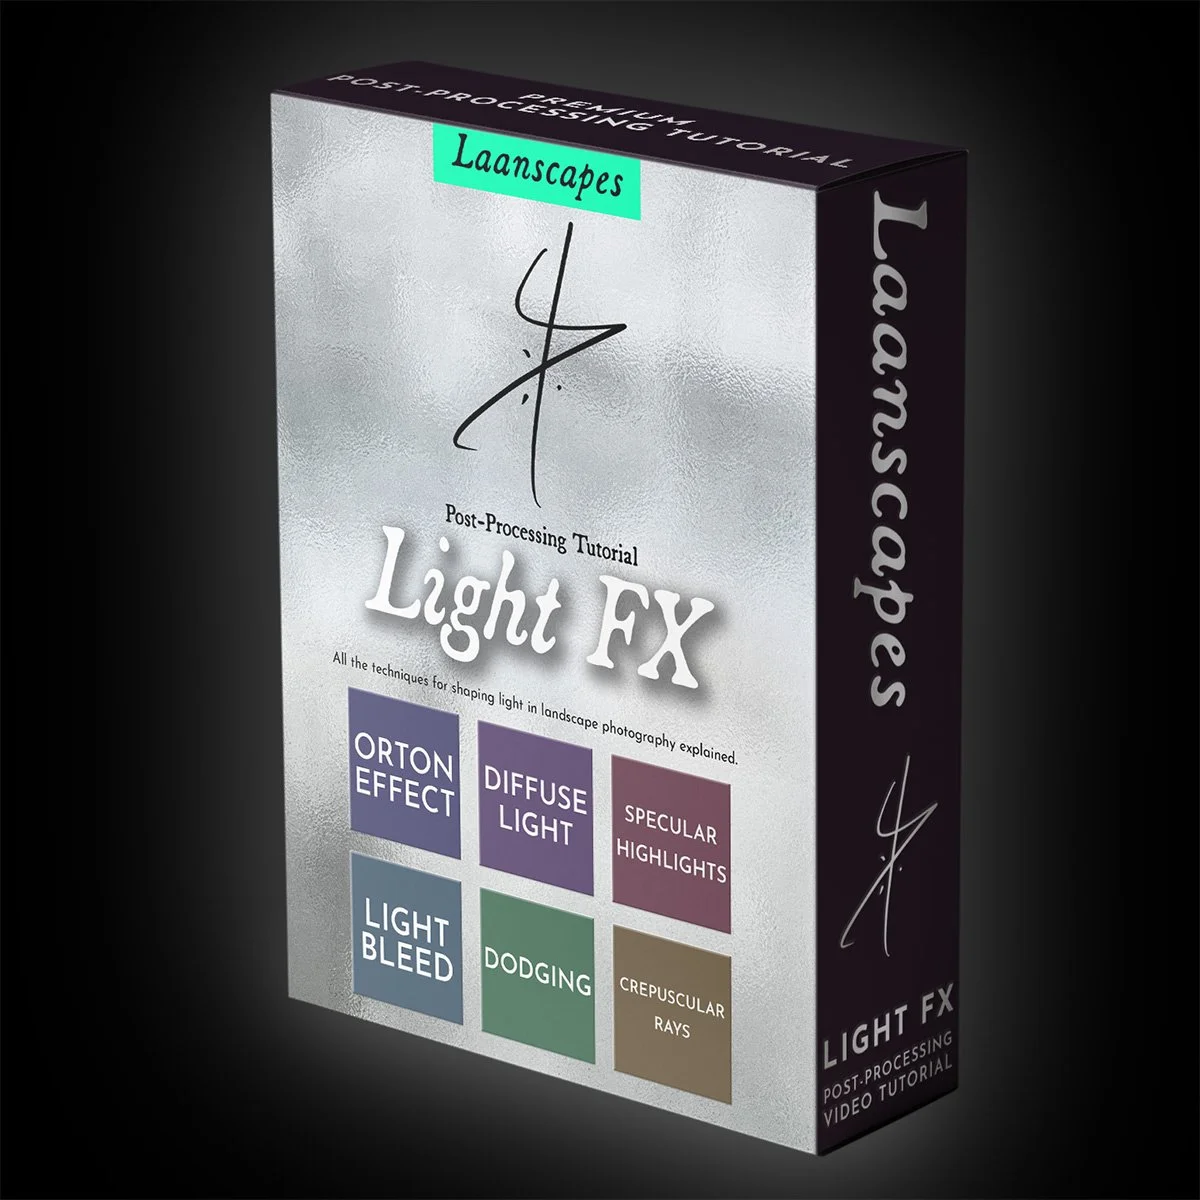
An amalgamation of many different magical lighting techniques. This video explains all light effects needed to enhance your own compositions.
Adding links like these pays the bills for me. Writing these articles takes about three days of writing, linking, finding the images to support the story in my archive of thousands of images and finding the EXIF to explain what went into the making of them. These post-processing tutorials are a win-win: you get to learn the techniques that I made my own in over 25 years of experience of using Photoshop, while I get to eat.
3. Use Telephoto Lenses First
Lens choice and perspective reinforce the process of making a photo not just simpler, but also much more personal. A longer focal length allows you to exclude peripheral distractions and compress elements into a more cohesive arrangement. A wider lens demands stricter discipline, because it naturally includes more than you might want. In both cases, the goal remains the same. Control what enters the frame, and be deliberate about why it’s there.
The idea behind using a telephoto lens as opposed to using wide-angle lenses in landscape photography is to narrow your field of view and make it much more personal. It ties in with the first tip, in that these tools help you to omit stuff that doesn’t contribute to the visual impact of your photos. If you start out with a relatively long focal length, chances are your photographic vision will evolve a bit faster. Like a hawk, you’ll suddenly recognize an interesting composition from way farther afield. There is also a practical advantage for beginners. Telephoto lenses naturally allow you to simplify chaotic environments. Instead of navigating through cluttered foregrounds, you can bypass them entirely and focus on what actually matters. This is particularly useful in locations where access is limited or where the most compelling elements are physically far away.
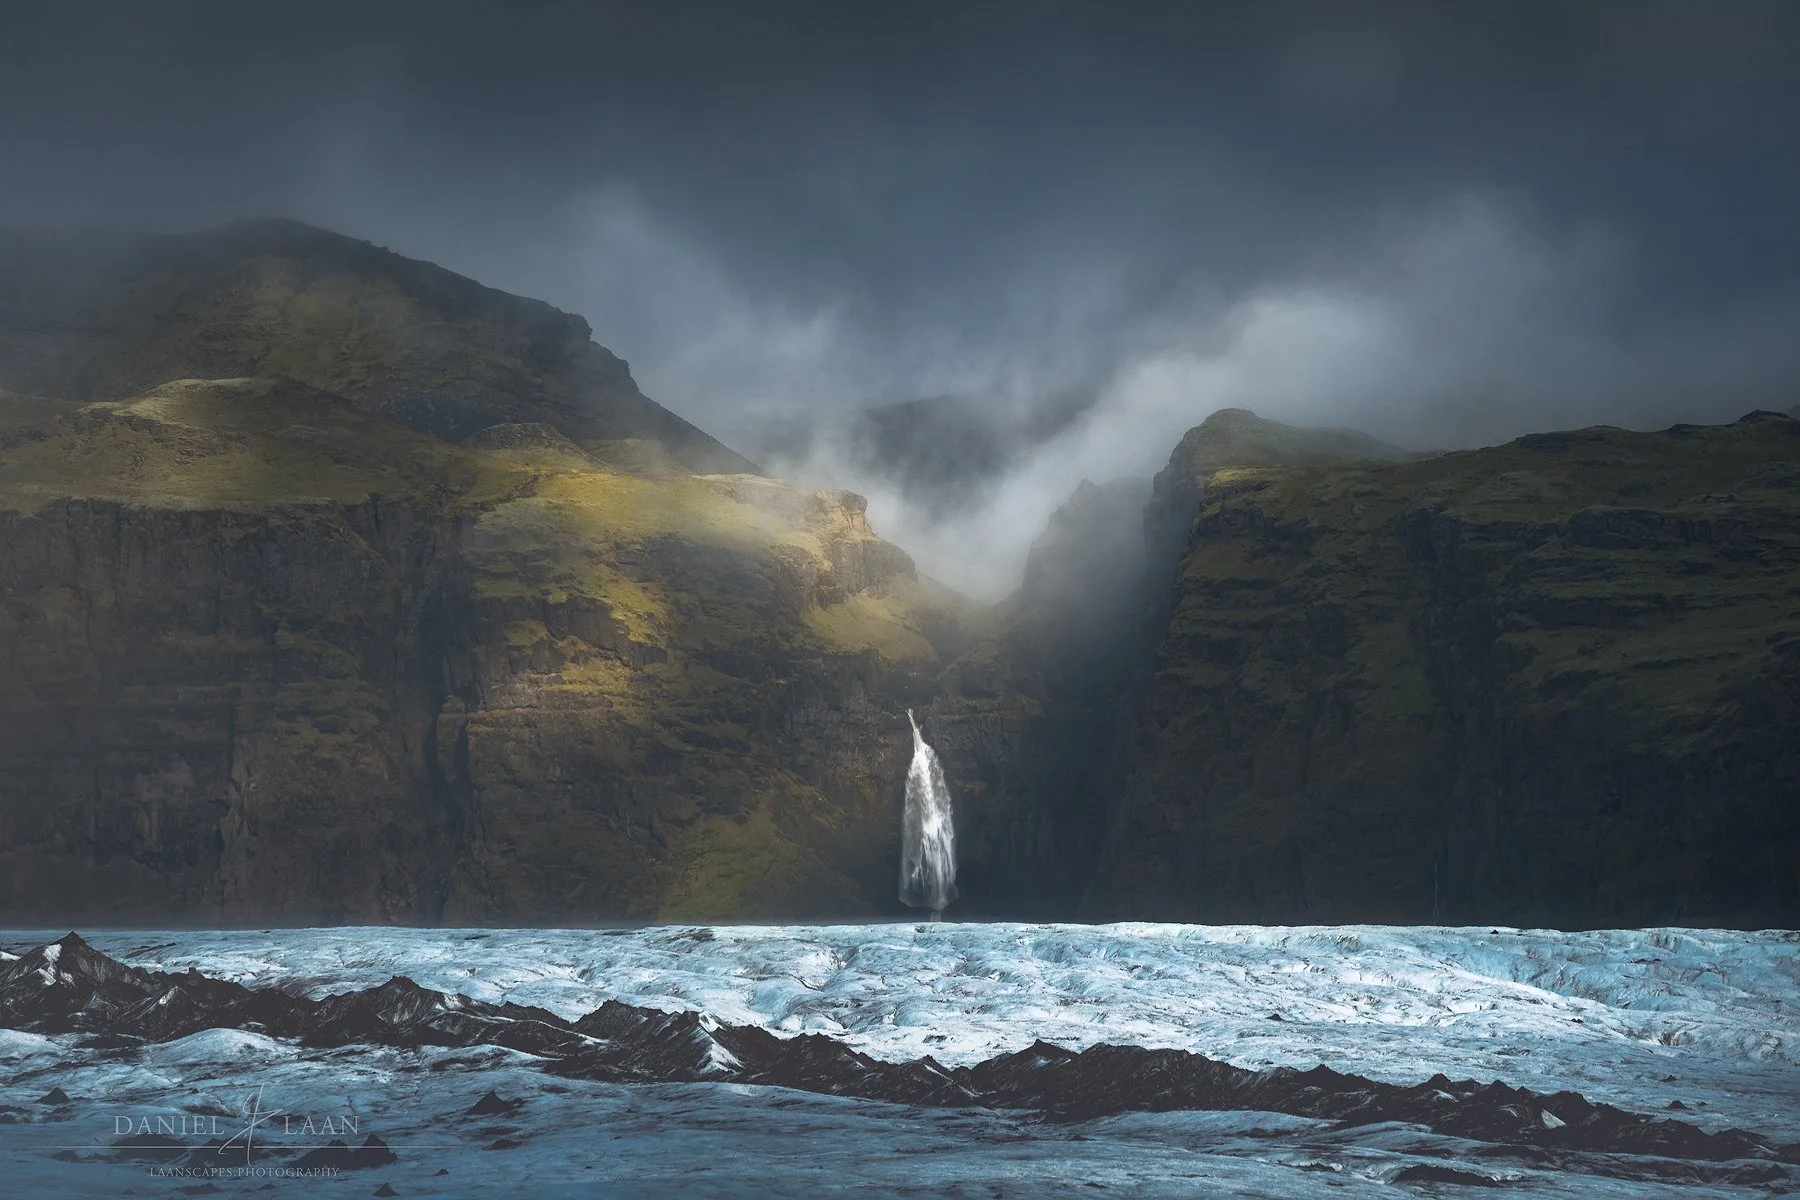
I couldn’t get this shot even if I wanted to, had I not had the 100-400 with me. This waterfall in Iceland’s Snaefellsness peninsula is across a glacier, and the dark clouds overhead just made the shot for me.
The telephoto lens compresses, which means that it visually puts objects closer to each other of the same apparent size, regardless of their distance towards you. Imagine for example a path in the forest, lined with a row of trees on either side. Because you’re zoomed in that much, the depth of the photo starts farther away. So each subsequently more distant tree will decrease much less in size than when you would see with a wide-angle.
Raw file. Shot using a Sigma 14-24mm F2.8 DG HSM at 24mm.
Raw file. Shot using a Nikon NIKKOR Z 70-200mm f/2.8 S at 70mm of exactly the same scene.
Aside from lens choice determining how much you fit into the frame, it changes how you interpret the landscape altogether. A longer focal length forces decisions earlier in the process. Instead of reacting to the entire scene, you begin isolating fragments of it. That shift alone leads to stronger, more intentional images. But in environments like the one above, you’ll notice that it appears a lot more foggy in the images shot with the Nikon NIKKOR Z 70-200mm f/2.8 S. That’s because we’re looking at a more distant selection of the wider view. And distance equals more air, more dewdrops and more dust to look through. This makes telephoto landscape photography inherently softer and exhibit less contrast. That’s completely normal, but often the primary reason why I go long in the forest.
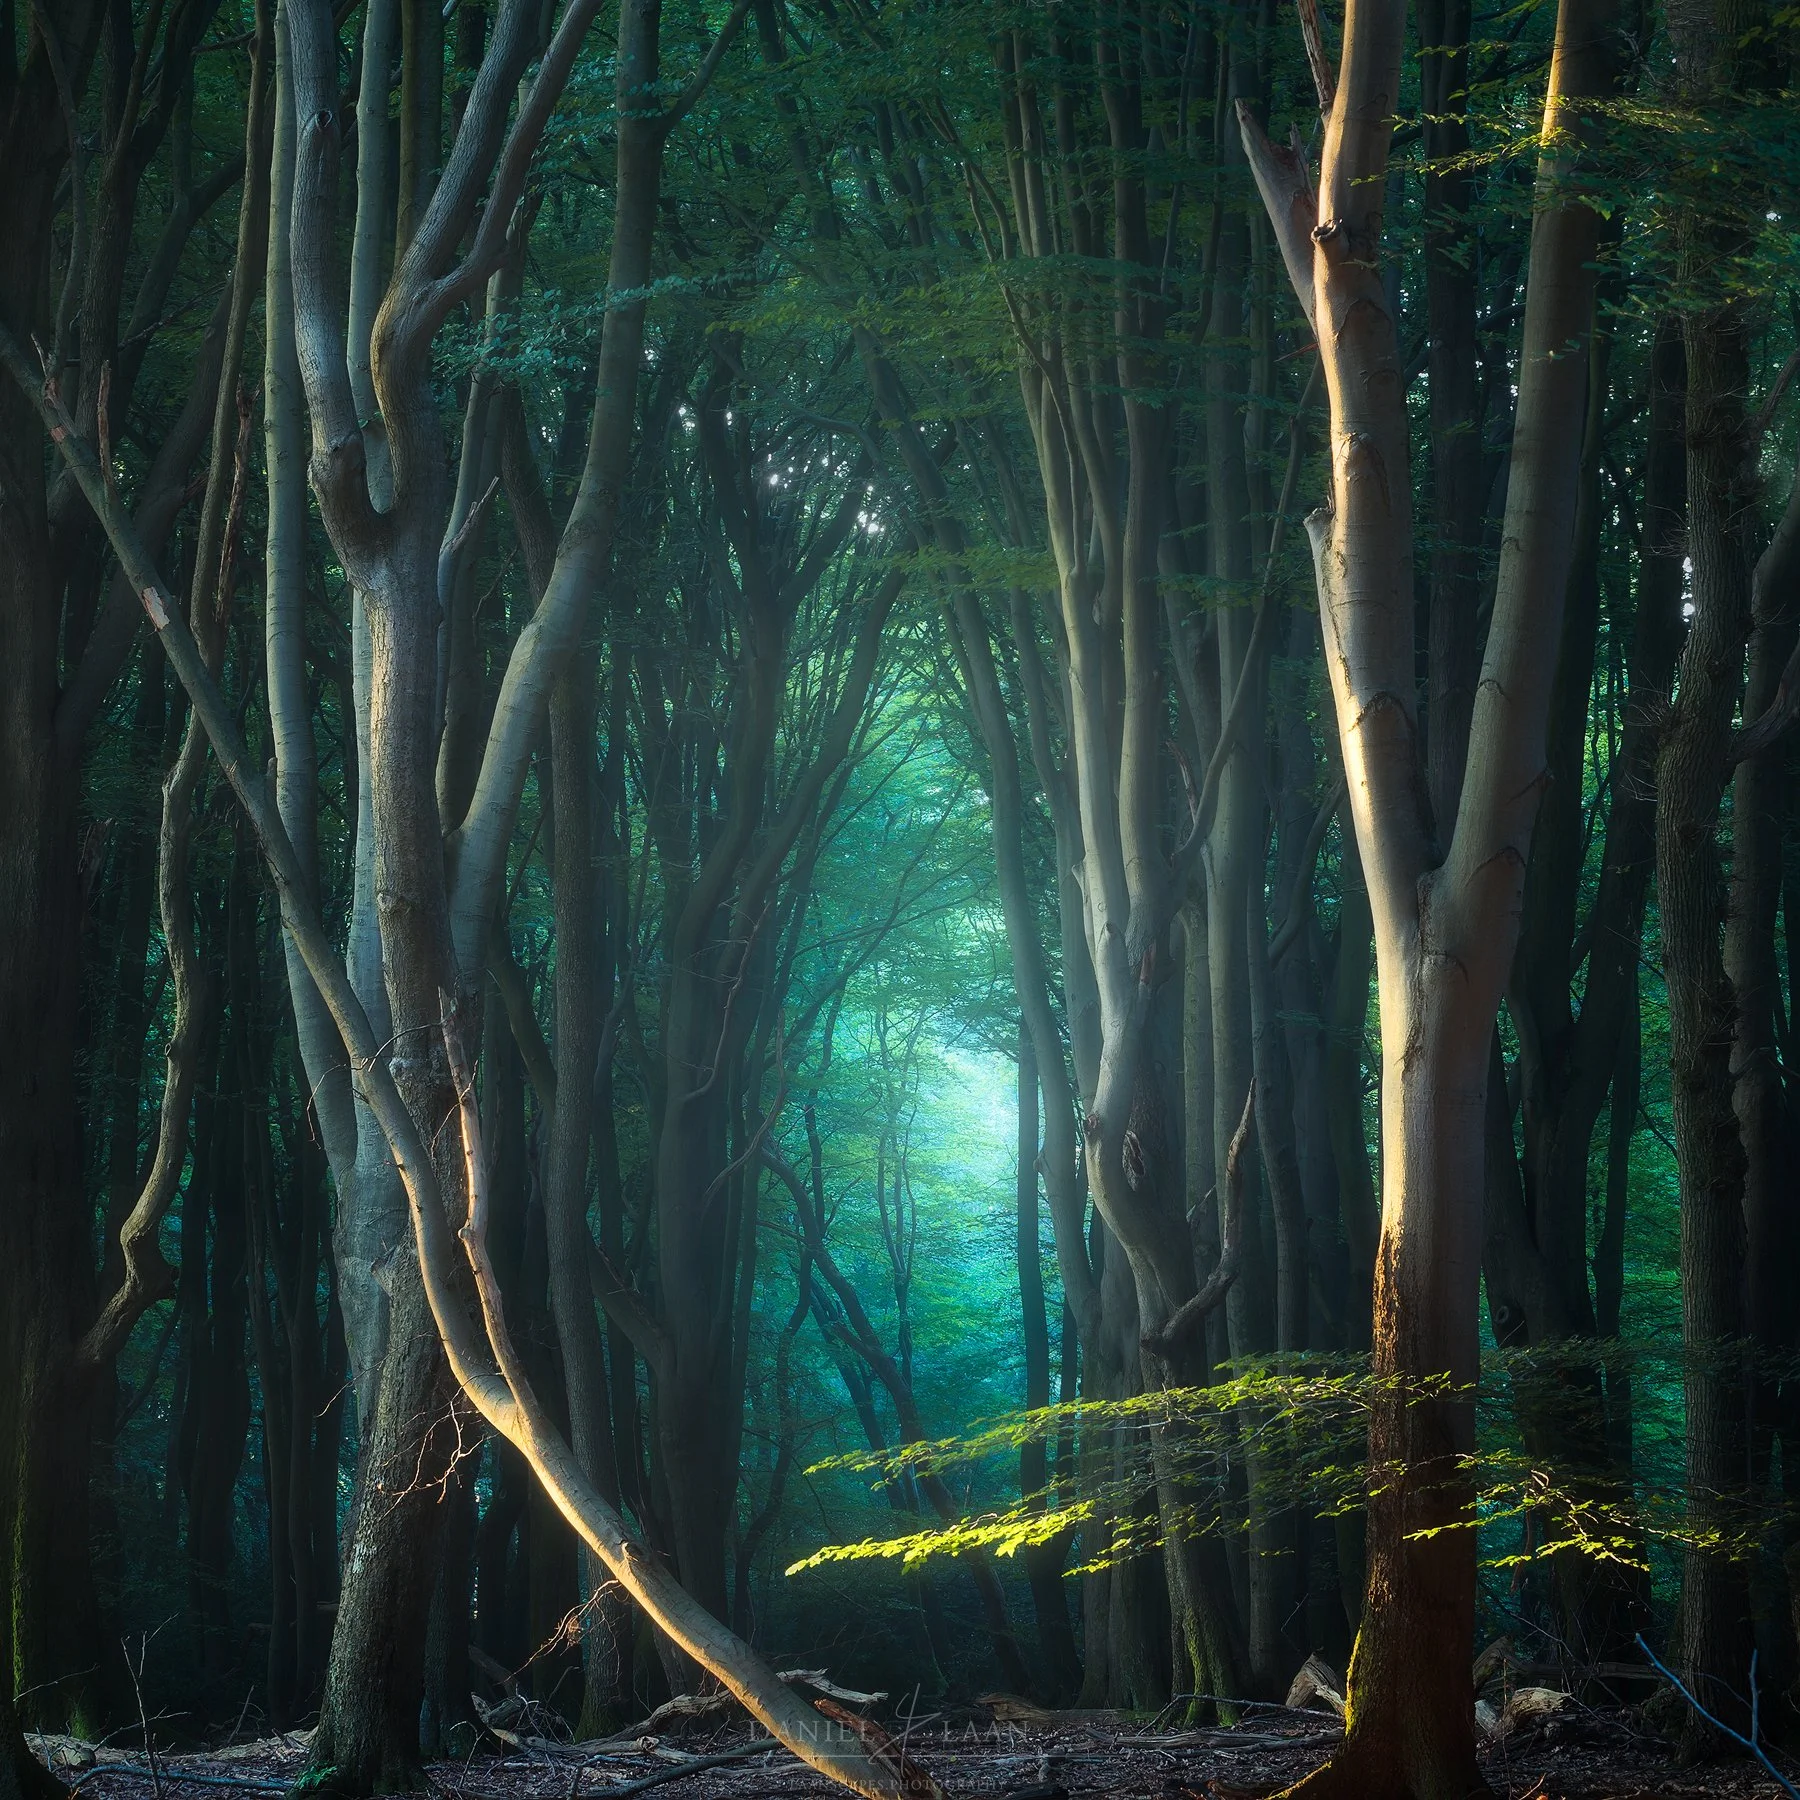
Another, finished image to illustrate why lens choice matters. A longer lens such as the one this was shot with (Nikon NIKKOR Z 100-400mm VR S) at 100mm, is useful to prevent large white parts of the sky coming in through the forest canopy. Those bright parts are made to be very intentional in this photo of Speulderbos here.
So working with telephoto lenses naturally limits what you include. You are no longer dealing with an overwhelming amount of visual information. You are selecting a slice of the landscape and committing to it. This makes composition more precise. Every element that remains in the frame has a reason to be there, because you actively chose it from a distance.
A telephoto’s compression is not just useful in the forest. Consider a series of mountain ridges fading into the distance like the image below shot with a combination of the Nikon AF-S NIKKOR 70-200mm f/2.8E FL ED VR Lens and a Nikon AF-S FX TC-17E II (1.7x) Teleconverter to get to 340mm.
With a wide lens, the nearest ridge dominates while everything else recedes quickly. With a longer focal length, those distant ridges retain more visual weight. They stack on top of each other, creating a rhythm that becomes the subject itself. The image is no longer about foreground depth, but about repetition and layering.
Telephoto lens recommendations for landscape photography
For those looking to explore this approach, most major systems offer strong telephoto options. I’ve mentioned a few in passing already, but for a wider audience, here are my top recommendations for all major systems available today:
Canon
Canon RF 100-400mm F5.6-8 is USM, Telephoto This one is only around 700 bucks, but is up there with the rest.
Nikon
I’ve photographed with Nikon for most of my carreer. The F-mount 70-200 f/4 was my favorite, because it was so light and it rivals the sharpness of its f/2.8 sibling. But I doubt they make them anymore. These are the lenses I used and am still a huge fan of:
Nikon 70-200mm f/2.8G ED VR II AF-S F-mount Nikkor Zoom Lens For Nikon Digital SLR Cameras
Nikon AF-S NIKKOR 70-200mm f/2.8E FL ED VR Lens F-mount Nikkor Zoom
Sony
Fujifilm
Hasselblad
Hasselblad X is a special case. For a long time, telephoto photography just wasn’t possible on Hasselblad’s famous XCD lens mount. There were no lenses going longer than the XCD 135mm f/2.8, which is about the field of view you get at 107mm on full-frame. What I did was using a 645 to XCD adapter on my X1D-50C II and use Japanese-made lenses made ages ago for the 645 format by Mamiya. I couldn’t find links for those, as the good ones are hard to come by. You’ll be wanting to keep an eye out for these:
Mamiya Sekor Zoom ULD C 105-210mm f4.5 Pro TL (about 83-166mm on full-frame)
Mamiya Sekor ULD C 300mm f5.6 N Super Pro TL (about 237mm on full-frame)
You’ll need a Mamiya 645 to Hasselblad X adapter. Kipon and XPIMAGE make one that’s relatively easy to come by if you live in Europe. Get the Fotodiox one if you’re in the US.
I heard a rumor of a telephoto zoom to expand upon the XCD E series lenses, but I doubt it will be as cheap as the above suggestions.
Panasonic, Leica and Sigma (L-mount)
I spend a brief amount of time on Panasonic Lumix, but didn’t like the hybrid workflow and DEEP menu layering. However, the available telephoto lenses on the L-mount platform rival the ones from all the others:
Do not get the 60-600. I know it’s tempting. Super zooms are to be avoided for lack of sharpness, fringing and other lens aberrations. It’s suprising that both the contemporary and sports 150-600 from Sigma are as good as they are, however, I would restrict my use between 200mm and 400mm on the contemporary and 200mm to 500mm on the sports version. The extreme end will get you there, but at a cost of loss of quality.
4. Try intimate landscape photography and fall in love like I did
This ability to reorganize a scene visually is what makes telephoto work feel more personal. You are not just documenting what is in front of you. You are editing it in real time, deciding how elements relate to each other before you even press the shutter. The result often feels more abstract, sometimes even minimal, without requiring an inherently minimal landscape.
There is a point where the scale of the landscape stops being the main attraction. Not because it loses its appeal, but because you start noticing that the most compelling images are often found in the parts people ignore. Intimate landscapes shift the focus away from grandeur and toward detail, pattern, and subtle relationships within a scene.
This approach changes how you move through a location. Instead of searching for a sweeping view, you begin scanning the ground, the edges of light, the way textures interact. A patch of moss, a ripple in sand, a few branches intersecting in soft light. None of these elements demand attention on their own, yet under the right conditions, they form compositions that feel deliberate and refined.
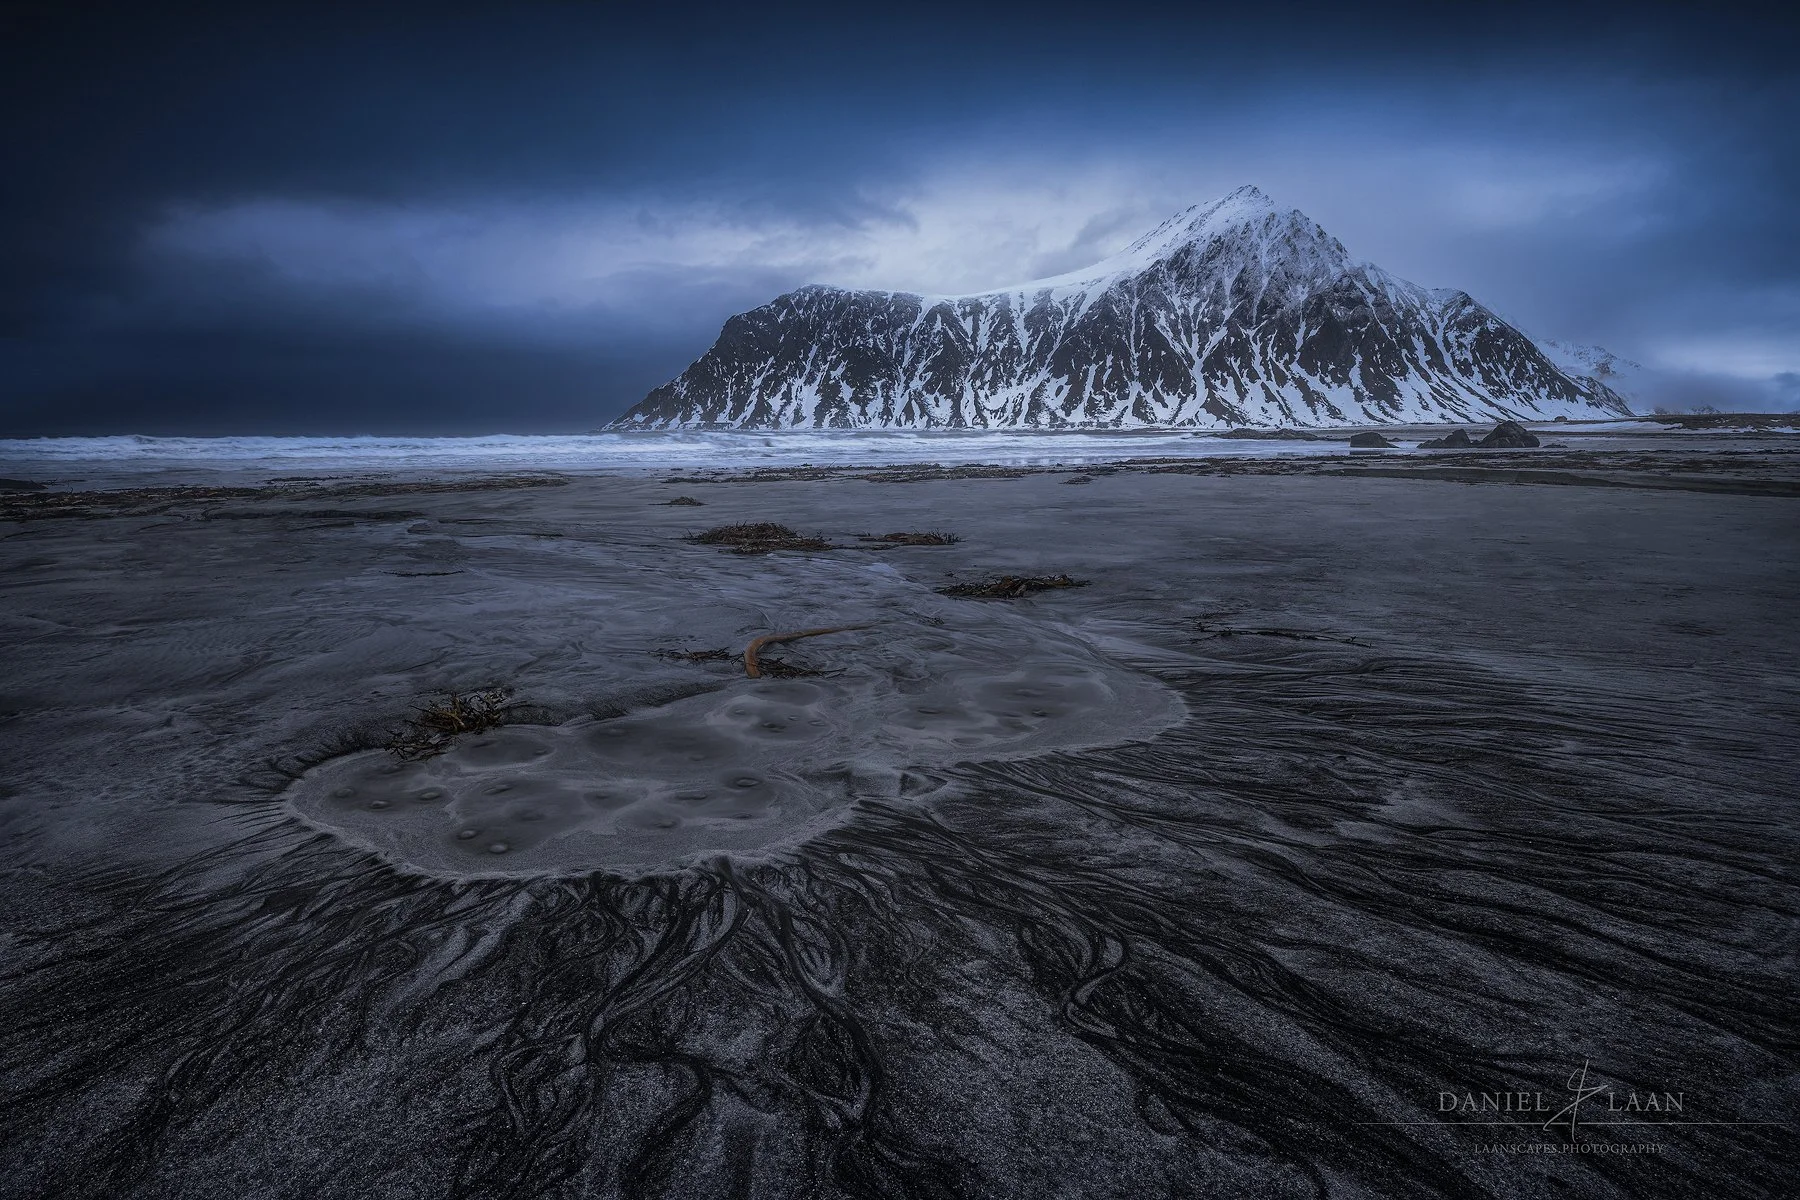
Take this familiar beach in Lofoten for example. Sure, finding a cool foreground like this “bubbling cauldron” can add an element to a well known foreground, but when we take a closer look at the point where mud and sand mix and create these intricate patterns, I found something that is much more spectacular to me.
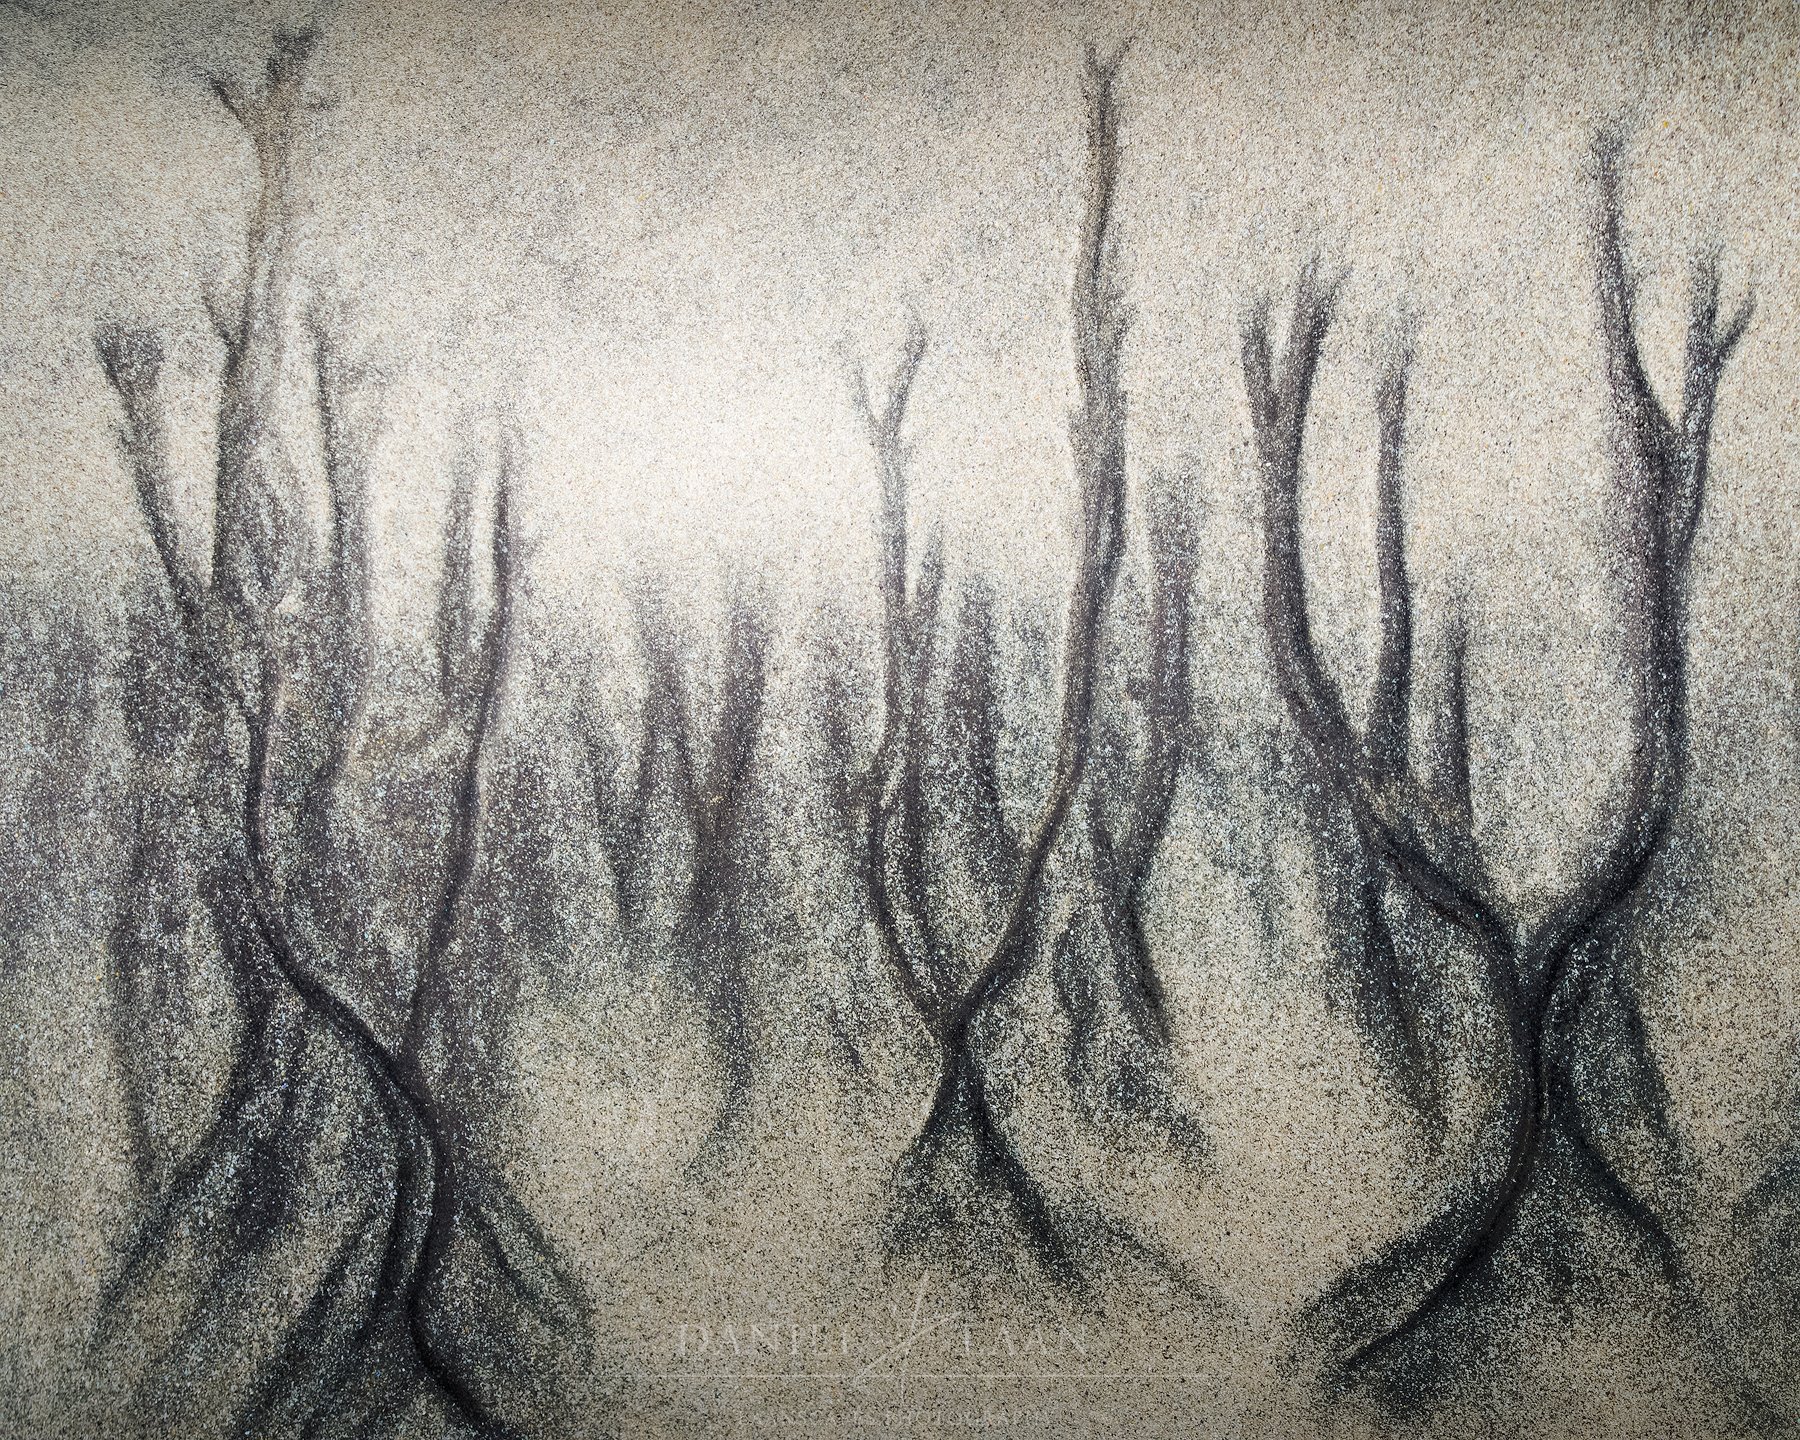
It’s not a forest and yet it is.
Changing the way you see the landscape
In the above images, I am illustrating what you can find if you switch off the part of your mind that takes everything literal. The right hemisphere is where creativity lives, but in our modern world we ignore what 50% of our brain’s capacity is telling us. I’ve recently read Martha Beck’s excellent book Beyond Anxiety in which she implores us to actively use the right hemipshere of your brain more to craft a life full of happiness and excitement. The closer look at one of the many fleeting sand patterns beaches can produce is just an example of imagination can produce for you if you open up to it. But hardly anyone is attempting to eternalize them. I think the reason is the assumption that as we see sand, so will others. While the creative process of selecting, composing, reframing and reorienting will change the way you see the landscape.
I’ve found a noticeable change in how I started seeing the landscape. With wider lenses, you tend to search for compositions nearby. With longer lenses, your attention moves outward. You begin scanning distant ridgelines, patterns of light across hills, layers of atmosphere stacking in the background. Scenes that might have gone unnoticed suddenly become viable compositions. Over time, this trains your eye to recognize structure and balance much faster.
Abstract landscape work pushes this even further. The subject becomes less about what something is, and more about how it looks. Sometimes interpretively, but I would be the first to admit this takes time. First, shape, tone, rhythm, and contrast take over. The image no longer relies on scale or location to be effective. In some cases, it becomes difficult to identify what you are looking at, and that ambiguity is part of the appeal. It invites a slower reading of the image and that’s one aspect of photography I’ve come to appreciate over the years. Consequently, such images do not “perform” as well on social media.
The healing power of the quiet image
In my journey as a landscape photographer, I had a lot of ups and downs. From feeling like I had to produce images to keep relevant, to the need to create a certain type of images to please judges and win photo competitions. We’re all prone to falling victim to what others want from us in a job that only pays the bills for images that sell. However, if I told you that the images that are found in hotels, spa’s, waiting rooms in dentist’s offices and at your local GP are all images that are quiet and often non-descript. They convey a certain calm emotion in a place that is absolutely anything but cheap. So there is definitely a place and a market for images that do not scream “here’s a sunset, look!”.
One of the steps I took along that path, was getting an 85mm prime lens that’s usually valued for working with portraits of people. And I brought it to my local woodland at the time.
Shot using some 85mm prime lens I had at the time.
The 85mm lens played a specific role in this transition to more intimate landscape photography. It sits in a range that is neither extreme nor limiting, but it encourages selectivity. It isolates without feeling detached. Over time, working with that focal length tends to shift your attention toward smaller scenes, because it naturally frames them in a way that feels complete. Moving from wide-angle work to an 85mm perspective often feels like stepping back from the obvious. Instead of emphasizing depth through exaggerated foregrounds, you begin to focus on alignment and balance within a tighter frame. The composition becomes less about leading the viewer through a scene and more about presenting a contained visual idea.
This has a direct effect on how you perceive your surroundings. Areas that once felt unremarkable start to reveal structure. Subtle color transitions, repeating forms, small pockets of light. These are easy to overlook when your attention is fixed on dramatic viewpoints. With a narrower field of view, they become the subject.
Shot with a 70-200 f/4 at 85mm.

“Trinity” - This was one of the 101 images in the coveted International Landscape Photographer of the Year book. Shot at 85mm.
There is also a shift in pace. Intimate and abstract photography tends to slow you down. You are no longer chasing conditions across a wide landscape. You are refining what is already in front of you. Small adjustments in position, angle, or timing make a noticeable difference. The process becomes more observational and less reactive.
What emerges from this approach is a body of work that feels more personal. Not because the locations are unique, but because the interpretation is. Many of these scenes are passed by without a second thought. They don’t announce themselves. Recognizing them requires a different way of seeing, one that develops through repetition and restraint.
An 85mm lens reinforces this stylistic choice. It narrows your attention just enough to filter out excess, while still leaving room for context. Over time, that constraint becomes a strength. You stop looking for landscapes, and start finding compositions within them.
Which 85mm would I choose?
Anyone will do if you do not shoot wide open. For that reason I chose the Nikon NIKKOR Z 85mm f/1.8 S. But if your camera supports it and you have the cash to burn, I recommend the Nikon NIKKOR Z 85mm f/1.2 S or the Canon RF 85mm F1.2 L USM for the extra creative aspect.
5. To focus stack or to shoot wide open
At some stage, the pursuit of maximum sharpness has become almost automatic, largely because modern cameras make it possible. Depth of field, or “how in focus everything is”, is one of the creative options you have as a photographer, but I myself saw that as a limitation on the maximum sharpness gear is able to reproduce. Depth of field can stop being a technical setting and start shaping how you photograph altogether. High resolution sensors reveal everything, which means any softness becomes immediately noticeable. To me, the logical response was to eliminate that softness entirely, just as much as I wanted to get rid of chromatic aberration.
That is exactly what focus bracketing is designed for. With an autofocus lens, cameras that support it, record a sequence of frames while shifting focus incrementally through the scene. Each shot locks onto a different plane, moving from foreground to background with consistent precision. The process is fast and controlled.
That level of control did not always exist. Focus bracketing used to mean turning the focus ring by hand between each frame, hoping for consistent increments and hoping you did not miss a critical stop of the turn. It was slow, imprecise, and easy to get wrong, especially because your physical touch disturbs the composition ever so slightly, leading to misaligned frames or even motion blurred images. Even now, many cameras still rely on that manual approach. Within the Sony system in particular, automated focus bracketing has been largely absent, which is the main reason I have consistently left those cameras out of my comparisons. Once you get used to a system that handles this process for you, going back to manual adjustments feels unnecessarily limiting.
The resulting frames are not finished images. They must be aligned and combined using software like Photoshop or dedicated apps like Helicon Focus. The program aligns and merges the sharpest parts of each image into a single file. The result is an image that holds detail from front to back, rendered at the lens’s optimal aperture where sharpness peaks and diffraction is avoided. This is the only way to fully exploit what current sensors are capable of resolving. A single exposure simply cannot deliver that level of clarity across depth. Not at critical focus and not at hyperfocal either.
Focus stacking the shit out of everything is how I lived. It lead to amazing, otherworldly images that I became known for:
“Earthen Abbey”
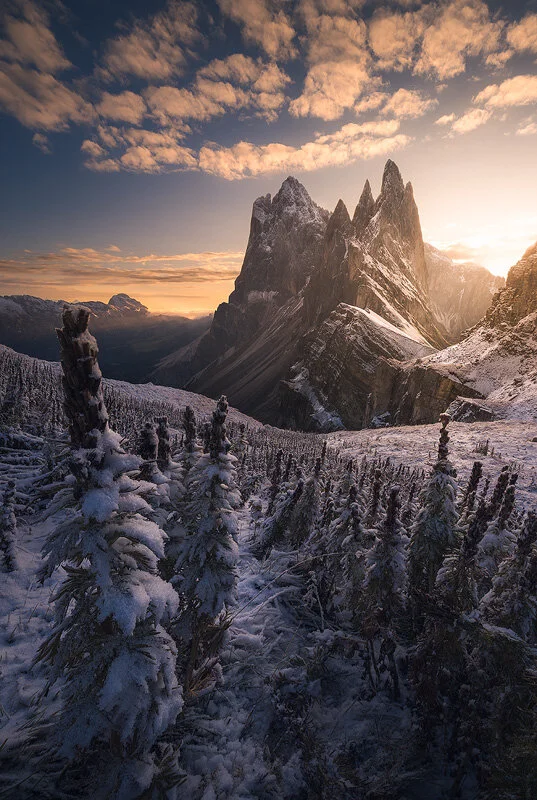
You’ve probably seen this mountain ridge a thousand times before. Using a wide-angle lens, you quickly show people a very recognizable picture in a landscape like this. Finding a unique perspective is then only influenced by the foreground subject matter and the conditions in which you compose the shot. The technical challenge lies in getting everything looking as sharp as it does here. That snowy flower in the foreground is not large at all. It is made to look that way because I shot this at minimum focus distance, then turned the focus ring away a bit and exposed the shot again and again and so on until I reached infinity on the lens marking. I then took a last shot where I not only zoomed in a bit on the Sigma 14-24mm I shot this with, but lowered the exposure as well. That accounts for the impressive background and sky that is not blown out of the histogram while shooting straight into the sun at sunrise in the Dolomites.
But the problem is not the result. The problem is the process.
When focus stacking, shooting becomes slower. A single composition turns into a sequence much like shooting panoramas. I shot so many panos when I started out, that my wife quickly got fed up with me bringing a camera on our holidays together.
As with panoramas, any movement in the scene complicates things. Then comes the editing. Large raw files, often exceeding 100MB, multiplied across multiple frames per image. Processing, aligning, exporting. Even fast machines start to struggle when this becomes routine. Not to mention Lightroom’s inabillity to keep up due to the way its database was programmed. Focus stacking everything turns photography into file management.
There was a point where that approach took over completely. Every subject was treated the same way. Multiple frames, every time. The intention was consistency. The outcome was the opposite. The process became so repetitive and time-intensive that it drained any sense of joy from post-processing until I reached the point where I could treat the stacked raw-files as single images. Already an hour or so had passed even before I started getting creative. That led to a stage where stepping away from photography altogether felt easier than continuing like that.
That shift led directly to a different way of working.
Using lenses like an 85mm f/1.2 or a 135mm f/1.8 wide open changes everything. Depth is no longer something to maximize. It becomes something to control with precision. Focus is placed exactly where it matters, and the rest is allowed to fall away. There is no need to construct sharpness across the entire frame when the image does not benefit from it. At this point, I don’t even own sharp lenses. I have a small set of anamorphic lenses for a pursuit of photography that transcends the way I’ve worked in such a way that I feel “Laanscapes” might not even be the right platform for continuing to share my creations. But that’s a story for some other time.
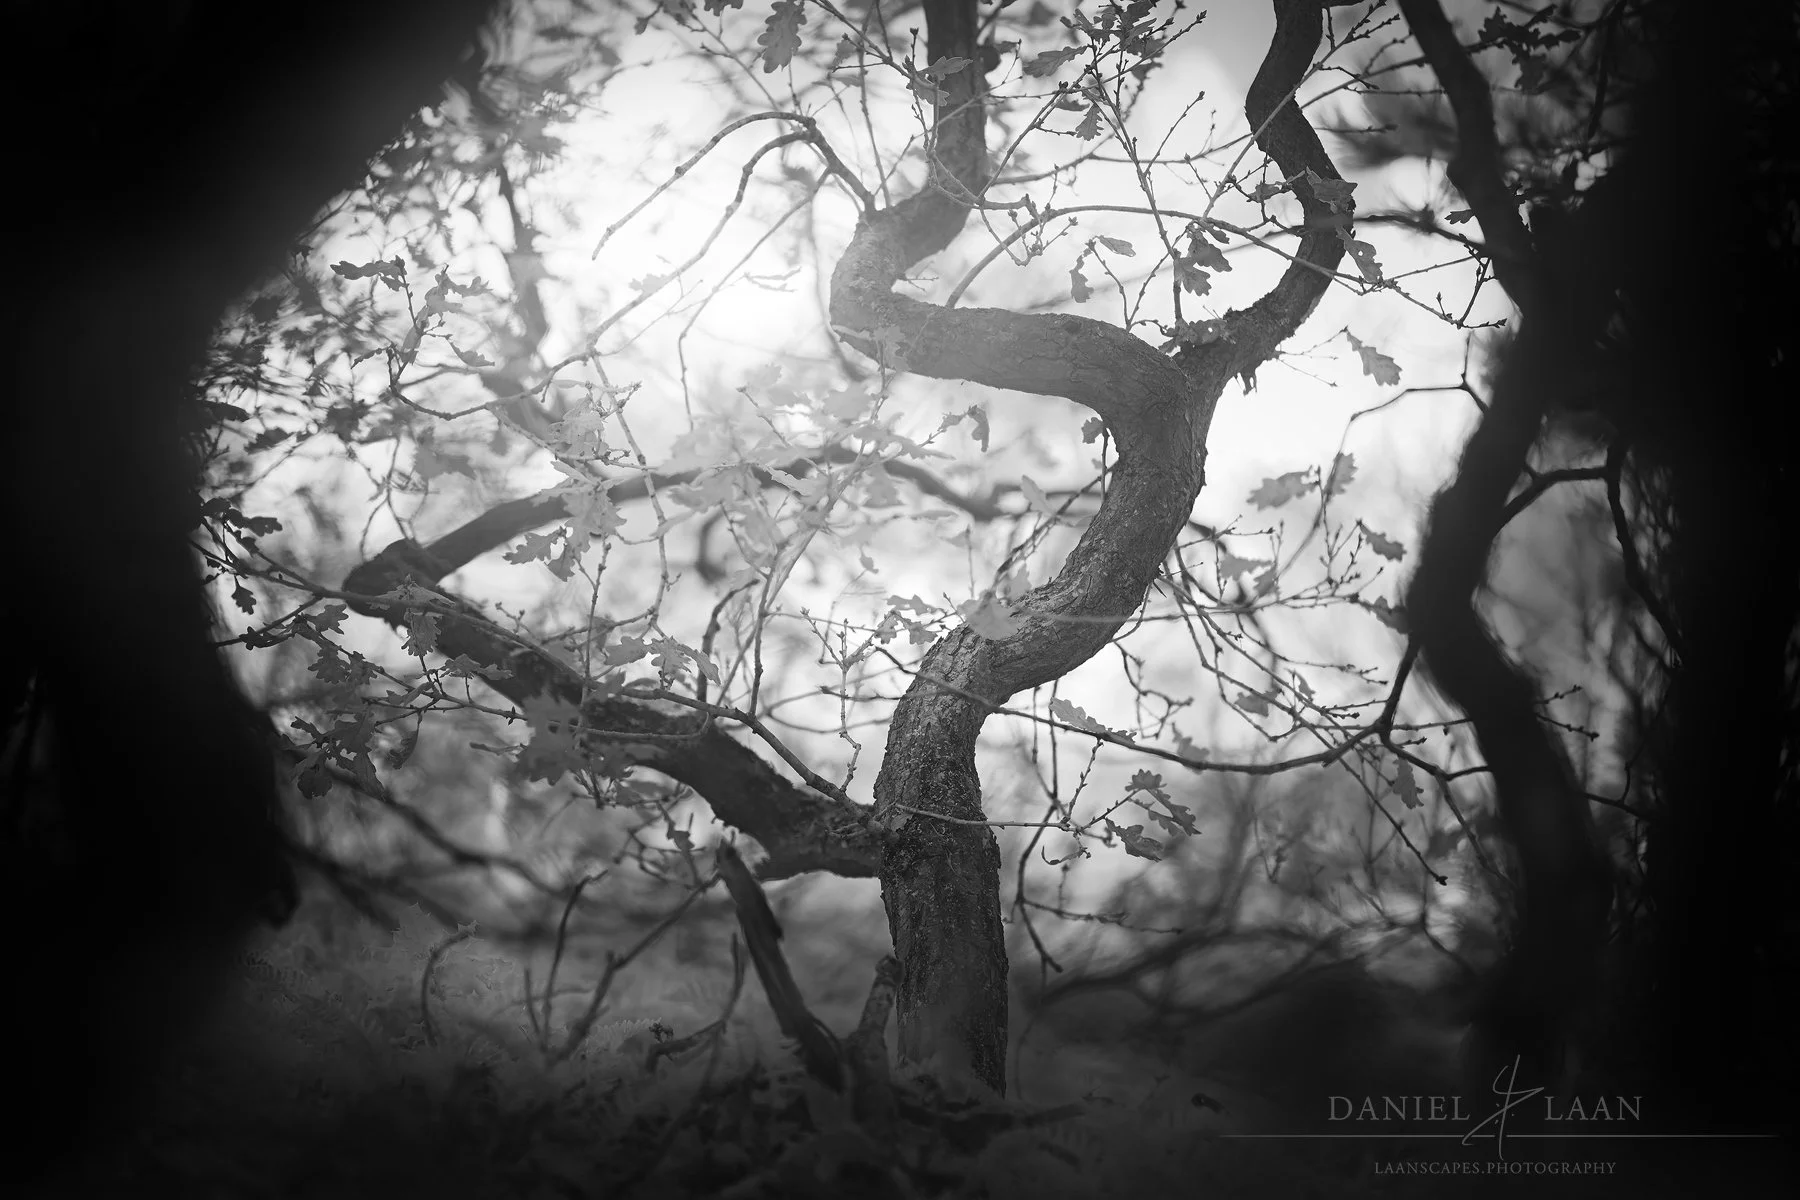
“Heart of Darkness” shot wide-open using a Sigma 135mm f/1.8 DG HSM Art on an infrared modified Nikon Z7.
A 135mm f/1.8 shot wide open produces separation that cannot be recreated through stacking. Layers soften, transitions become gradual, and the scene simplifies on its own. The 85mm f/1.2 takes that further, narrowing attention to a very specific part of the frame. What remains sharp, carries the image. Everything else supports it by staying out of the way.
This approach removes the need for complex workflows. One frame, one decision, immediate feedback. The connection between seeing and capturing tightens again. There is no delay between the idea and the result. And this will no doubt resonate with readers first starting out in photography. Although admittedly, this article is anything but basic information.
The fun part about gear like this is that it also changes what you look for. Scenes that rely on total depth lose importance. Smaller sections, subtle details, quiet moments in the landscape start to stand out. I love adding leaves in front of the lens to convey depth and dreamyness. So I often find myself immersed in the branches, picking spiders out of my hair afterward. I fell in love with intimate landscape photography because it demands clarity of intent as much as seeing with a set of eyes that’s unique to you as a photographer.
Focus stacking still has its place, but it comes with a weight that is hard to ignore once you have experienced both sides. Working wide open brings the process back to something direct and manageable. The image is shaped in the moment, not constructed afterward. Even when a photo might need just as much post-processing.
Thank you for reading this article. Any purchases made through the links in this blog post will earn my a small commission. I’ll never recommend crappy gear for the sake of making money. What I recommend, I either actually used myself or are the results of meticulous online research. As such, these articles take days to complete. If you’re in the market for new gear, I would really appreciate it if you use any of the links in this article as it enables me to write more actually useful tips that help your landscape photography.