
Pinhole Solargraphy Masterclass.
Pinhole Solargraphy for Beginners
As a staff writer for Fstoppers 10 years ago, it was a lot of fun coming up with photography-related projects. I can’t believe it’s been a decade already since I last wrote about solargraphy. Now that I’ve scanned a new batch of 6 month solargraphs from the first half of ‘26, it’s time to share with you exactly what I did, how I made my pinhole cameras and everything I’ve learned in the process of solargraphy so that you can try this yourself. But first, a little recap.
One of the processed solargraphs from exactly 10 years ago.
What is a solargraph?
Solargraphy is the practice of letting the sun etch or expose a trail on photographic paper over the course of an extended period of time. This is usually done using either a ready-made pinhole camera or a DIY project involving drinking cans of beer or soda. I’ll show and tell you exactly how I made my pinhole cameras using half liter cans later. There are a few important things to understand about solargraphy and pinhole cameras before we start our project that will guide us to taking better pictures.
A DIY pinhole camera conveniently supported by a branch in a tree.
How does a pinhole camera work?
Any pinhole camera is the most basic tool for photography. In fact, all cameras used to be pinhole cameras before lenses were used to focus the light. A pinhole combines what glass elements and the aperture of a lens do into one tiny little opening. The size of the hole determines how much and at what angle light rays enter. Larger holes allow more light, but in doing so, light is gathered from more angles, resulting in more blurry results through an optical process called diffraction.
The smaller the hole in a pinhole camera, the sharper and darker the result. Larger holes make the results significantly brighter, but also less sharp or “dreamy”.
The light emitted or bounced off the subject travels through the pinhole and onto the photographic medium, both upside down and horizontally mirrored. That medium can be a digital sensor, photographic film or light-sensitive photographic paper, which is what we will be using for solargraphy. The pinhole itself doesn’t do much for the size or angle of the picture, but its position relative to the medium does.
The farther the pinhole sits from the film or sensor, the larger the focal length.
Some photographers use empty beer cans, pringle cans or other household trash to fashion a longer focal length.
Digital pinhole photo. Credit: chutipon Pattanatitinon@721y via Unsplash.
Tangent: Digital Pinholes and Flange Distance
Popular methods involve drilling a hole in a spare body cap and gluing a pinhole in some metal to this body cap. Those are very fun to get started with digital pinhole photography. More of these images will at some point be shared here on my website as well. If you’re into digital pinholes, it’s good to know that mirrorless full-frame cameras like the Nikon Z (16 mm), Sony E-mount (18 mm) and L-mount like the Panasonic Lumix S series and Canon RF cameras (both 20 mm) have mounts that sit seriously close to the sensor. That is why these cameras will offer the widest field of view for DIY digital pinhole photography. This distance between the mount’s edge and sensor plane is called the camera’s flange distance.
For solargraphy, I often make pinhole cameras out of upright beer cans. So “can” and “pinhole camera” are used interchangeably here.
How to make a solargraph
So a solargraph is what comes out of a pinhole camera after a set amount of time. What we need to do is put a light sensitive piece of paper in a pinhole camera, while being aware of the facts about pinholes I wrote above.
Now, I’ve done it a couple of times before and at first I failed miserably because of several reasons. Other times I could have definitely done better and sometimes, pure magic comes out of a weathered, beat and battered, 12 month old rusty empty beer can. Well, once you process it.
Expectation management
Solargraphs are meant to be processed. At the very least, you need to invert your image (going from negative paper to a positive scan), flip (downside up) and mirror them (left to right). But once you’ve done that, you’re entirely free to emphasize, clone, dodge, burn and play with the hues. While it is definitely black and white paper, most papers do render a lot of color when you use them for solargraphy.
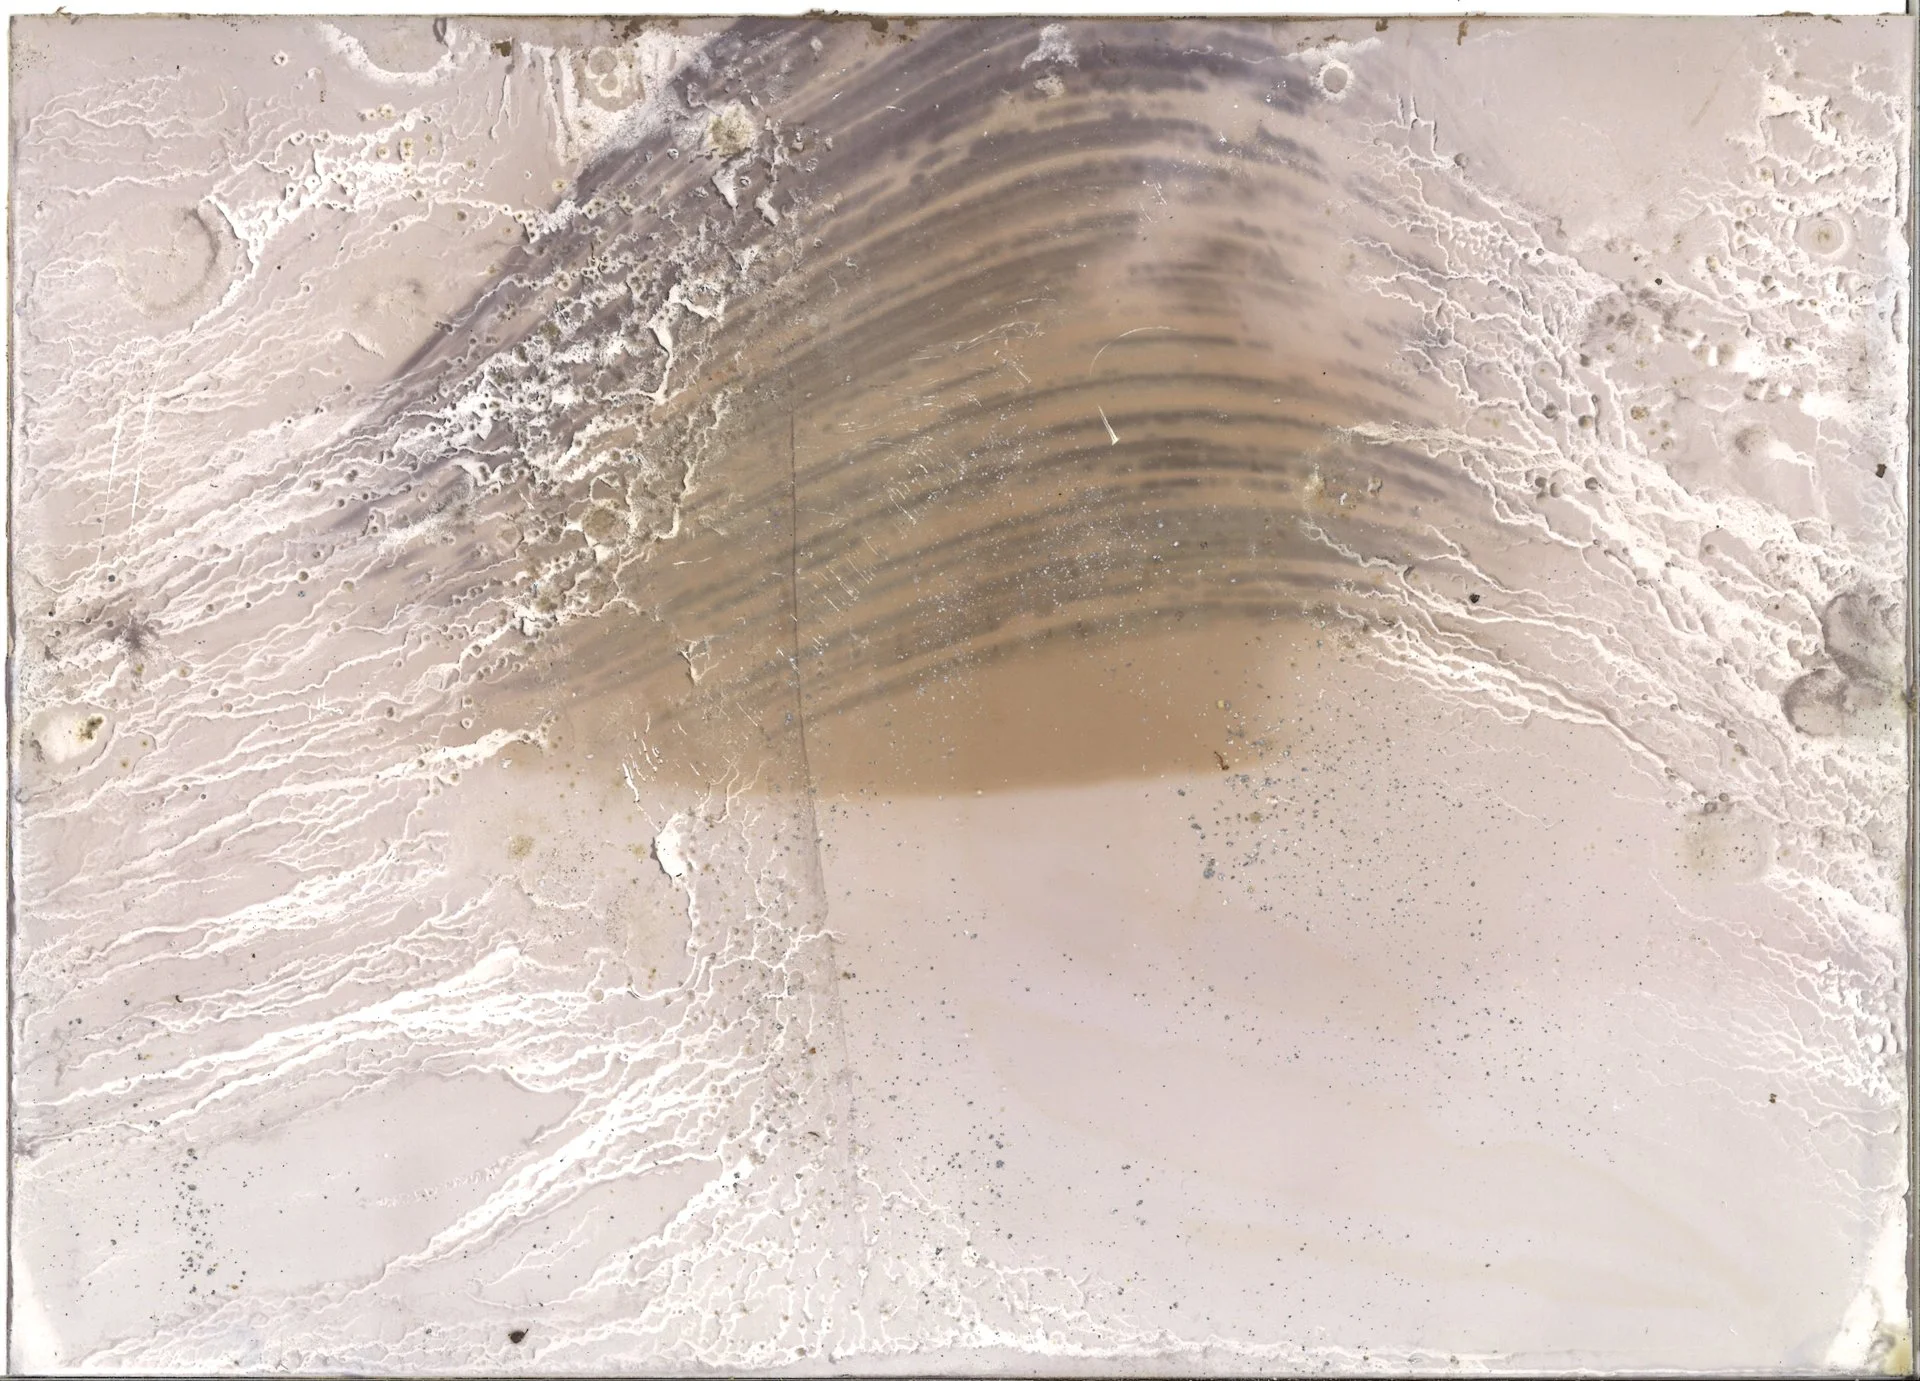
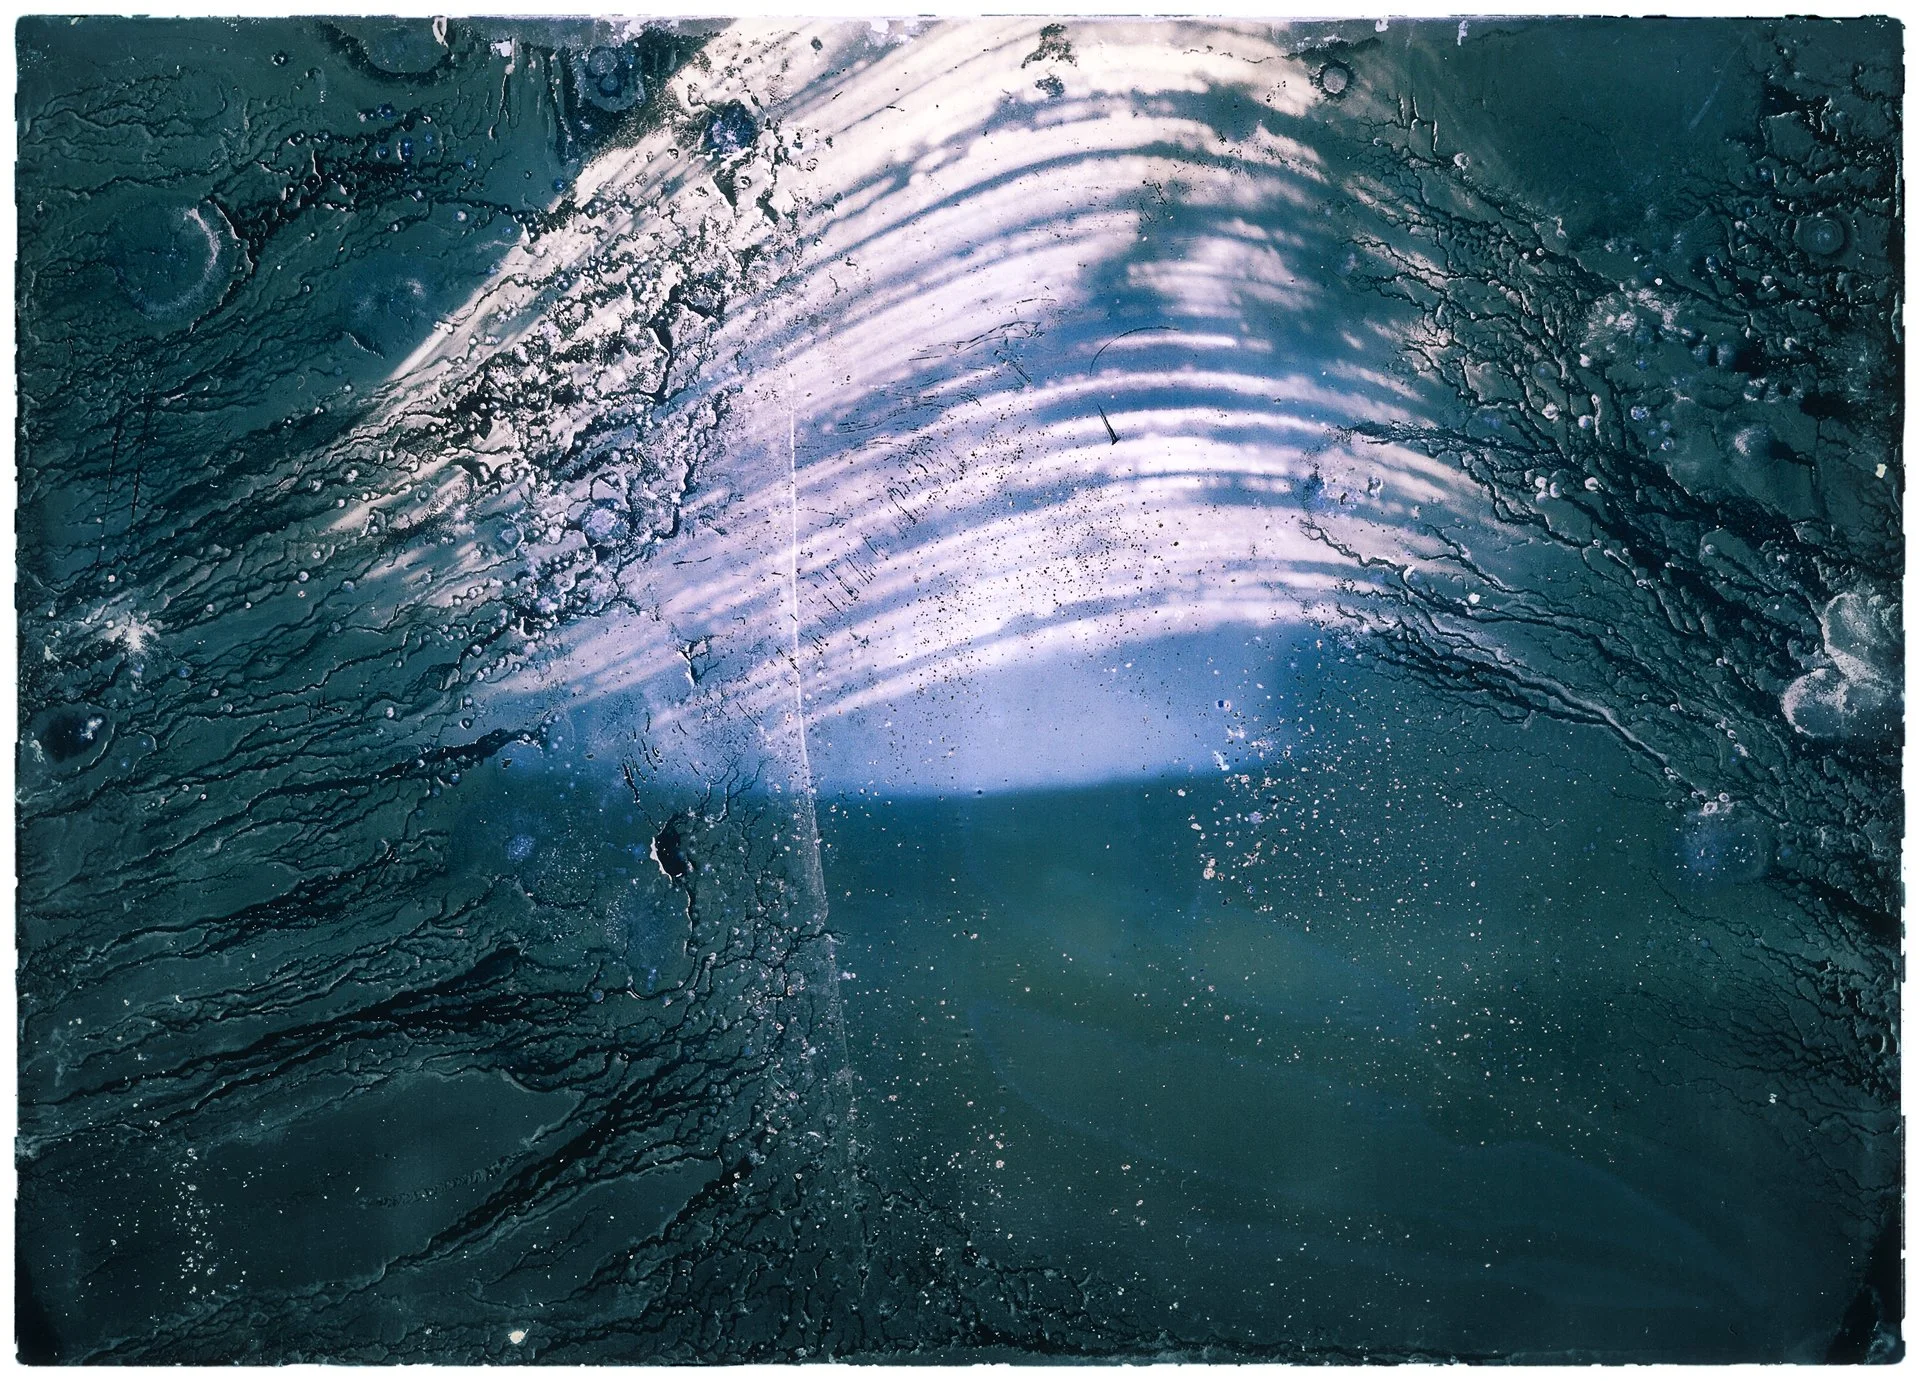
How to make a pinhole camera with photo paper for Solargraphs
We’re going to need some stuff before we get started.
Solargraph shopping list
These and other affiliate links help offset the monthly cost of running this website. Most of the gear and supplies listed I use myself or a variation of it.
Photographic paper of your choice, I use generations of Ilford Multigrade Pearl, more details below.
Optional: a paper cutter to crop or divide your photographic paper.
Beer or soda cans, larger are generally better.
Needles. A sowing kit is great value.
Duct tape or gaffer tape (black is preferred).
Tie-wraps - larger ones are preferred, but you could extend them by doubling up.
Sandpaper (optional, but recommended to make the inside of the pinhole smooth, so the photos end up sharper).
Optional to waterproof: plastic lids larger than your pinhole camera diameter.
An app to mark your pinhole cameras on a map (I just use Google Maps).
Industrial strength knife that can cut through aluminum.
Gloves to protect against cuts from jagged aluminum.
A backpack to transport the cans in.
A red safe light (optional).
Pocket bellows / air blower to clean the inside of the can as well as the solargraphs before you scan them.
To make this whole thing easier, here is all the stuff you need when you recover and develop your solargraphs later:
Any flatbed scanner (although a CCD scanner like this is highly preferred, but hard to find used. New ones cost between 1 and 2 grand). More on scanners later.
Scissors or wire cutters.
Trash bags - there will be dirty, sticky and sandy beer cans. Line the backpack with a large trash bag.
A lightproof folder to archive your solargraphs.
A white permanent marker to mark the bottom of your pinhole cameras.
Step 1: Gather all the stuff from the shopping list
For the photographic paper, I’ve researched quite a lot what I like and don’t like about aspects of papers. Contrast, colors, finish, texture… I would have loved to share this research with you, but it was ten years ago that I last read this article where it visually compared solargraphs created with different papers. Suffice to say that out of the dozen options tested, I liked Ilford Multigrade IV the most back then. But version IV went out of stock and got replaced by the 5th generation called just Ilford Multigrade RC Deluxe. I opted for the Pearl finish option because the Satin finish wasn’t available.
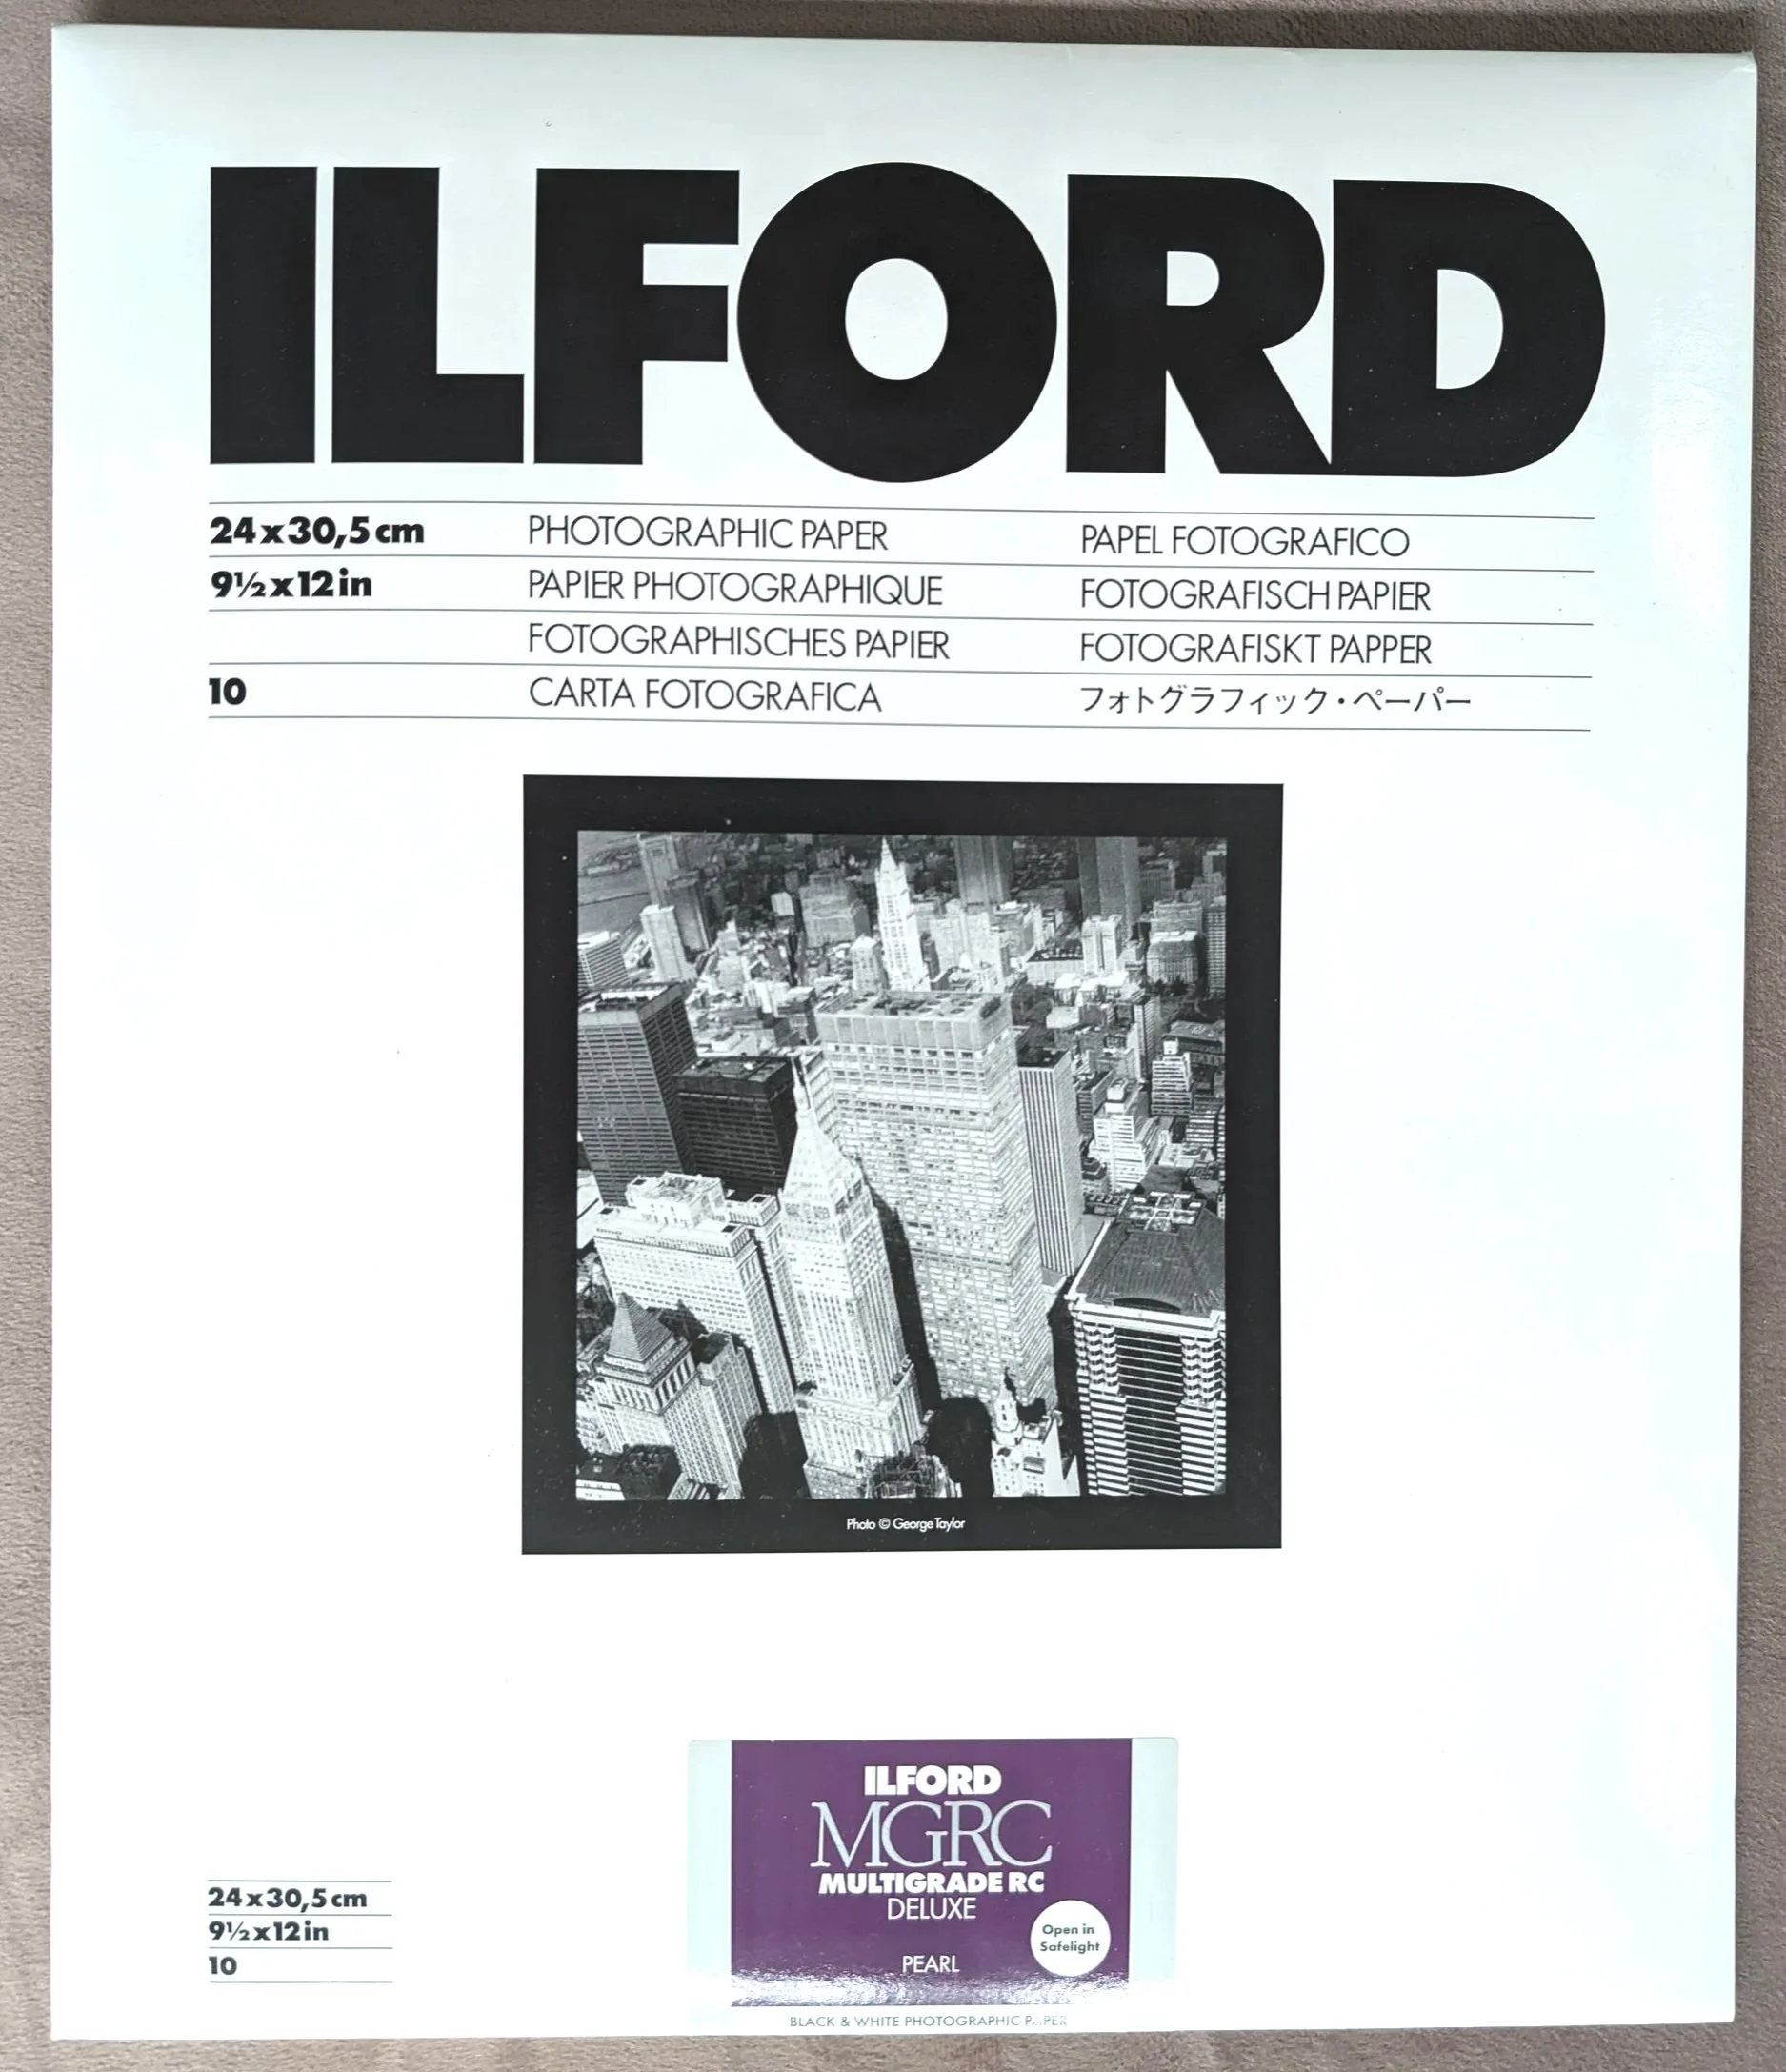
The size I got fits into a 500ml can exactly once cut into four strips. This is much cheaper than buying paper that fits straight out of the pack.
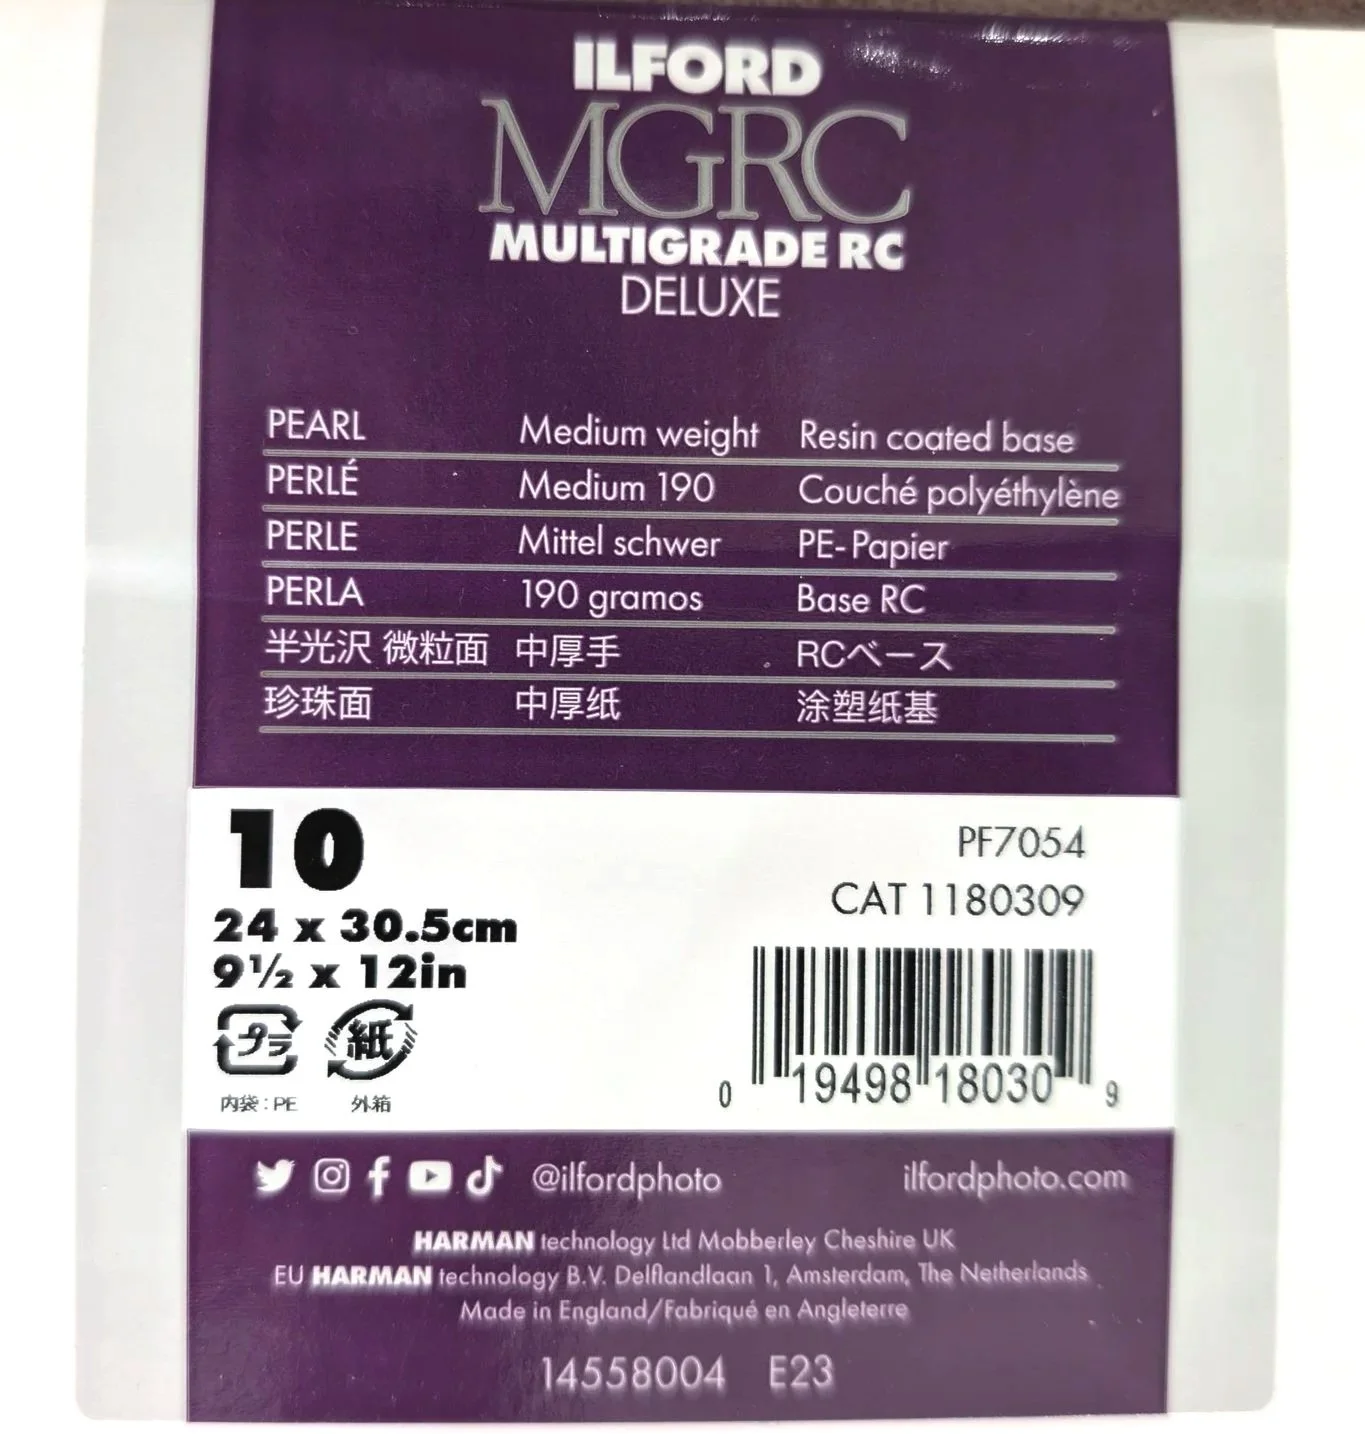
A close-up of the label. At the time of writing, Ilford put silvery-gray around the edges for pearl and yellow for satin. Either will do, but I’m leaning slightly more towards the satin one. Stay away from gloss that has bright pink borders on either side. These will reflect light too much inside aluminum cans.
This is black and white photographic paper, but there will absolutely be different colors in there. You don’t even have to push the scan too much in post-processing to see that.
How is black and white paper producing color? Ilford Multigrade can produce color in solargraphs because months of sunlight turn its silver-halide emulsion into a visible image without normal chemical development. Different amounts of exposure create silver particles of varying sizes and structures, which absorb and reflect different wavelengths of light, producing pink, blue, yellow or purple tones. The paper’s mixture of blue- and green-sensitive emulsions may broaden these effects, but the colors are chemical and optical artifacts rather than accurate records of the scene’s original colors. That means they don’t really show color as is, but rather a chemical interpretation based on the intensity, not frequency of light hitting it repeatedly over time. This takes on very interesting forms and leads to unpredictable outcomes that makes this project so much fun.
Pearl paper will offer more water resistance, but it’s also easier to feel the difference between the backing and the emulsion than satin, although not by much. Remember that I accidentally put a few backwards inside the cans 10 years ago?

So this is the backside, which is not sensitive to light. If you make the mistake I did, this will pretty much look the same 6-12 months from now as it does now.
Step 2: Making pinhole cameras from beer cans
You can do this step in daylight. First, take the smallest needle you have among the sowing kit you bought, and press it on the outside surface of the beer can. It will probably flex and dent as you attempt this, but that doesn’t really matter. What does, is where exactly you decide to punch the hole through. For solargraphy beginners, my advice is putting it slightly above the middle point of the can if you intend placing the cans vertically. This will allow more space for the top (sky and summer months) of the photographic paper to be exposed. Through the laws of optics, the image will be projected upside down on the paper. The higher the hole is, the longer the sunrays need to travel to reach the bottom of the paper. This will also make the top arcs of the sun less intense, although the higher the sun is, the brighter it is; effectively offsetting the brightness falloff of the sun.
Also, it’s a good idea to take a small needle and not push it through completely. Just the tip. Rolling it between your index finger and thumb as you hold pressure helps to get more control. The smaller the pinhole, the sharper and darker the photo; much like closing the aperture of your lens. But don’t worry about your photos getting too dark. That will not happen. Even with exposures that are “only” 12 hours long.
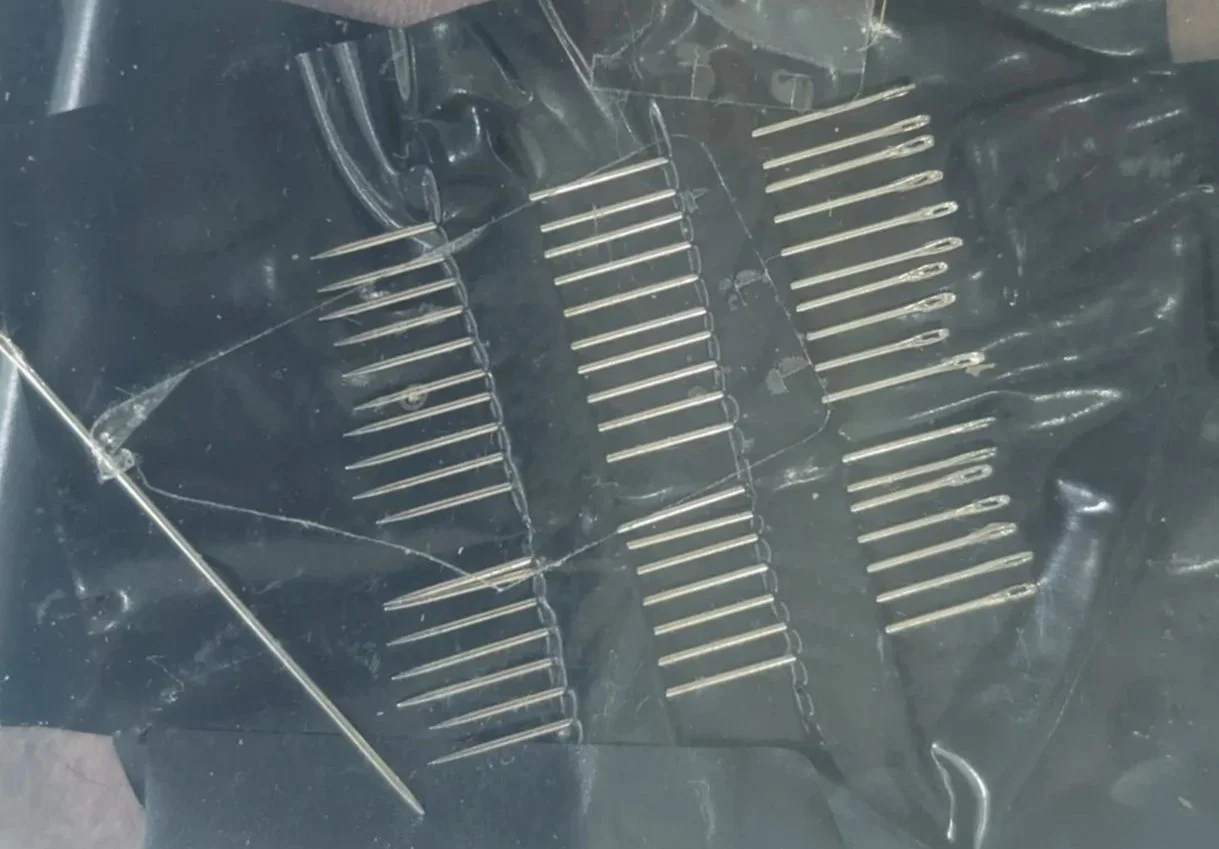
A few assorted needles in case they’ll blunt. You’re pressing through tin-coated steel after all.
Mark the pinhole with a permanent marker, by ripping a piece off the label or by scratching the surrounding area with your knife.
I recommend removing the tops of the cans after creating the pinholes, as they are more steady this way. With the top removed, it’s a good idea to clean the inside of the can with plain water. Rinse a couple of times, leave in water overnight but under the level of the pinhole (lol).
In any case, make sure the inside is bone dry. Rub it dry, use a hairdrier or use the air blower to get rid of all the remaining moisture.
Optional is to deburr and sand down the inside of the can where the pinhole is situated. In theory, this will create rounder pinholes that cause less diffraction and therefore blurry images. But while that may certainly be true for digital pinhole photography where laser cut pinholes in brass sell for a few dozen bucks, I have found no discernible difference in my solargraphs. Maybe this is more visible if you include a steady, still and dark subject, but I have not tested this yet as all my pinhole cameras are up in slowly waving trees anyway.
Now it’s time to tape off the pinhole with a piece of tape. I tape one end together to make this DIY lens cap or shutter easy to remove. With the “shutter” closed, we’ll now take our stuff into a dark room (or an actual darkroom if you have one).
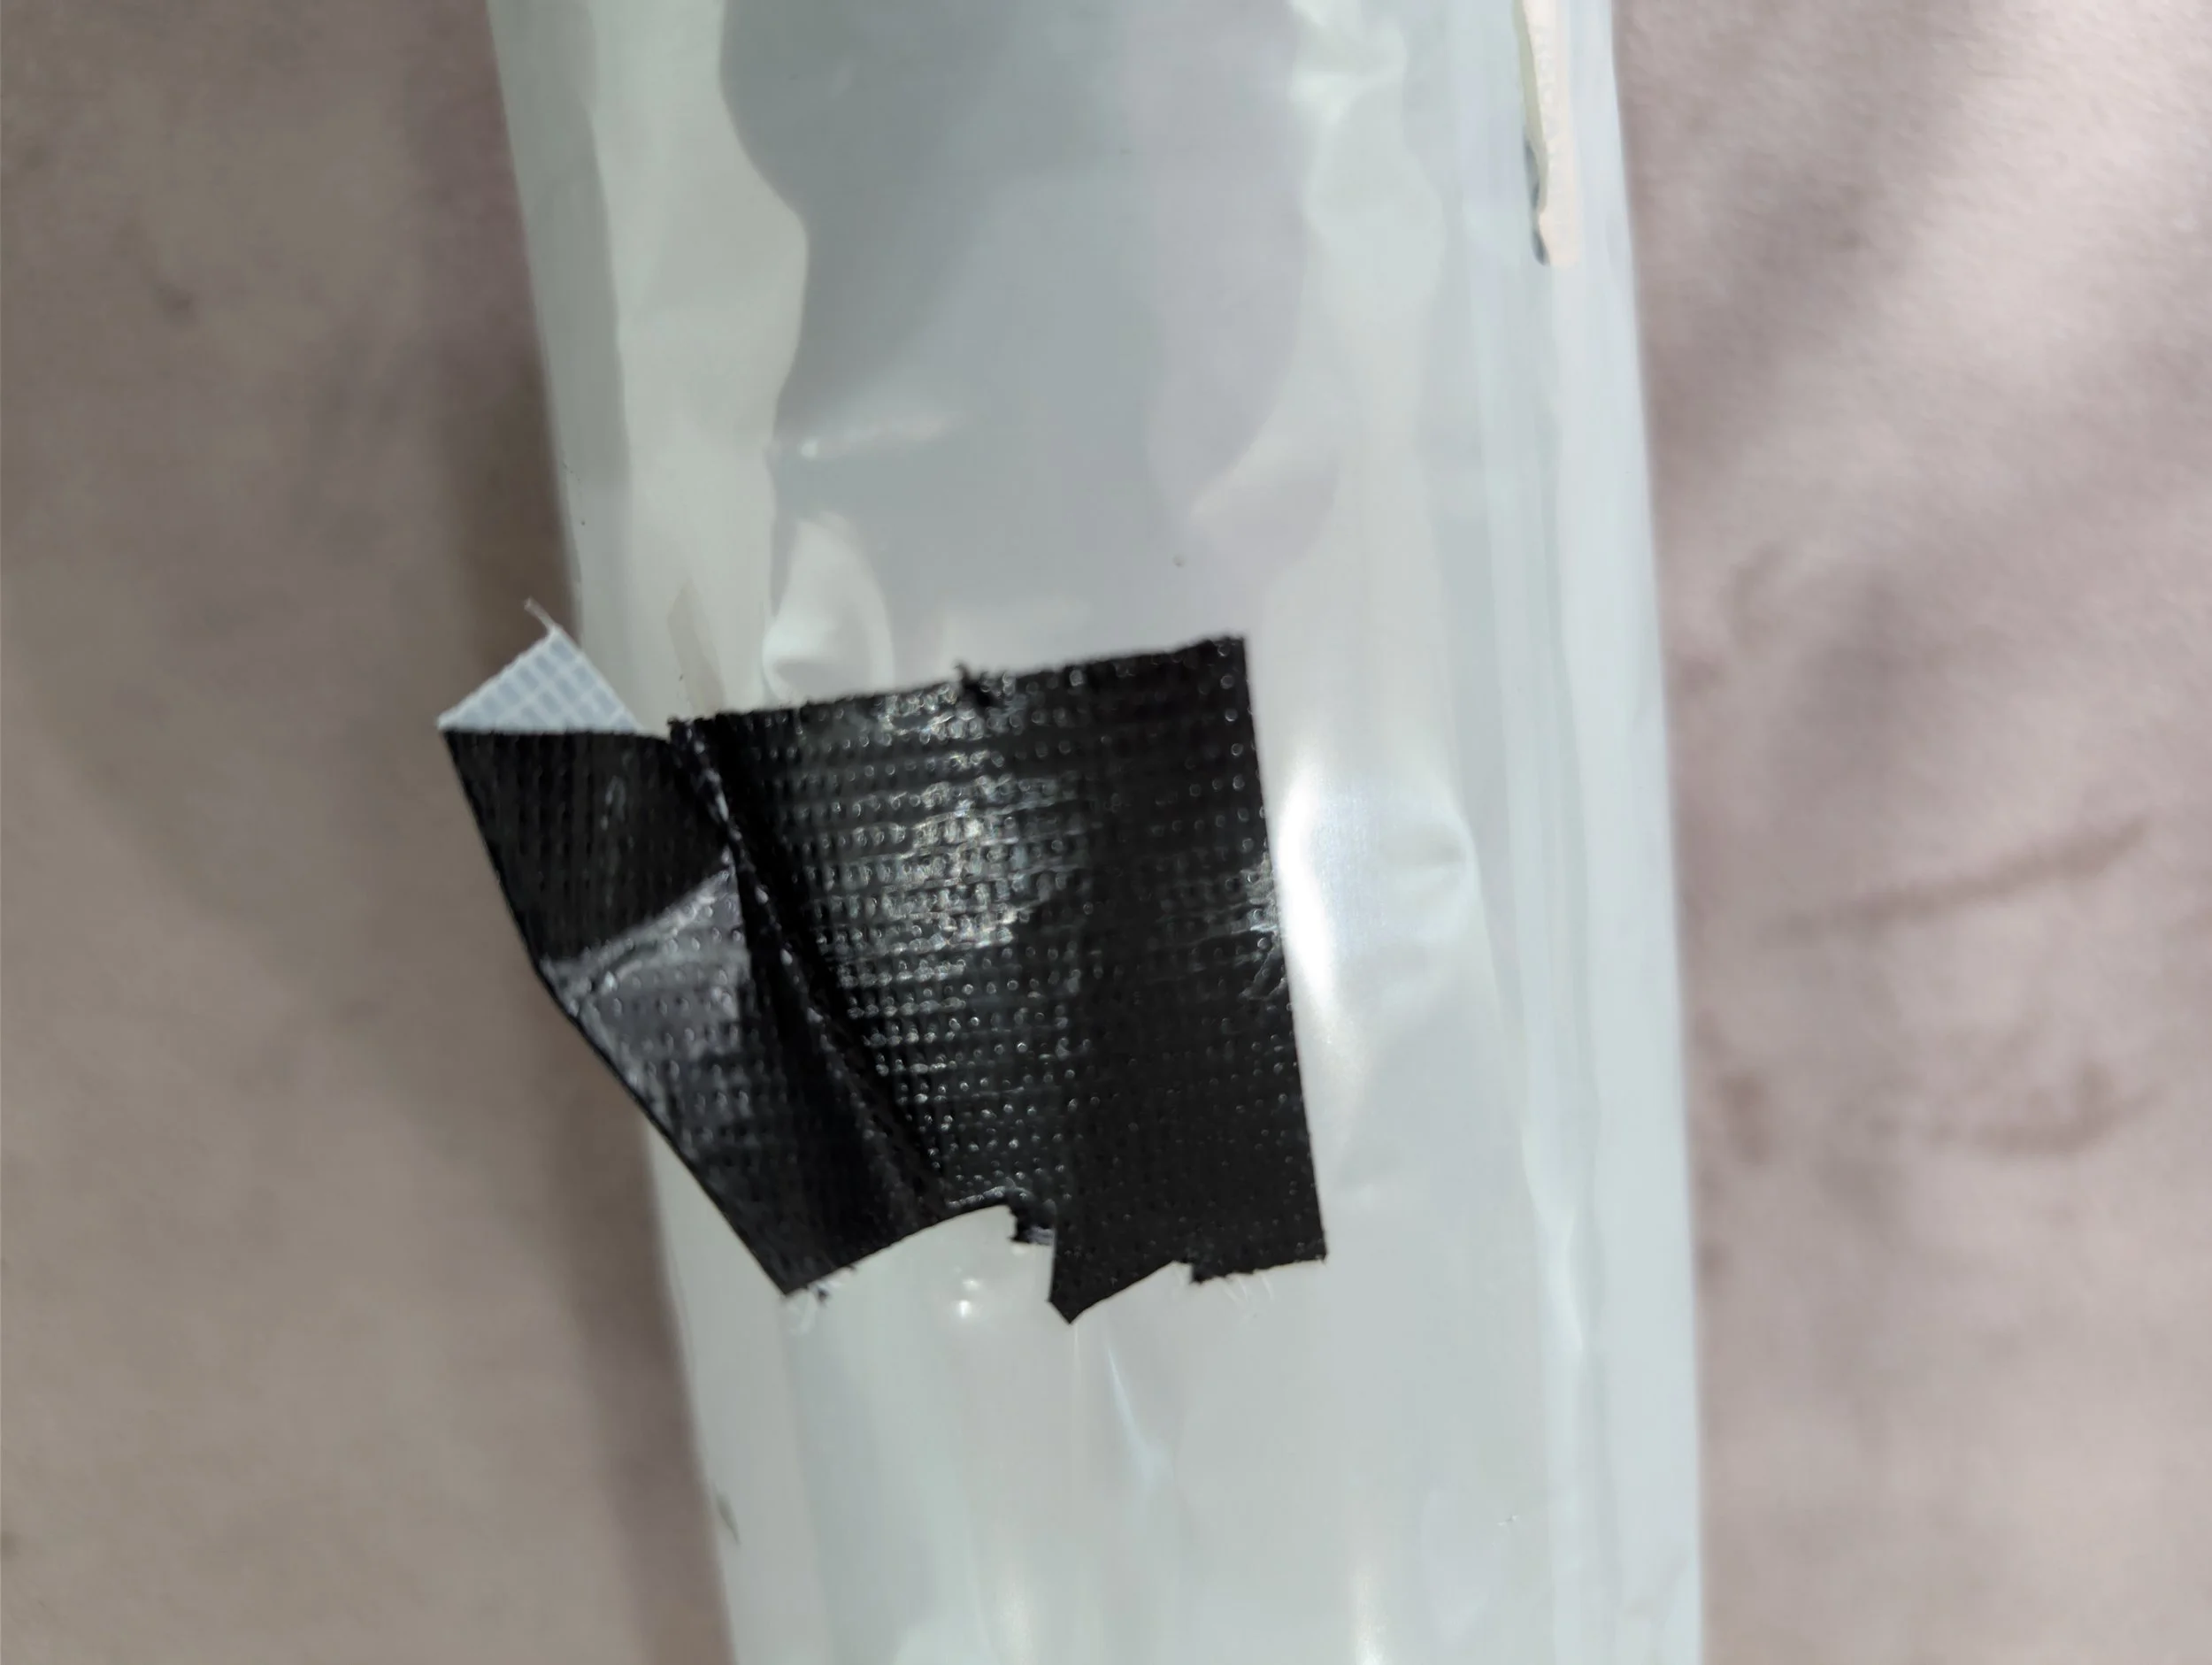
Tape one end together to make it easy to peel off.
Step 3: Loading the pinhole cameras with photographic paper
This step must be done in as close to a dark room as possible. The darker it is, the higher the contrast will turn out. You can safely use a red light - that’s why darkrooms feature a single red light or safelight. To be extra sure, I recommend either getting an actual safelight meant to develop film under or lower your RGB-LED lighting’s intensity to candlelight levels and let your eyes adapt to it. But be aware that your milage may vary depending on the light you have. Stronger light sources and shorter wavelengths will near-instantly ruin your solargraphs.
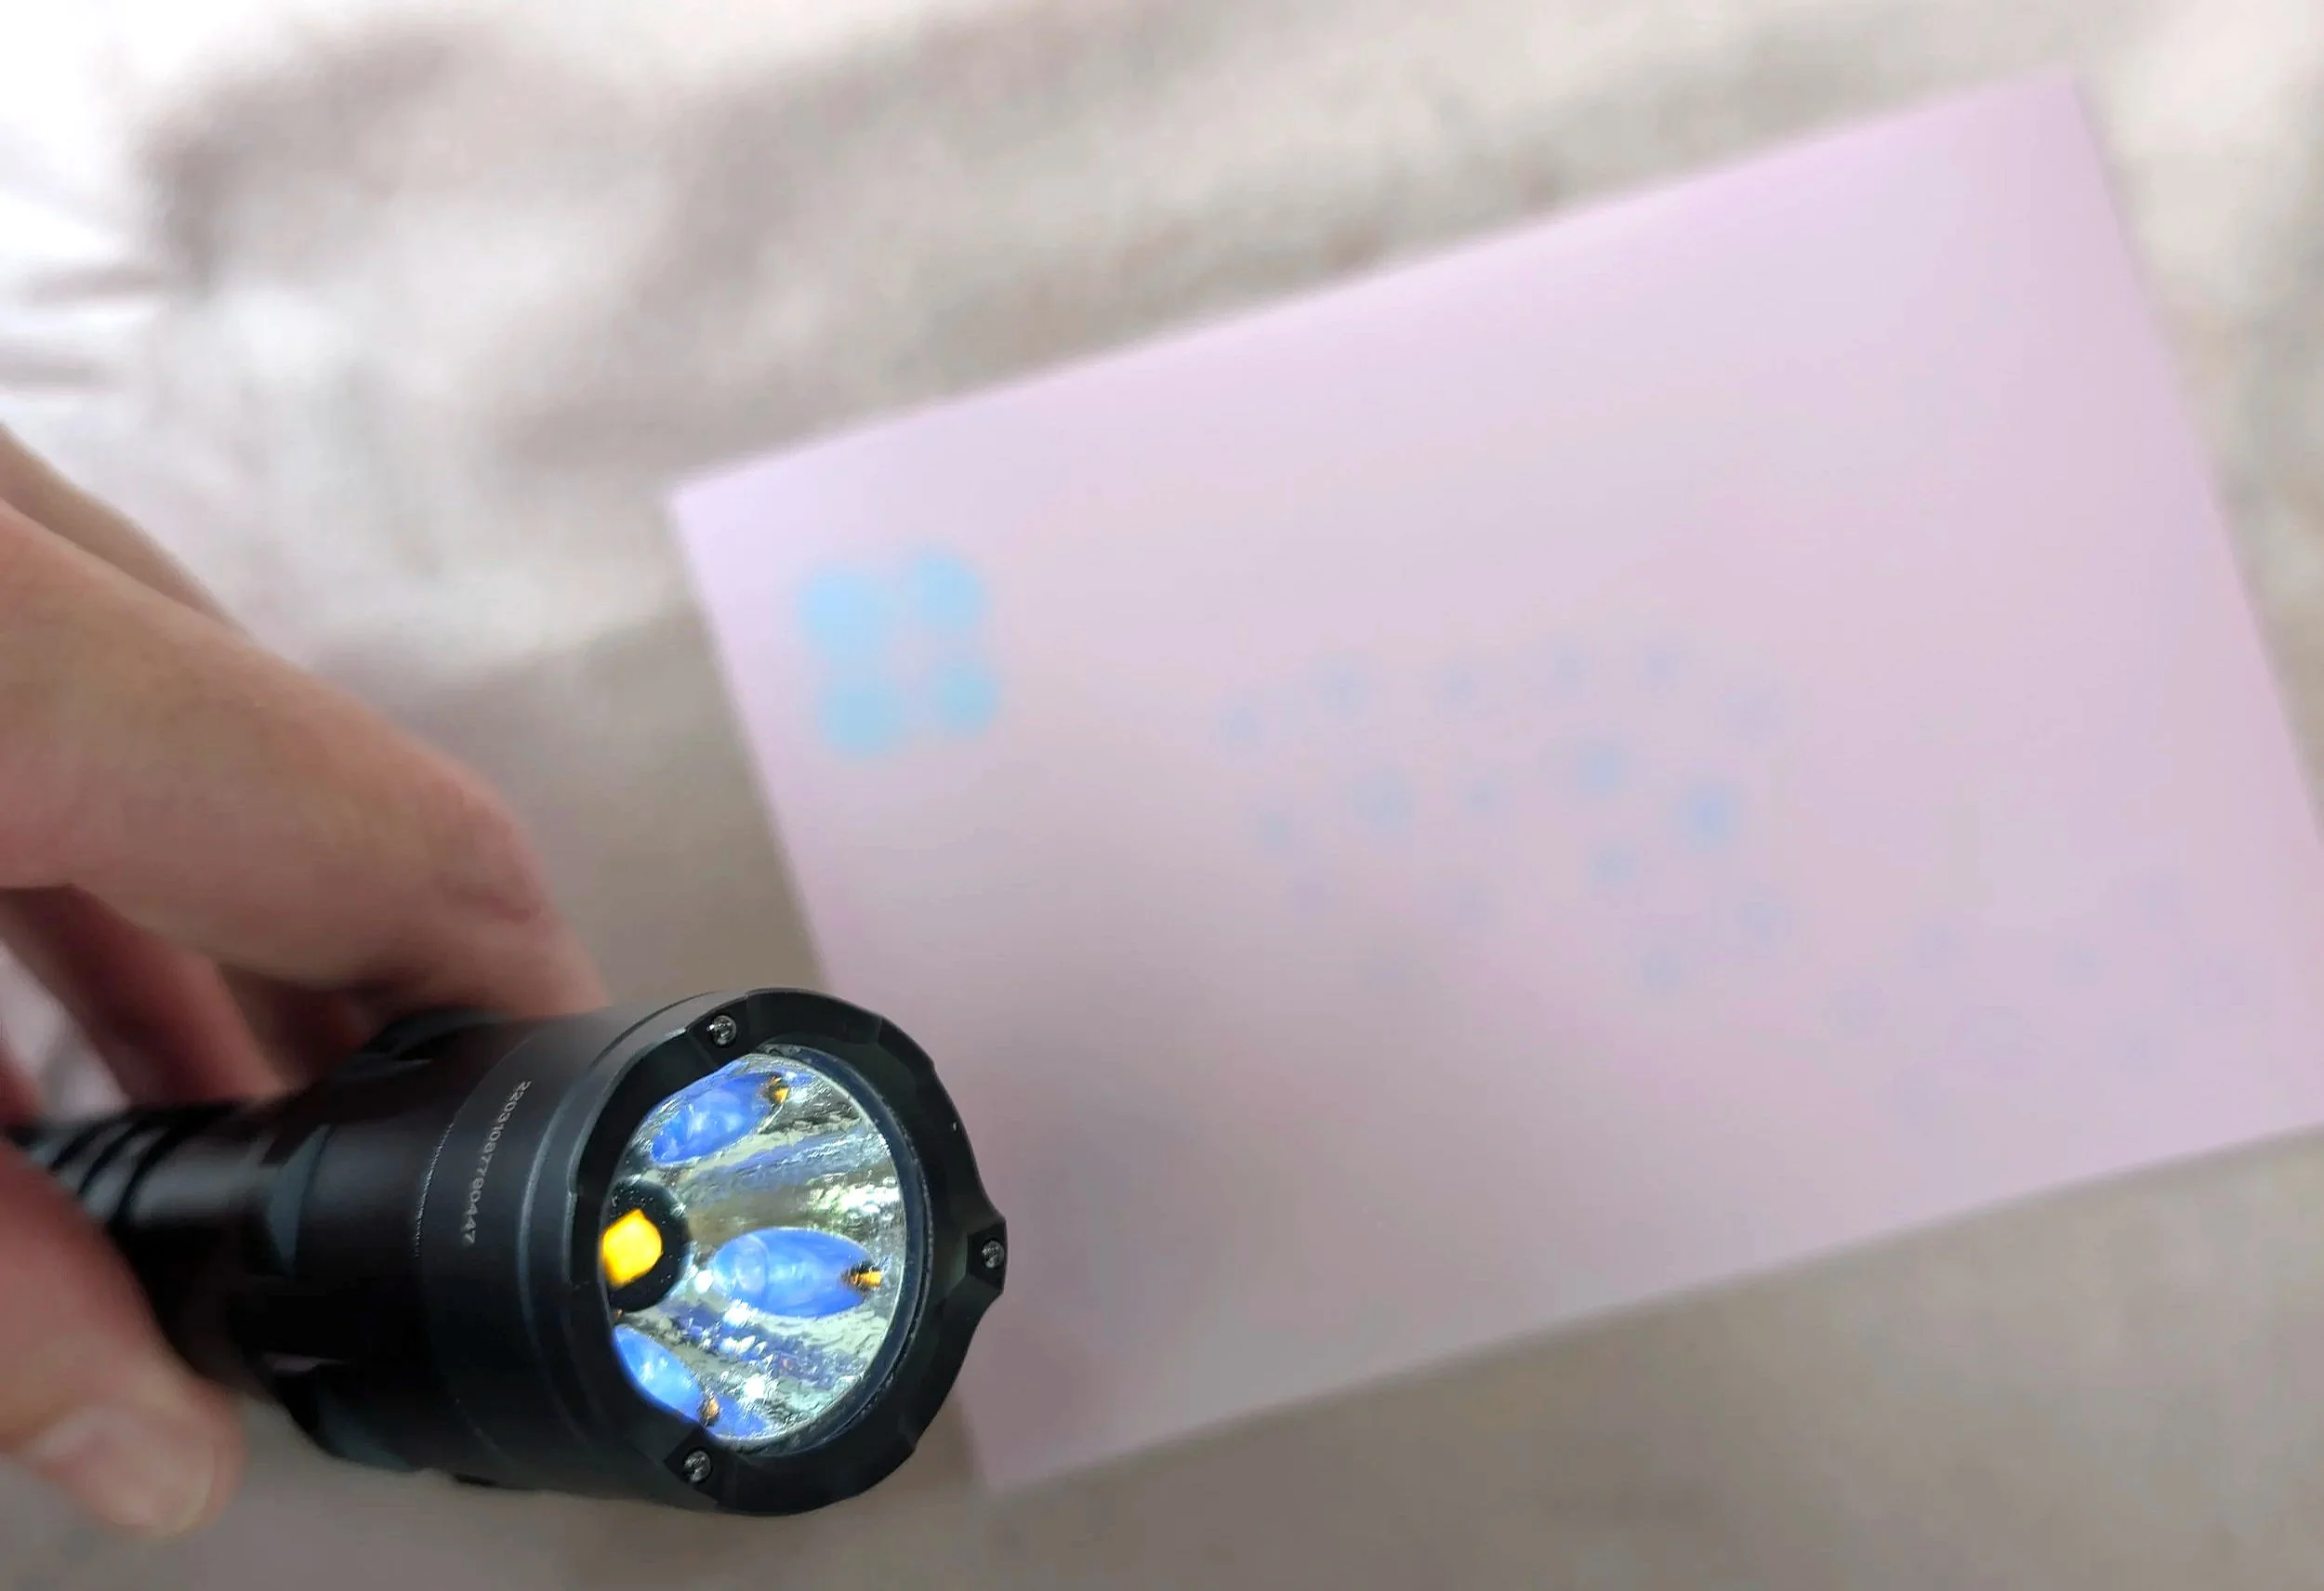
Here’s an example of a one second exposure using a high energy, but low intensity UV light. Have a look at the dots on the scrap in the background.
My studio has a few Philips Hue RGB lights, so I just turned on one and made sure only the red LEDs are on and put it on 5%.
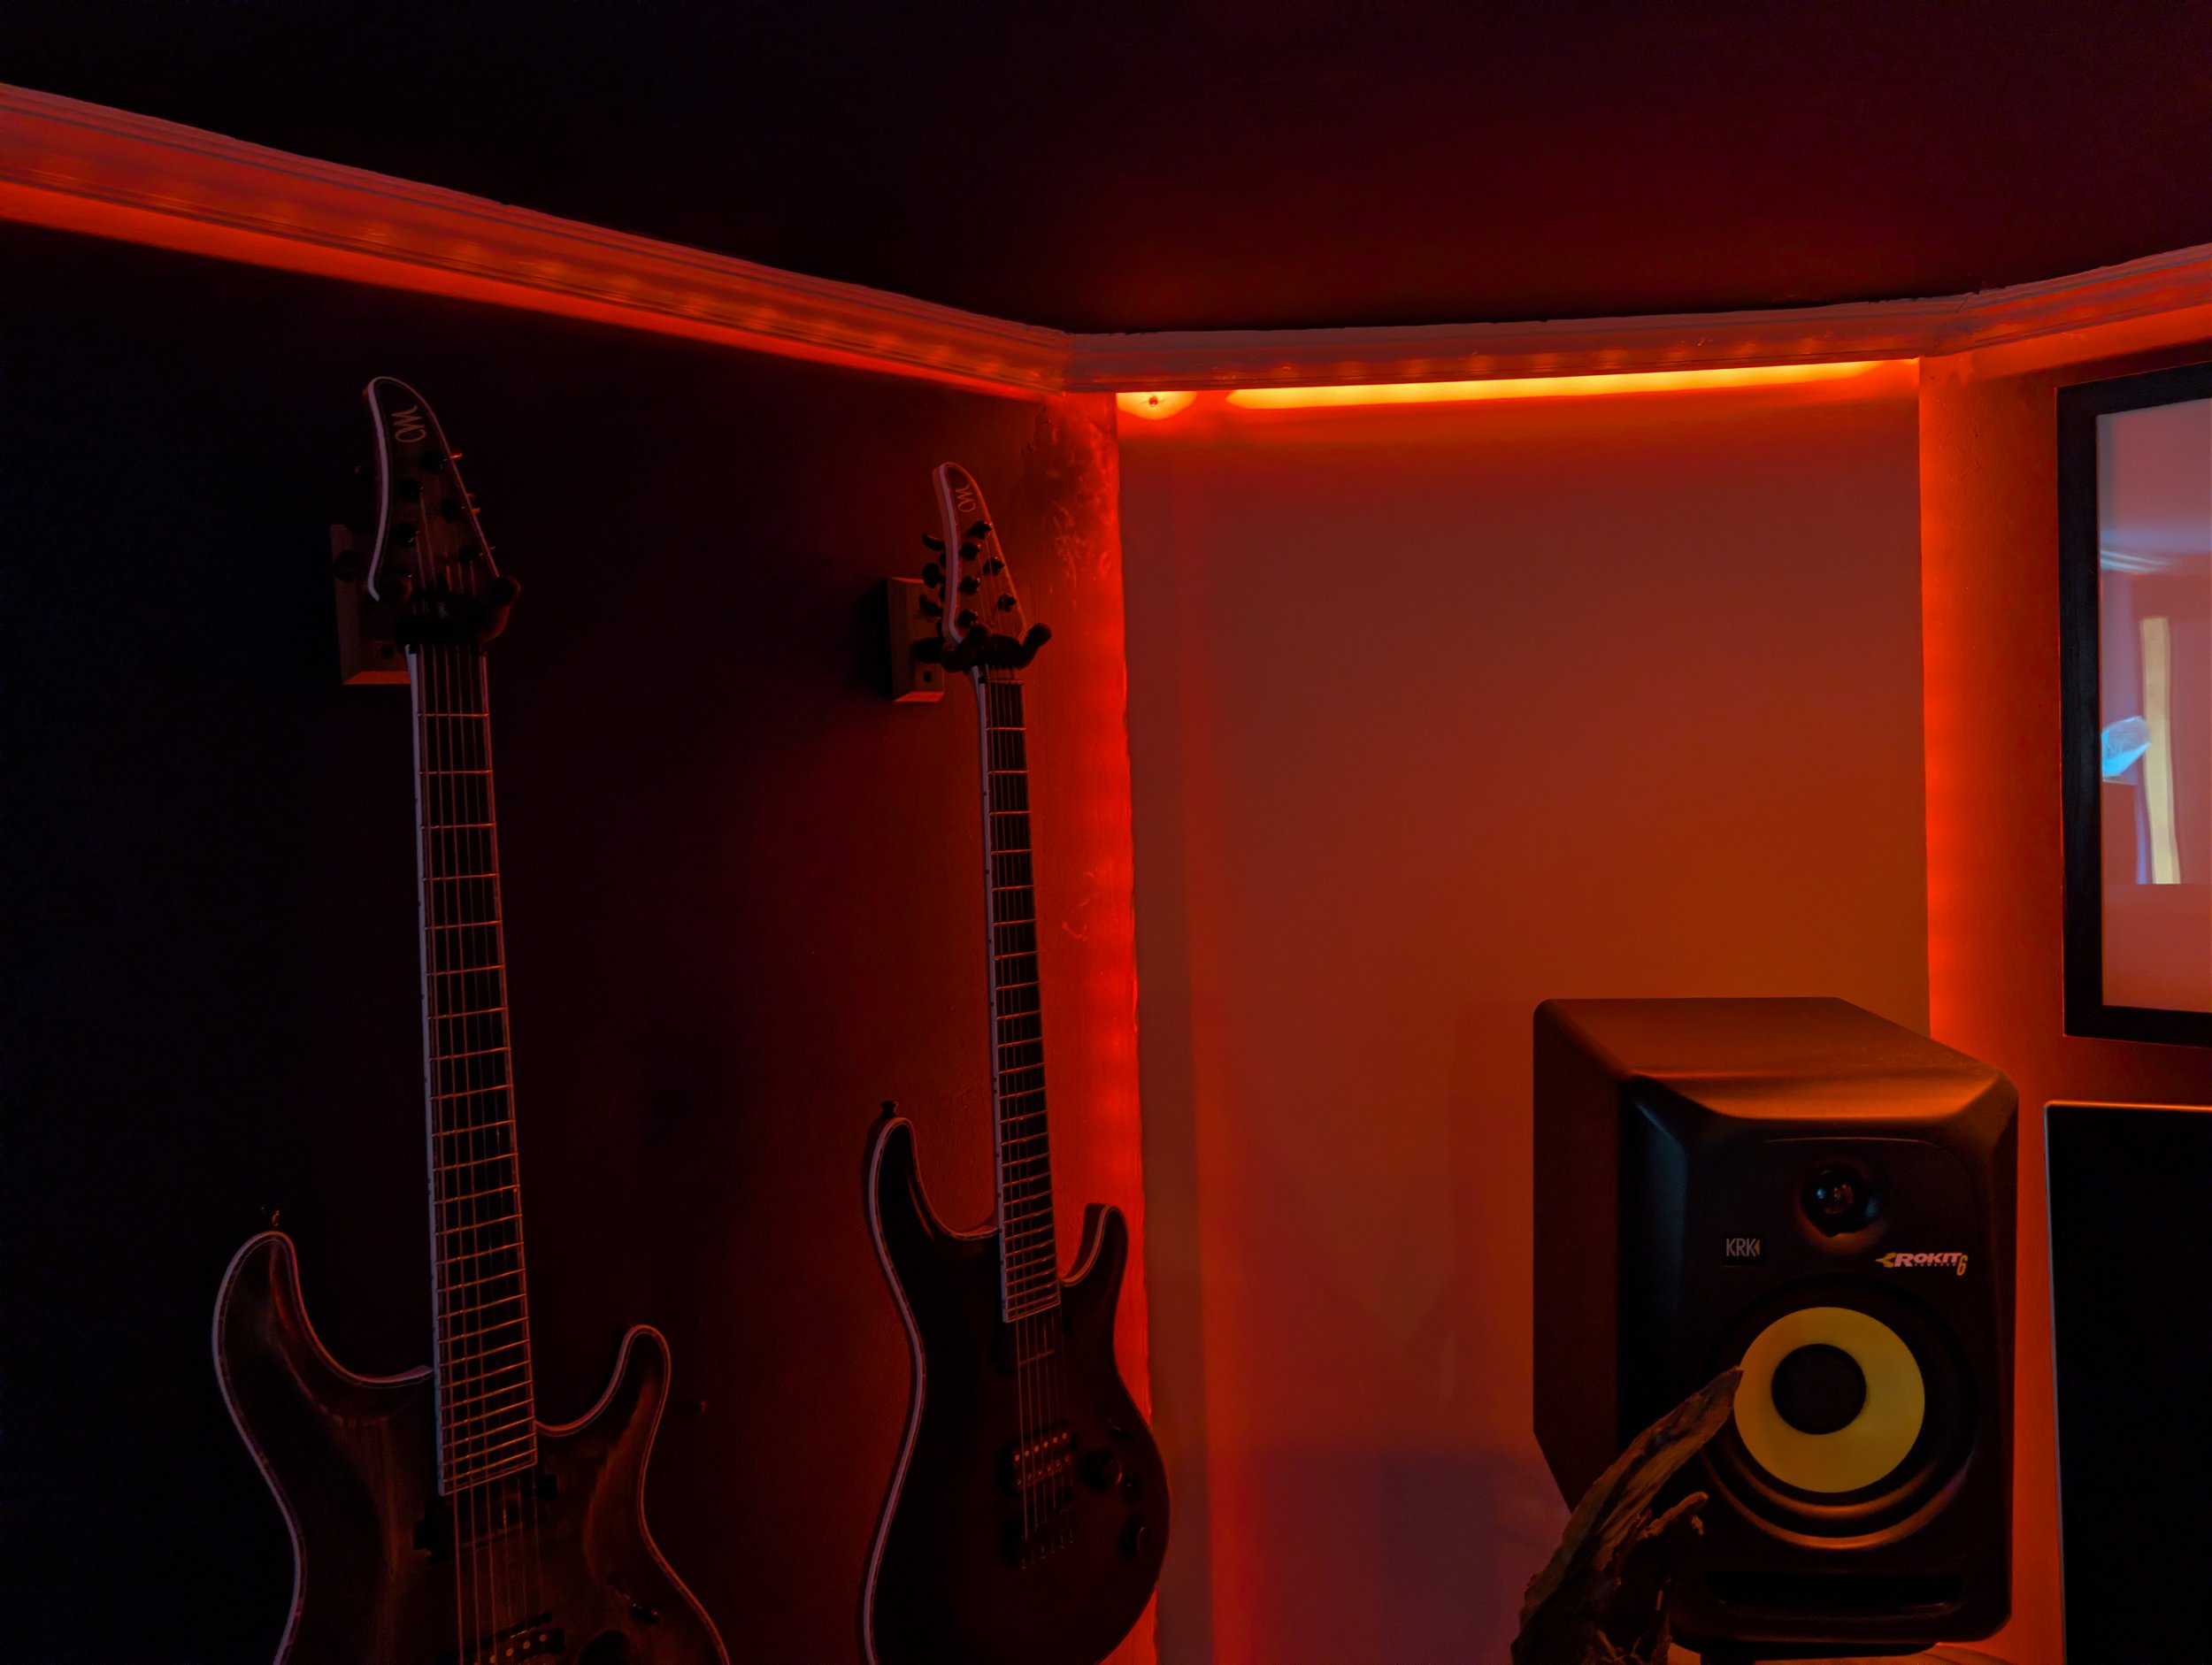
A regular Dutch Red Light District.
The only downside to using Ilford Multigrade photographic paper is that the back is just plain white. I imagine others might have a logo or some markings there, but maybe it’s universally unmarked for a reason. I don’t know. I do know that this makes it near impossible to see the difference, even using a red light, although there is a bit of sheen to pearl papers. I trained myself to feel for the difference to make sure the top is facing the pinhole, rather than attempting to discern the happy side visually.
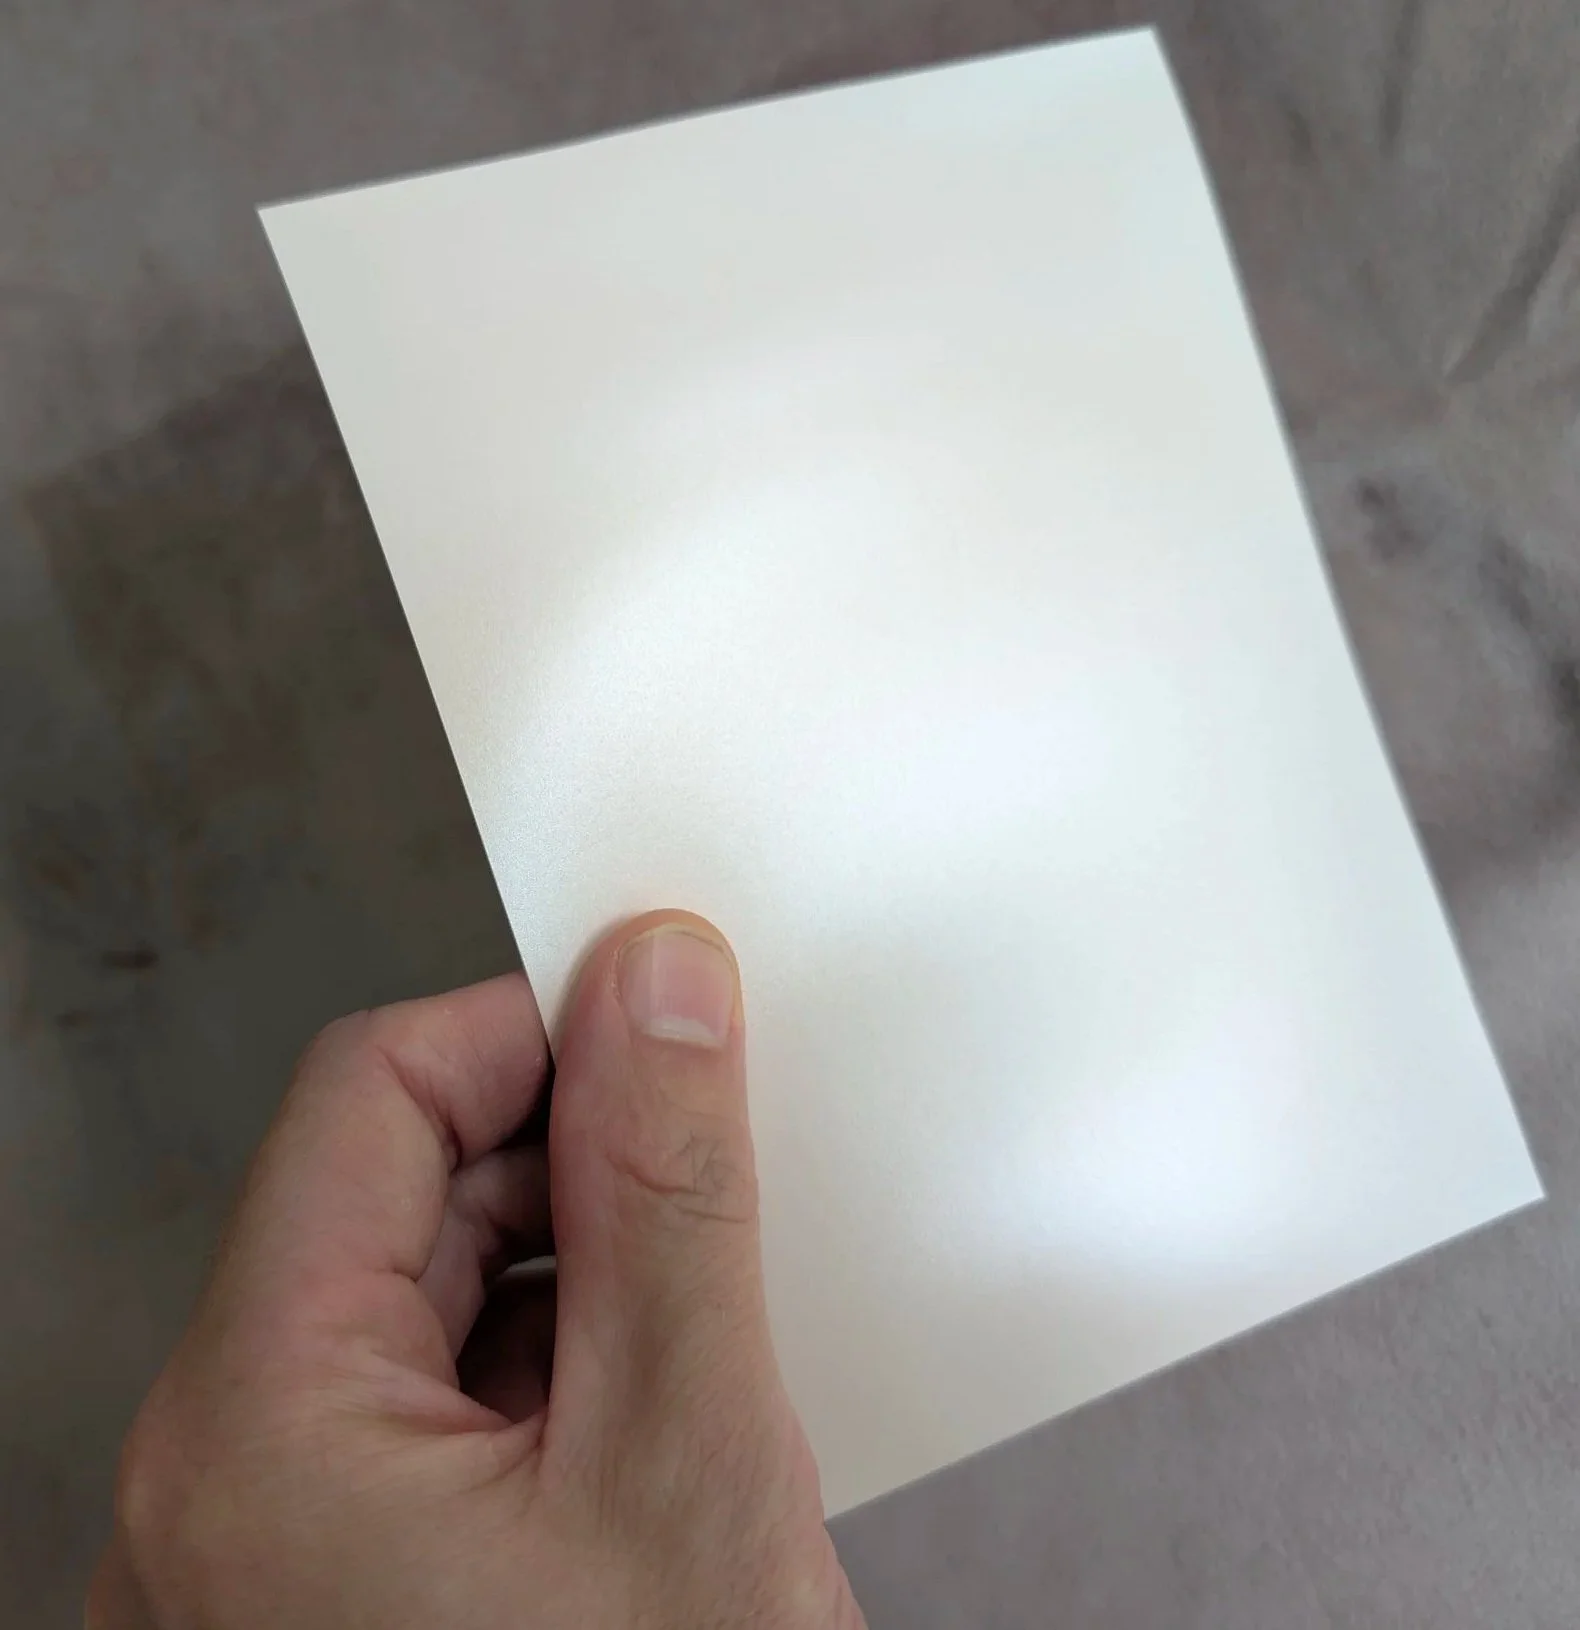
There’s a slight sheen to the photographic side, which can also be felt by gently rubbing the paper. Otherwise it’s hard to tell the difference between sides in the dark. This scrap piece is already warming up in tone, meaning it’s turning while taking this photo.
Then feel for the pinhole. Even if it is sanded down, it’s easy enough to notice where that is. The roughened up metal should do the trick in that case. The paper should of course not cover said hole. If the paper is too large, now is the time to cut it down. In my case, the paper’s ends are about a centimeter to an inch apart.
Step 4: Closing your cameras
Still in the dark, you will also need the caps if you decide to use them, and copious amounts of duct tape to seal the DIY pinhole camera. A cap is placed over the top of the can, so rain washes over the can instead of in or through a few coatings of just duct tape. Perhaps a simple plastic bag could work too if you can fix it in place well. I just went to the local hardware store, searched a couple of aisles for a useful and cheap part and ended up in the sewage section, where I found myself looking at these red lids that are probably meant to close off drainpipes temporarily. They’re reusable too and will live through several years of solargraphy. They’re just not opaque enough, so use tape as well to darken the top of your pinhole camera.
The red plastic things in the the bottom right will do fine. Also: One of these drainpipes could be a great option for a reusable pinhole camera. Just remember that the larger the diameter, the longer the focal length and the more “zoomed in” the result.
Just seal the top of the camera for now. As the “shutter” is already closed. Then you’re good to turn back on the lights.
Step 5: Camouflaging pinhole cameras
Now you will be both camouflaging the cans and making them more lightproof. I’ve found plain black duct tape to work 90% of the time in natural surroundings in summer and winter. I say 90% because 1 in 10 pinhole cameras ended up going missing in places that aren’t that frequented by visitors. And while a few just fell down from their spots, others were definitely found and… well… “repurposed”:
I don’t know what they tried to make here, but they definitely used my missing pinhole camera’s tape to create this right next to the spot where I left it recording. Call it rustic art. Minus one solargraph this year.
About bomb threats & notes
Ten years ago, I wrote an article on Fstoppers on solargraphy. And while much of my approach has changed, a few things stayed the same. I still recommend putting a note on there if you plan on putting the pinhole camera in a city somewhere. I recall the story about the actual bomb squad being called in because a pinhole camera was taped to a bridge in, I believe it was London, looking eerily like a make-shift pipe-bomb.
A note could read that it’s a scientific experiment or photography project. It’s customary to add a date of placement and when you intend to remove the “bomb”. Don’t write bomb by the way. And it’s a good idea to leave contact information in case of questions or concerns.
However, I never put notes on my solargraphy cameras. First, you need to put the note on the outside, where it can easily be spotted. That makes the thing more easy to see from a distance. Second, I place my cameras in places that are not that obvious. High in trees in woodlands, off footpaths are my favorite locations. Speaking of which…
Picking locations for your handmade pinhole cameras
While there are more ideas for locations at the end, the basic idea of solargraphy is that you image the sun as it streaks across the sky throughout the year at different apparent altitudes. So point the thing south when you’re located in the northern hemisphere or vice versa if you live south of the equator. One remark I would have is, the closer you are to Earth’s equator, the more I would consider to angle the pinhole cameras up towards the sky. I mean, my summer solstices are often cropped and I live in the Netherlands. But I also haven’t remembered my own advice of pricking the pinholes above the middle of the cans.
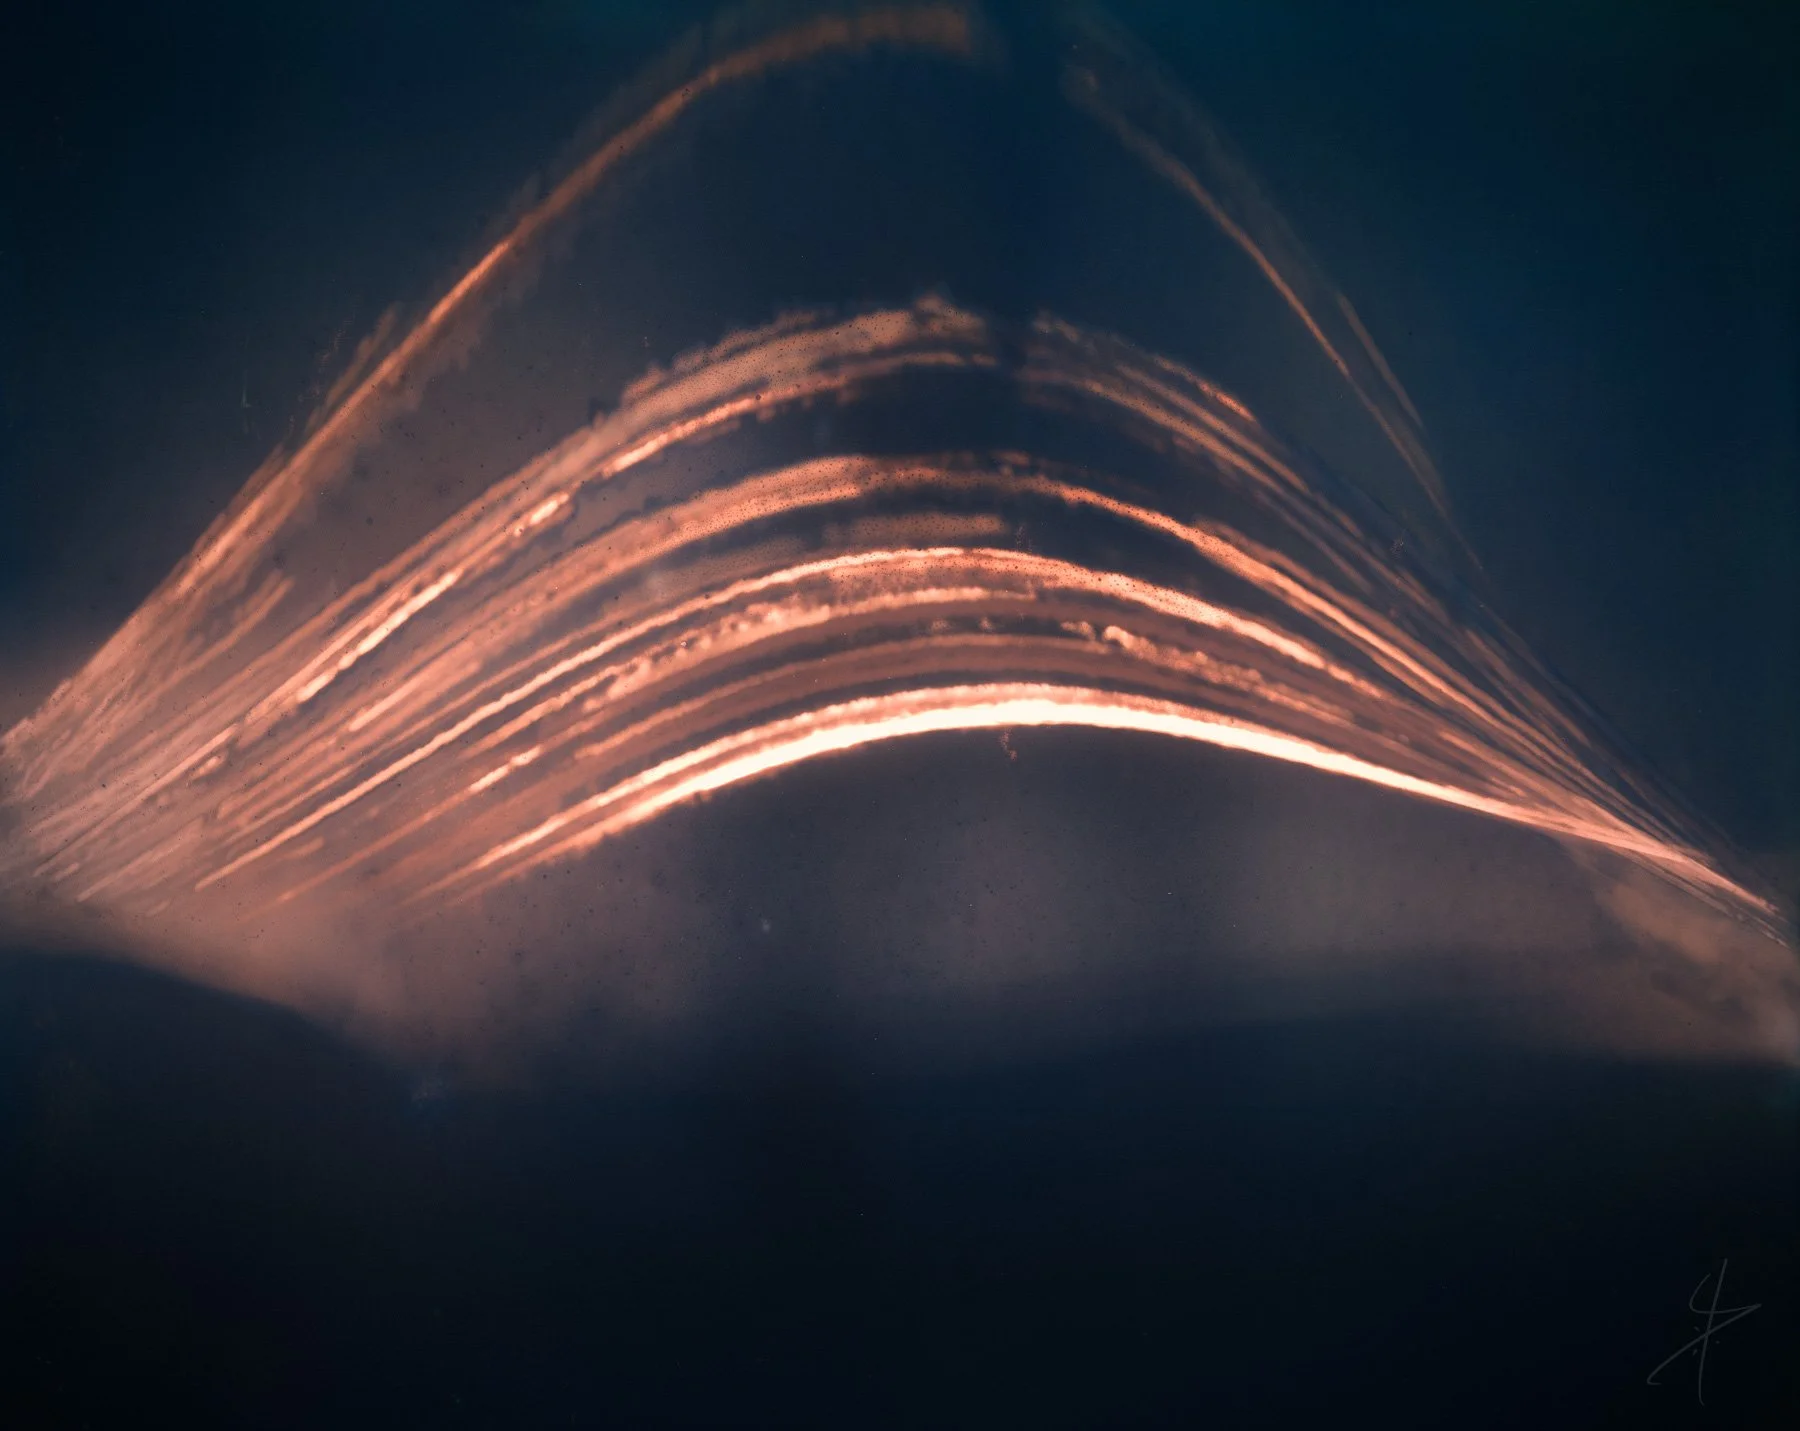
Notice the top arc as it leaves the crop. That is probably June 19th and later, judging by the amount of partial arcs to the left of it. If you put the pinhole in the middle of your can, angle the pinhole camera slightly up so it will include more of the sky.
Here’s my map of the most recently recovered solargraphs, some location info on them and a few images of my plan for next year below.
Just don’t forget to tear off the tape acting as the shutter when you’ve put them in place and are ready to start the exposure.
A little different than the usual. What would it look like if the sun bounced off all those evergreen leaves? Check back here in 6-12 months.
You could also try capturing a reflection of a pond, lake or in my case, smelly swamp. This can is pointing south, like most do. Hopefully it records the arcs in the reflection too.
This big tree could be a great subject. Anything with high enough contrast should work well. But also notice the footpath right next to it. It’s hard to spot, but if your glance happens to rest on this tree, you will see the a black cylinder tied to a tree, undoubtedly raising questions.
When to start solargraphy
Although it doesn’t really matter, the solargraph classic is to expose from solstice to solstice, when the sun is at the highest and/or lowest point in the sky. In general, the December solstice occurs around the 21st and so does the June solstice, but half a year apart. It’s not exact, because our calendar isn’t that accurate. To be sure, check the solstice days and hours before hand. I would recommend placing the cameras about a day before the longest or shortest days.
For a first time, you could also do a month from whenever you read this. Or even a day. I’ve done year-long exposures and half-year-long exposures and they look pretty similar if you consider the subject matter:
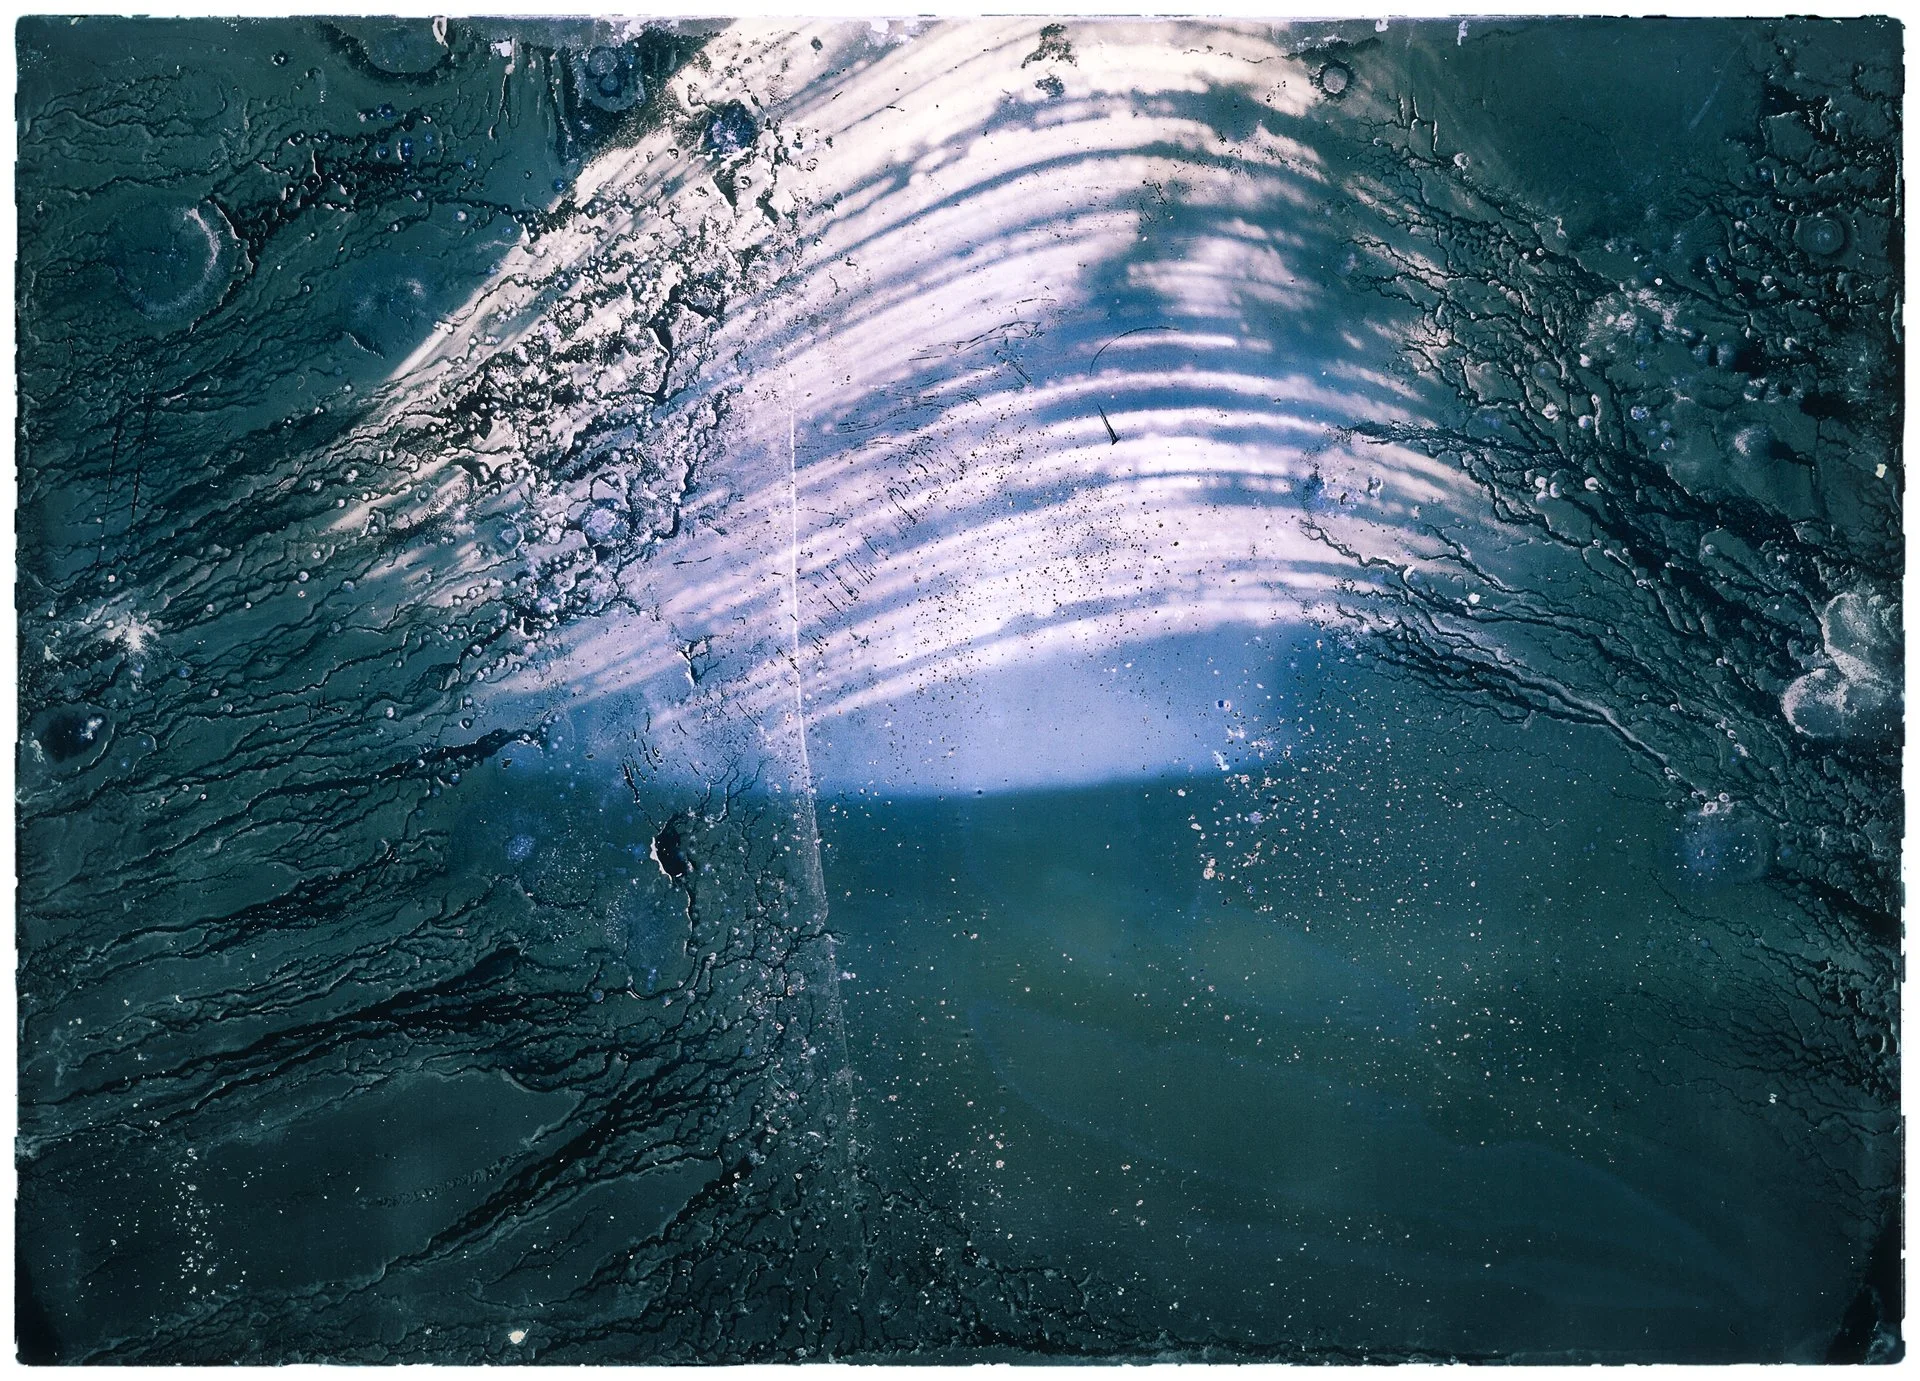
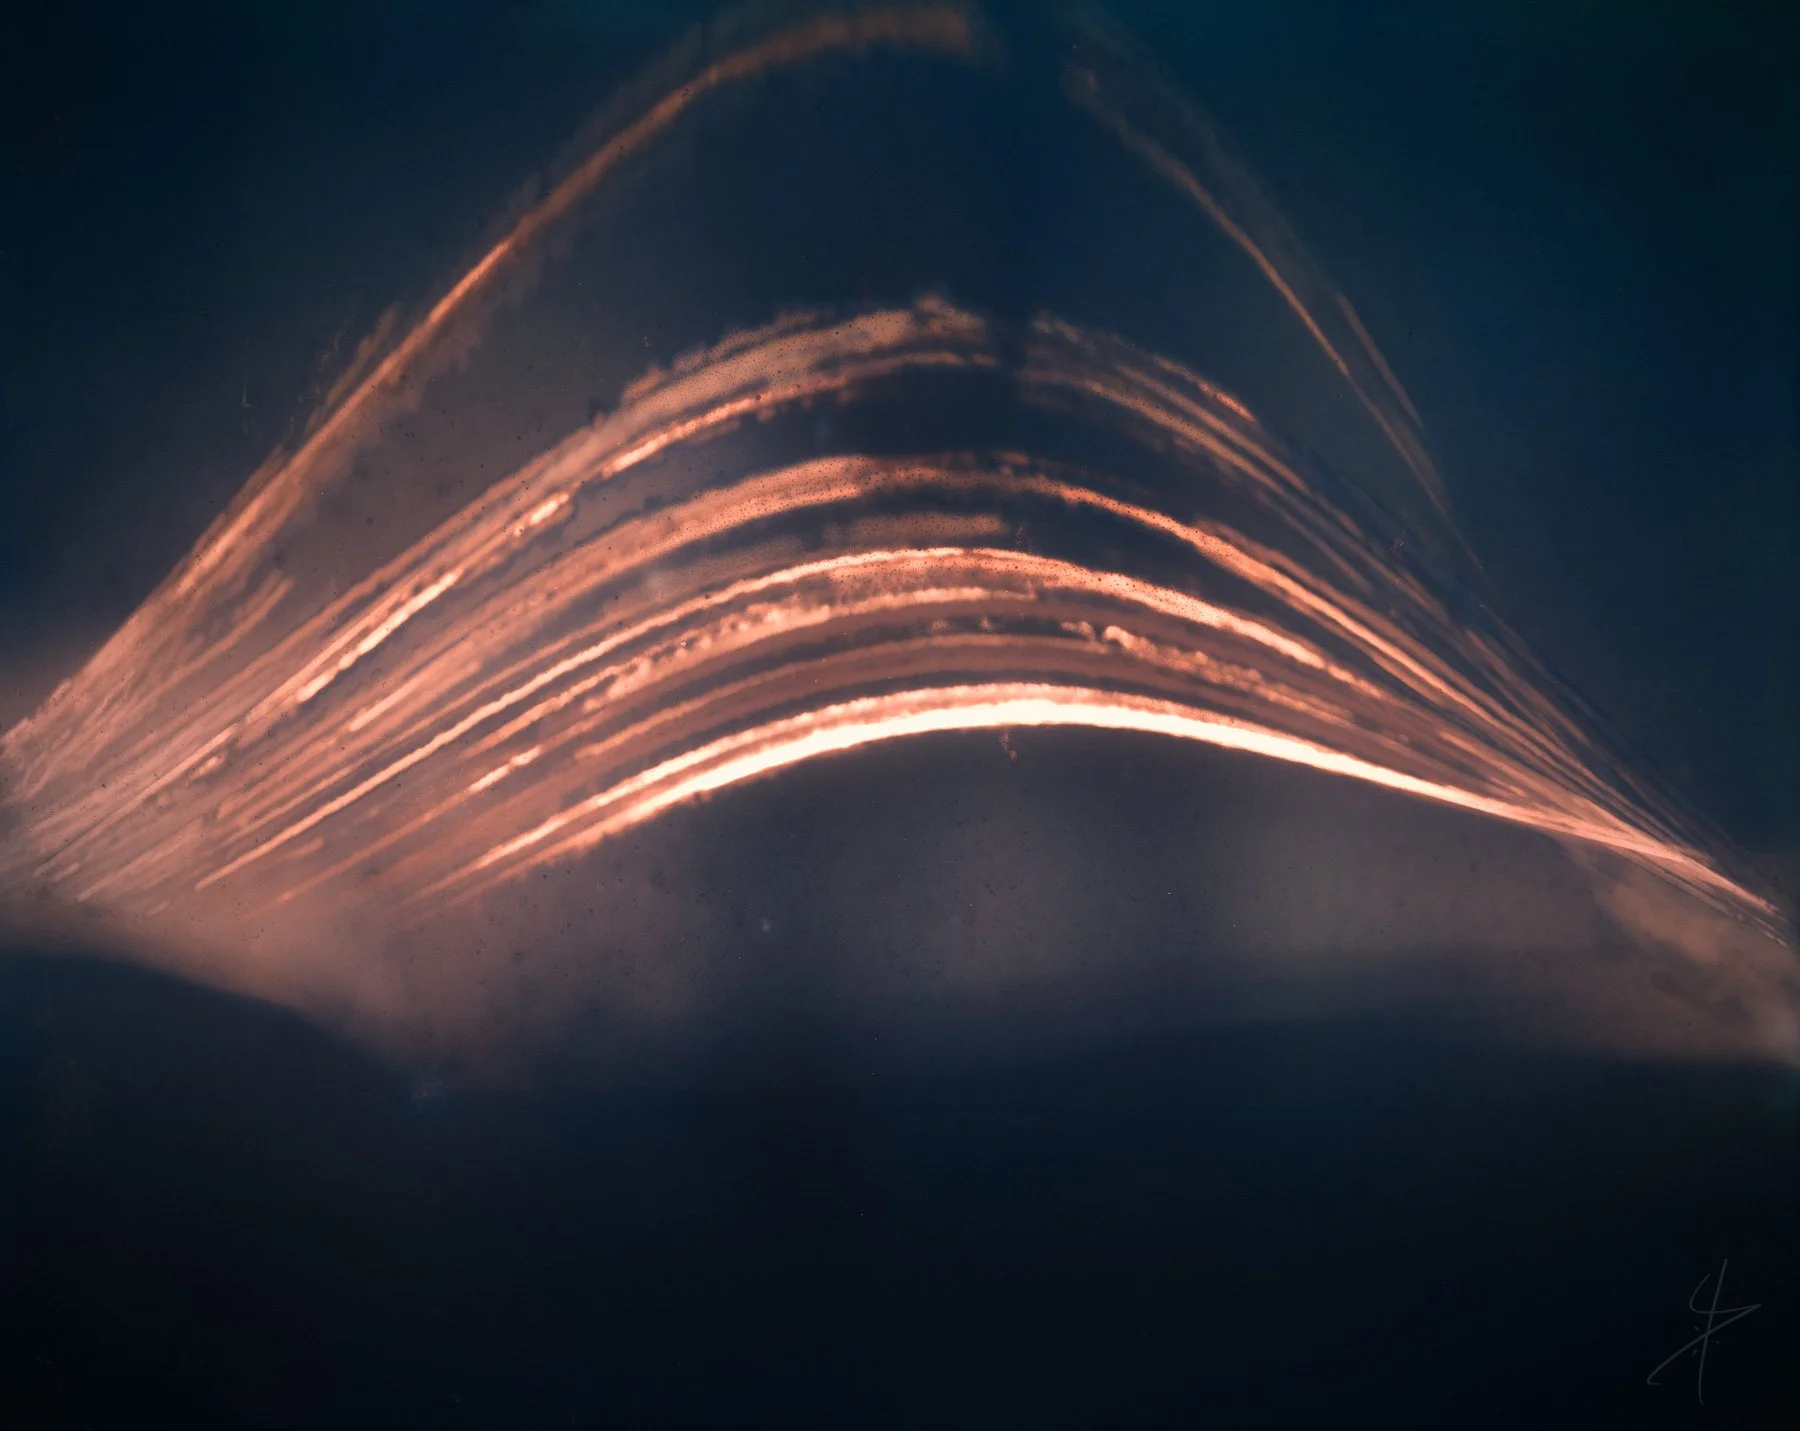
The paper is more beat up on the 12 month exposure, but the reason for that is that these lacked the plastic lids on the cans. The 6 month exposure was sealed with the cap on the top, preserving the paper much better. The differences in color are mainly due to my taste having changed over the course of 10 years, and to a minor degree the difference between version IV and V of the Multigrade paper they were captured on.
Optional: Check if the cameras are still there
If you want to go for a walk when it’s not absolutely freezing or too damn hot to move, a spring or autumn check is a fun way to tell a friend about your project as you stroll by your chosen locations.
Recover lost pinhole cameras
Unfortunately, not all pinhole cameras make it. Consider the elements that they’re left in: half a year of rain, drought, storms, swaying trees and eagle-eyed people spotting something out of the ordinary in a tree. But not all has to be lost. Especially for those extremely long exposure attempts. I’ve more often found one at the base of the tree I left it in, than that the pinhole camera was gone-gone.
Can down!
You know what? This is actually my favorite of the set. It seems like this camera has fallen down quite soon after the winter solstice. The pinhole turned out to be looking up and we see the base of the tree it leans against, as well as a few solar streaks here and there. I love the brighter part in the center and the trees making a natural vignette. Of course this has been edited, as you should too. More about that later in this article as I walk you through this process.
Nature first
In case you can’t find your pinhole camera, at least cut the tie-wraps that are often still in the tree and take them with you. So when you do visit your pinhole camera locations, make sure you have a backpack with you to take your plastic back to the house and it doesn’t end up as litter.
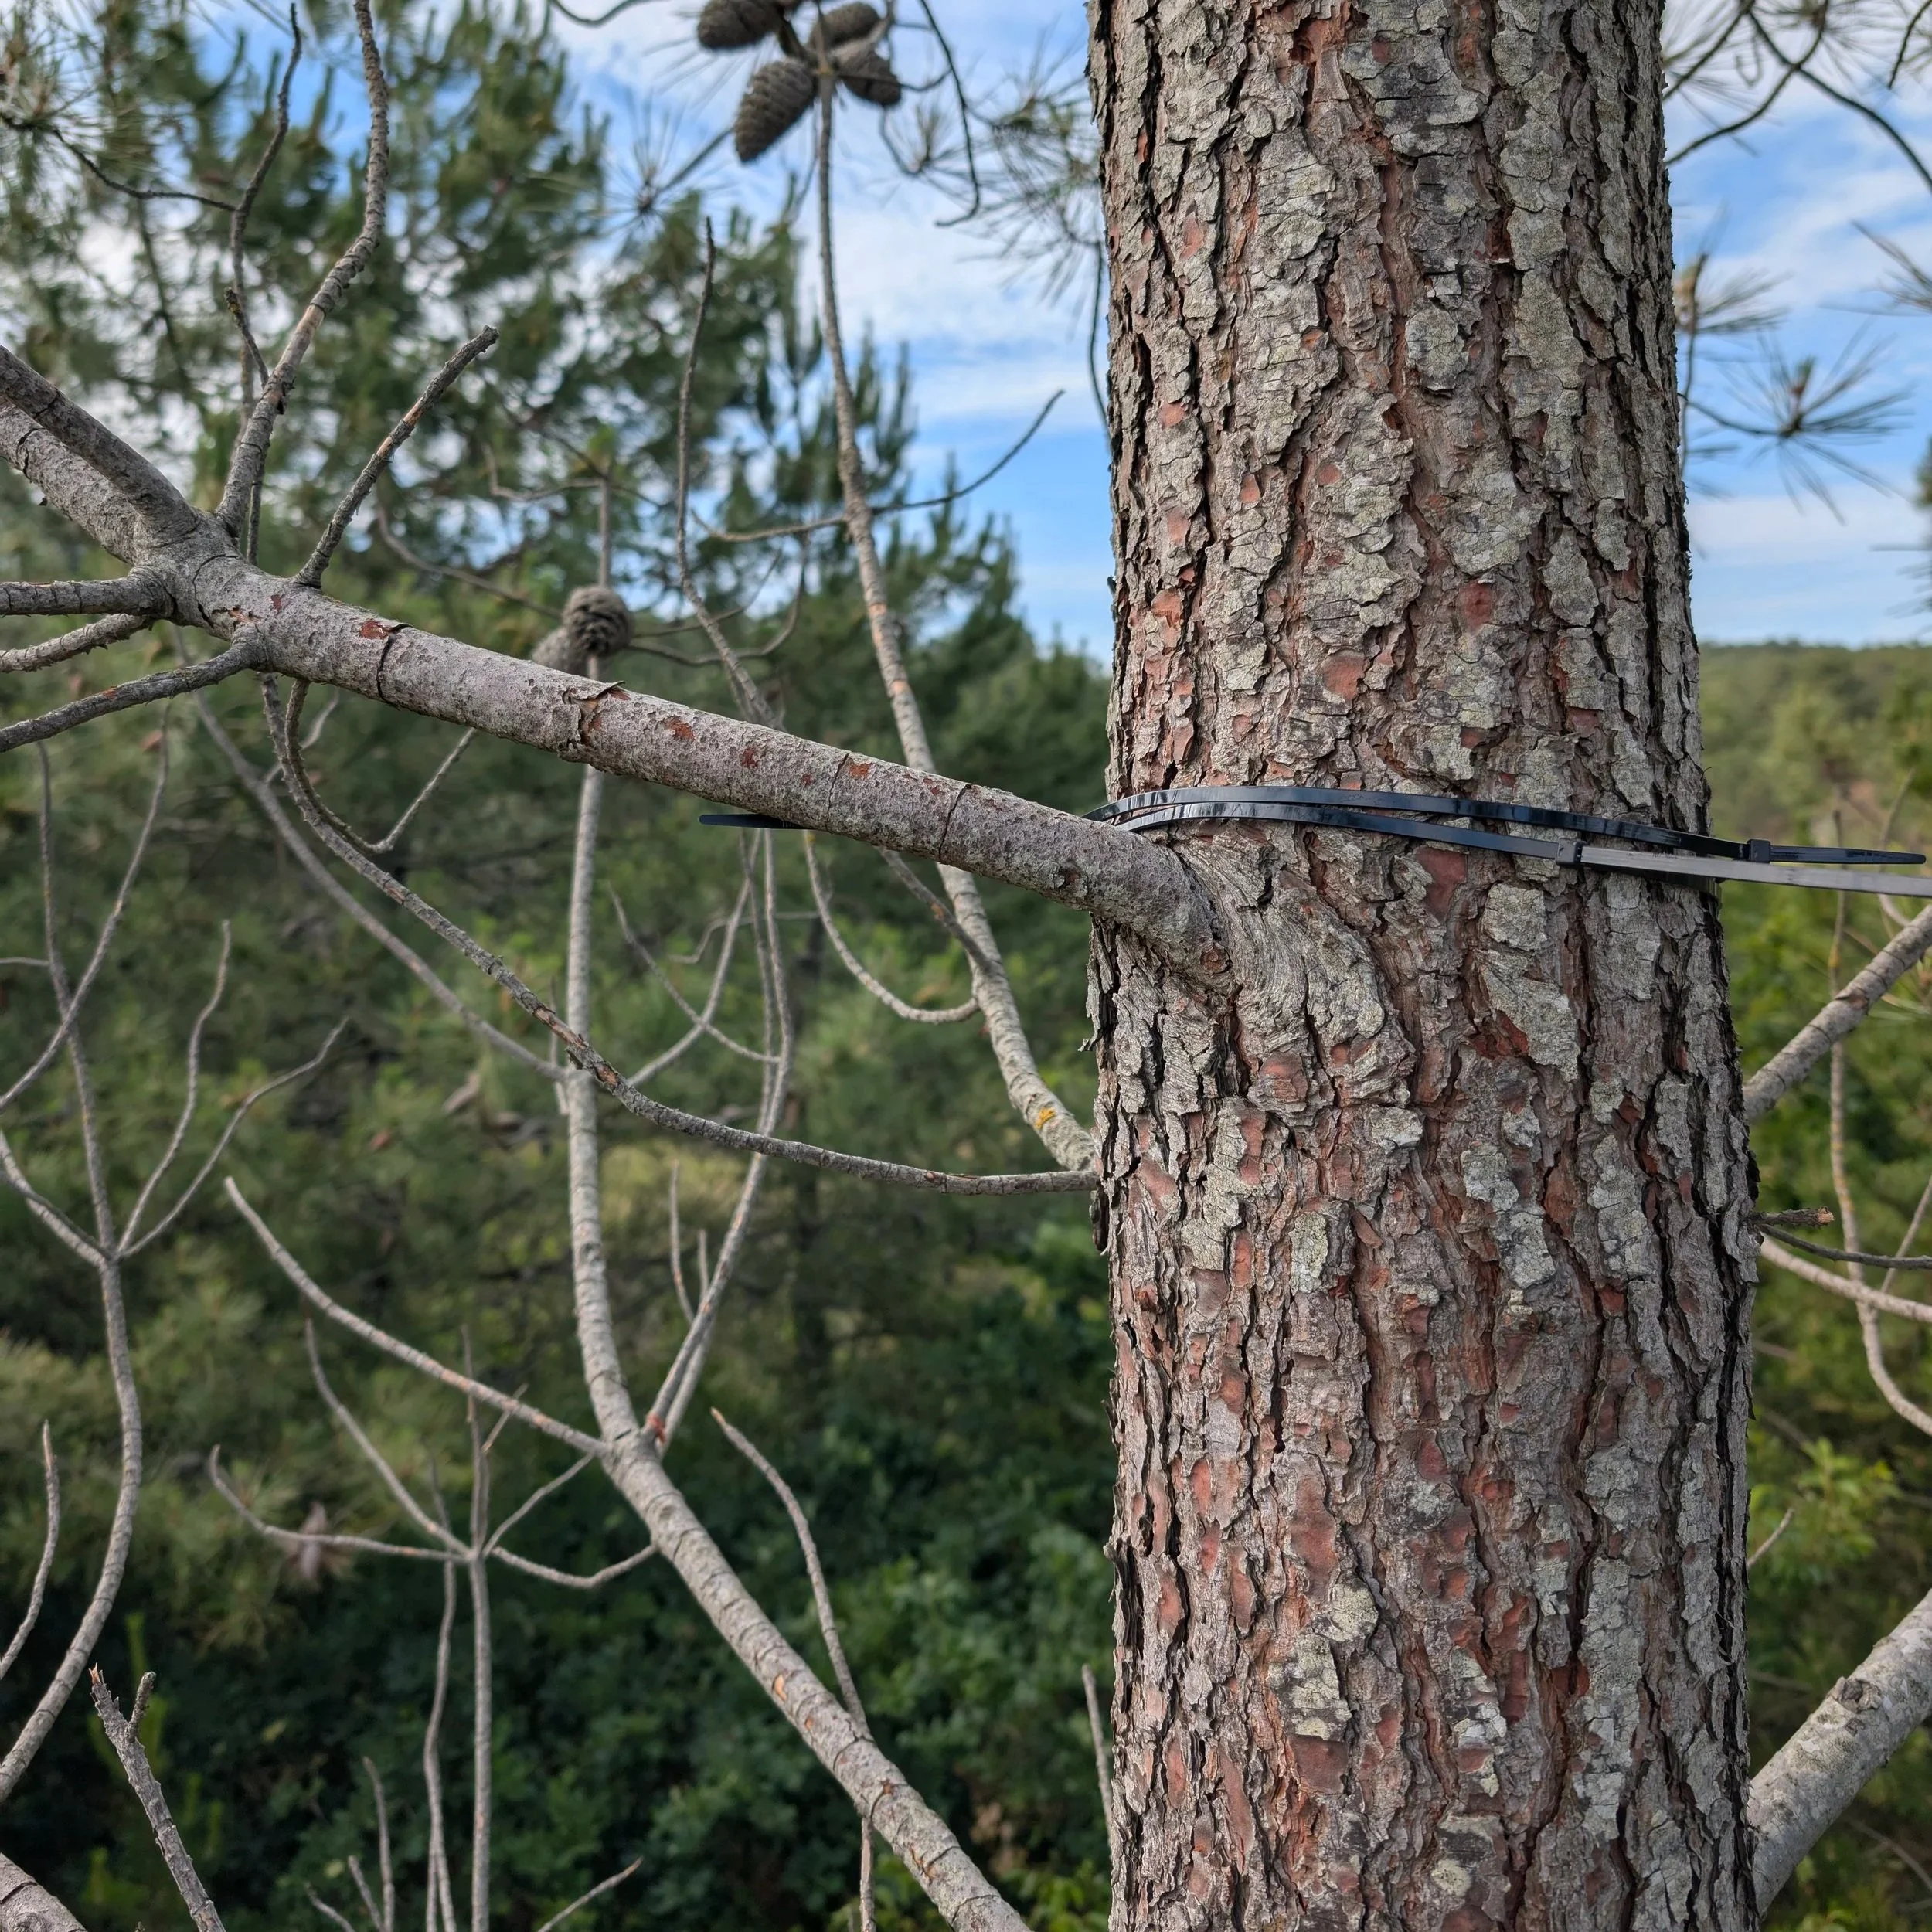
Even if you only find tie-wraps, please cut them down and bring them back with you.
Picking up pinhole cameras and stopping solargraphy exposure
When it’s time to recover the solargraphs. Take the following stuff with you:
Backpack lined with a trash bag.
Scissors, knife or cutters to remove the tie-wraps.
Black duct-tape to act as the new shutter.
Time to climb in that tree again. Put a small piece of black tape over the pinhole to end the exposure. Then cut away whatever holds the pinhole camera in place and take that stuff with you please. Solargraphy is fun and all until it starts becoming a burden on the landscape.
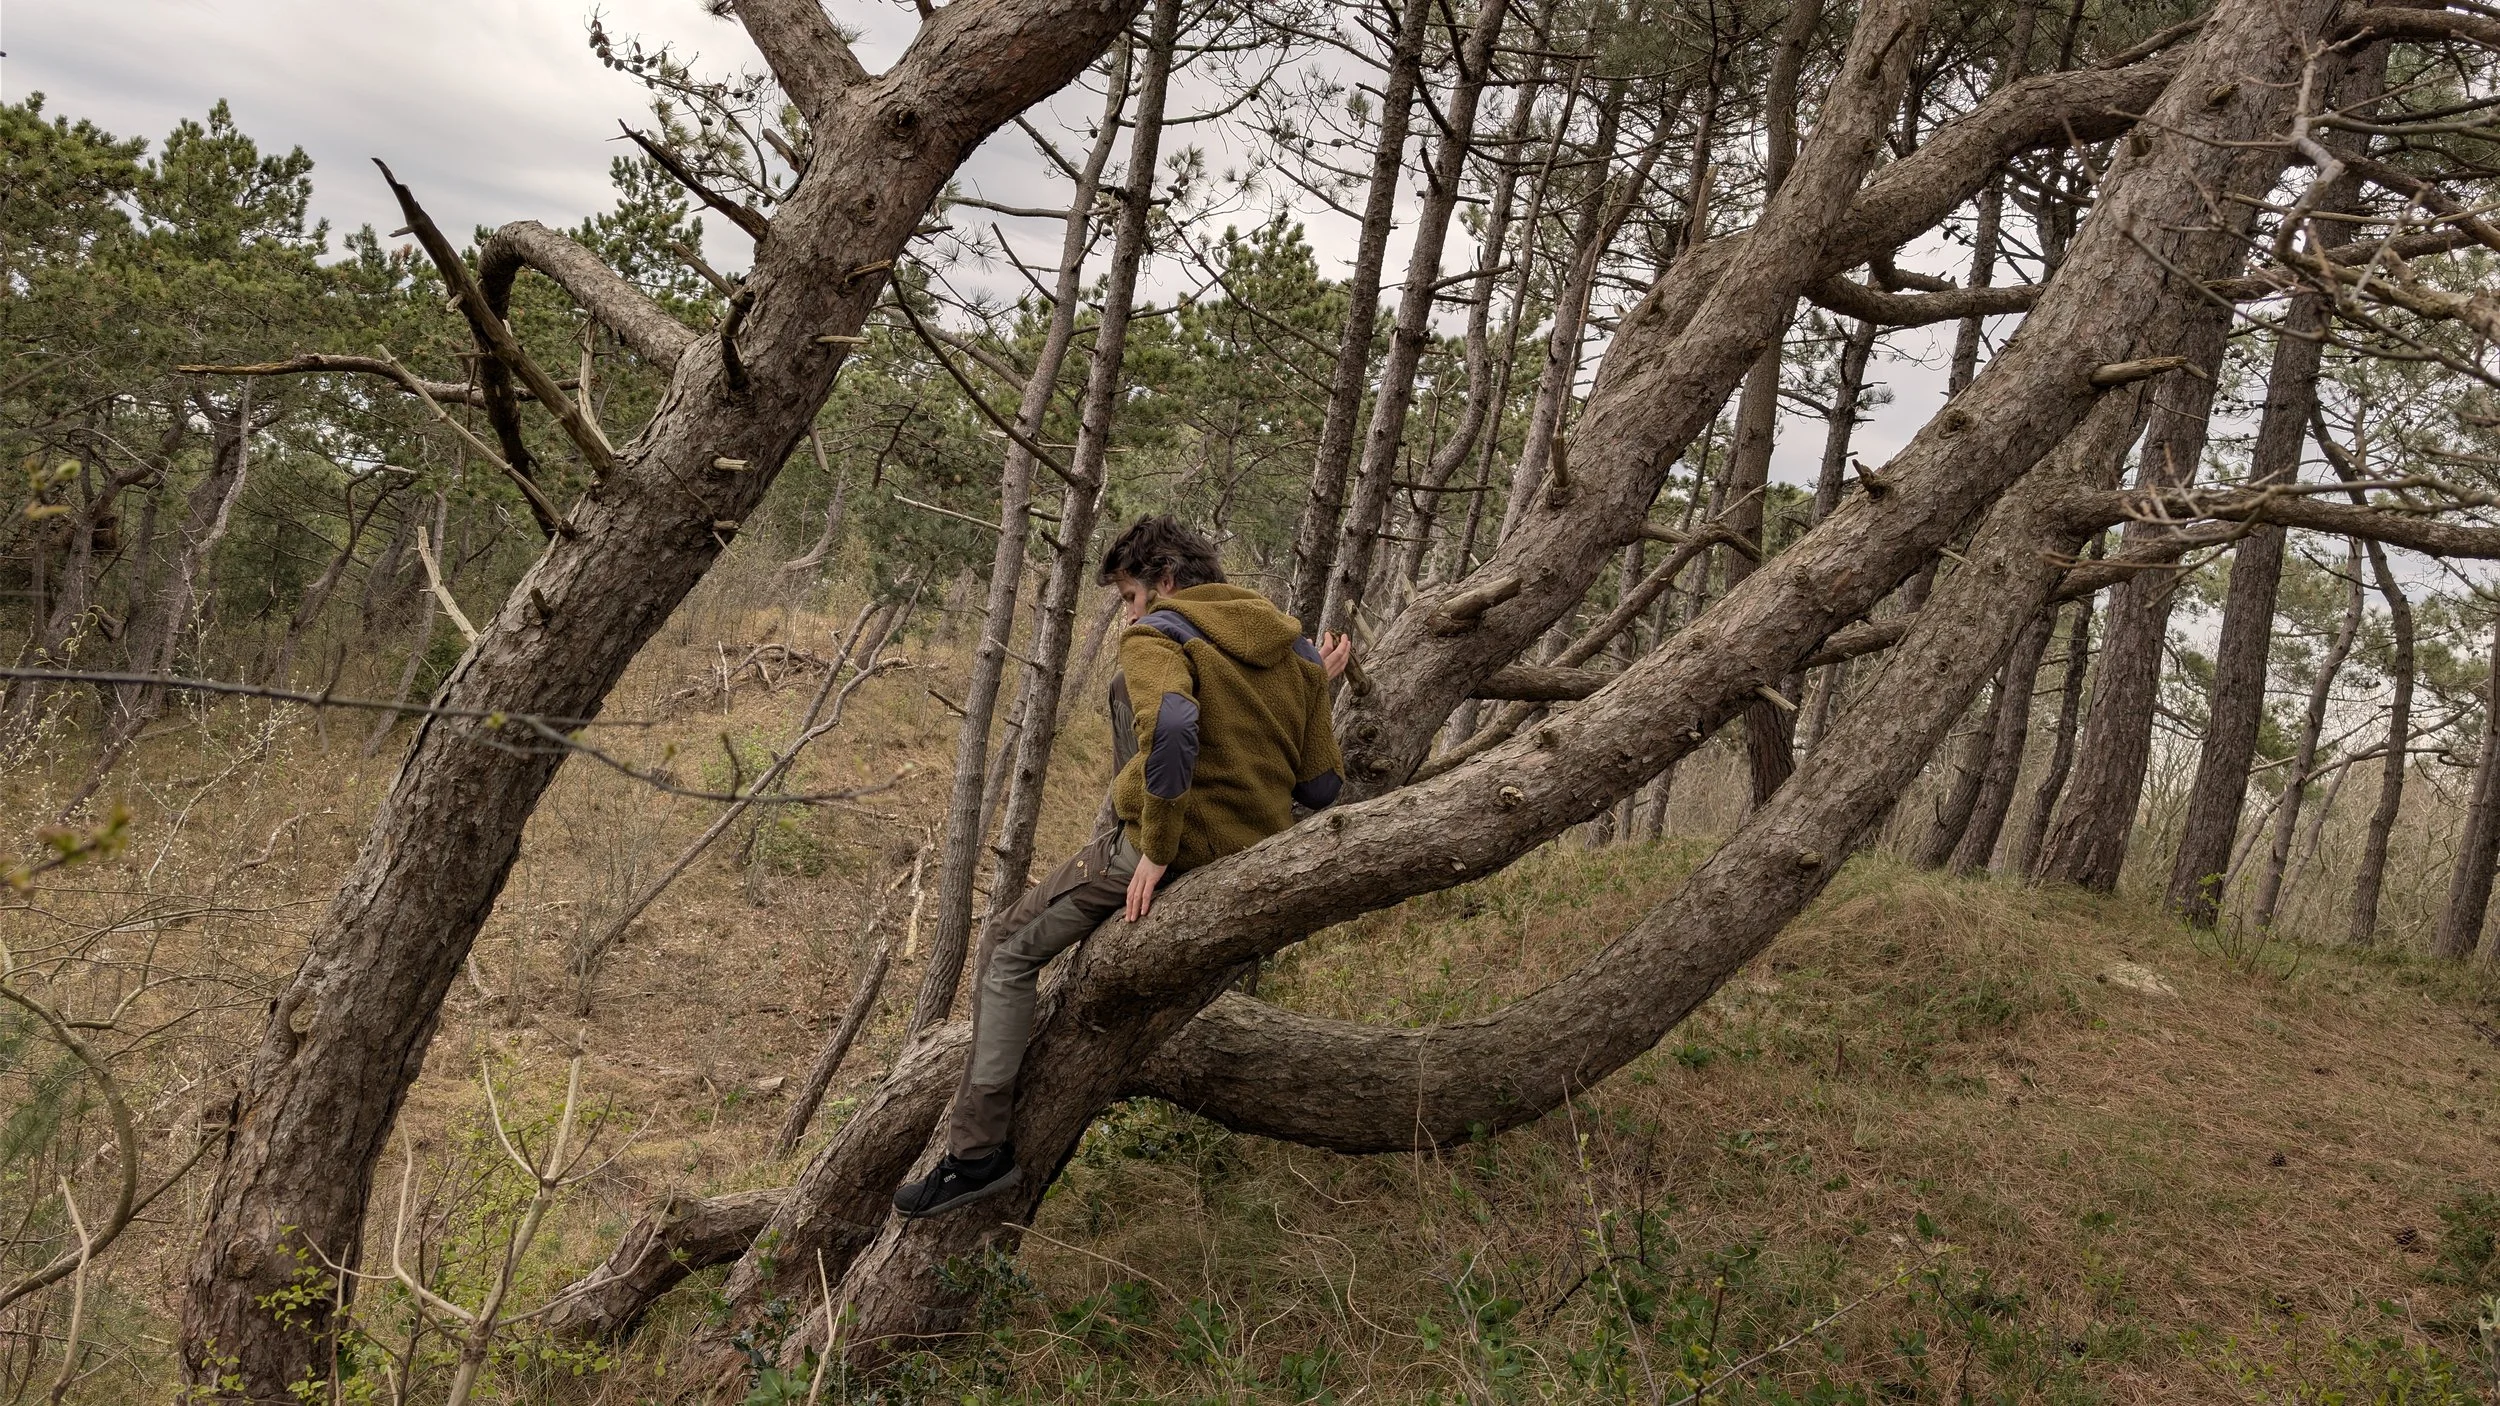
There is a surprising amount of photos of me up in trees.
How to develop solargraphs
There’s one more challenge ahead of us. Solargraphs made with photographic paper like my preferred multigrade have a very specific way to develop them. First off, you can not develop these chemically as you would with traditional film negatives or slides. I’ve read that you can attempt to fix them, but since they have been exposed to the elements for a long time, chances are that it would harm the solargraphs more than it would do them good.
Instead, here’s what we do in a nutshell to develop solargraphs:
Move your pinhole cameras containing the exposed solargraphs into your makeshift darkroom. A red light allows you to see, while keeping the risk of continued exposure low.
Prepare your scanner, scanner application and folder for saving in advance. Be ready to put the paper in the scanner, hit scan and go on to the next.
It’s a good idea to protect yourself against cuts from the razor sharp edges while preventing smearing and fingerprints on your prized solargraphs as you pull them out. So a pair of fresh gloves designed to protect against cuts is highly recommended.
Cut through the layers of tape at the top of one can at a time, pull the solargraph, and judge if they’re ready for scanning.
If what you pull out feels wet or slimy, make sure to dry the solargraphs first. Do not use heat to dry them. Dry them inside a dark room or…
…if the solargraphs are really distorted or curled, put the paper inside a large, heavy, hardcover book for a day or two. Put them between two microfiber towels inside a book. It will probably ruin the book, but it will straighten the solargraphs. So use a book that you mean to get rid of anyway. Keep the book in a dark environment.
Wipe the scanner’s glass surface with an appropriate dry cloth. Place one on the scanner and hit scan. For all scan settings I use, read on. Upon scanning your solargraphs, it’s up to you how many times you want to scan each one additionally. It could be worth it, but I recommend momentarily lifting the solargraph after each scan, blowing air underneath and moving it so it’s not exactly in the same spot on the glass. It could be slight or a lot, as long as each scan is fully within the preselected scan area. The reason for this is omitting scratches in the glass plate and other tiny imperfections that you could automatically edit out later. Even if you don’t have the skill level to do so yet.
Save the solargraphs in a light-tight folder or something like that. I doubt you can store them for a long time, but at least this gives you the opportunity to revisit the scanning process in some capacity in the coming days or weeks in case you notice a big defect later.
Another one from the archive.
Scanner considerations for solargraphy
This took a big chunk of my time researching. And it might get technical.
Can I take a photo instead of scanning solargraphs?
Taking a high-res photo of your solargraphs could work, but you need at least some light to make this work. More light equals shorter exposures, but more fading of your still light sensitive paper. Remember, solargraphs are not to be fixed before scanning. On top of that, if the solargraph isn’t totally flat, you will have out-of-focus scans. One way to mitigate that is to use focus stacking techniques. These techniques are often done in museums using medium format digital cameras for digitizing art.
The plus side is that you could probably start to take a photo of your solargraphs on the day the exposure is done without buying a scanner first.
Drum scanning
On the other side of the spectrum, you could have the solargraphs drum scanned by a lab. But this is pretty expensive and I don’t know how they feel about potential peeling off of junk from the “character” of your solargraphs. Never tried this.
Flatbed scanners
The third and proven option is to use a flatbed scanner at home.
It turns out not all flatbed scanners use the same technology. And you could say that scanner tech has not advanced much over the last 10-20 years, other than the more frequent use of LED-lights. But it’s not the lights that I was concerned about. Not directly anyway.
Cheaper scanners use a scan head known as CIS. These Contact Image Sensors (CIS) are almost in direct contact with your solargraphs. They could potentially touch the surface. CIS scanners like the Epson V39 II are pretty easy to get online and don’t cost much. I got one for less than a hundred bucks.
But there are downsides to using CIS scanners. For one, a CIS scanner like the V39 II needs the paper very close to the glass. If the paper is curled from sitting in the can, parts of the image may scan softer or unevenly, resulting in out of focus areas. Additionally, I’ve used a scanner in the past at a moderately high DPI setting like 1800 DPI. The amount of data is high, which is why file size increases quite a lot with higher settings. That data is transferred over whatever connection the scanner makes with the computer, usually some version of USB. If the data rate of the scan head exceeds the data rate of the connection, the data is buffered in the scanner’s memory. If the scanner’s temporary memory is full, the scan head will either slow down or stop completely in some areas. Think of the burst mode on a digital camera as it slows down after a certain amount of images has been recorded. In the case of a CIS scanner, this is a huge problem, because the light passing over solargraphs will further expose them. And each pause or change in speed will cause visible streaks that will be worse when you post-process your scans.
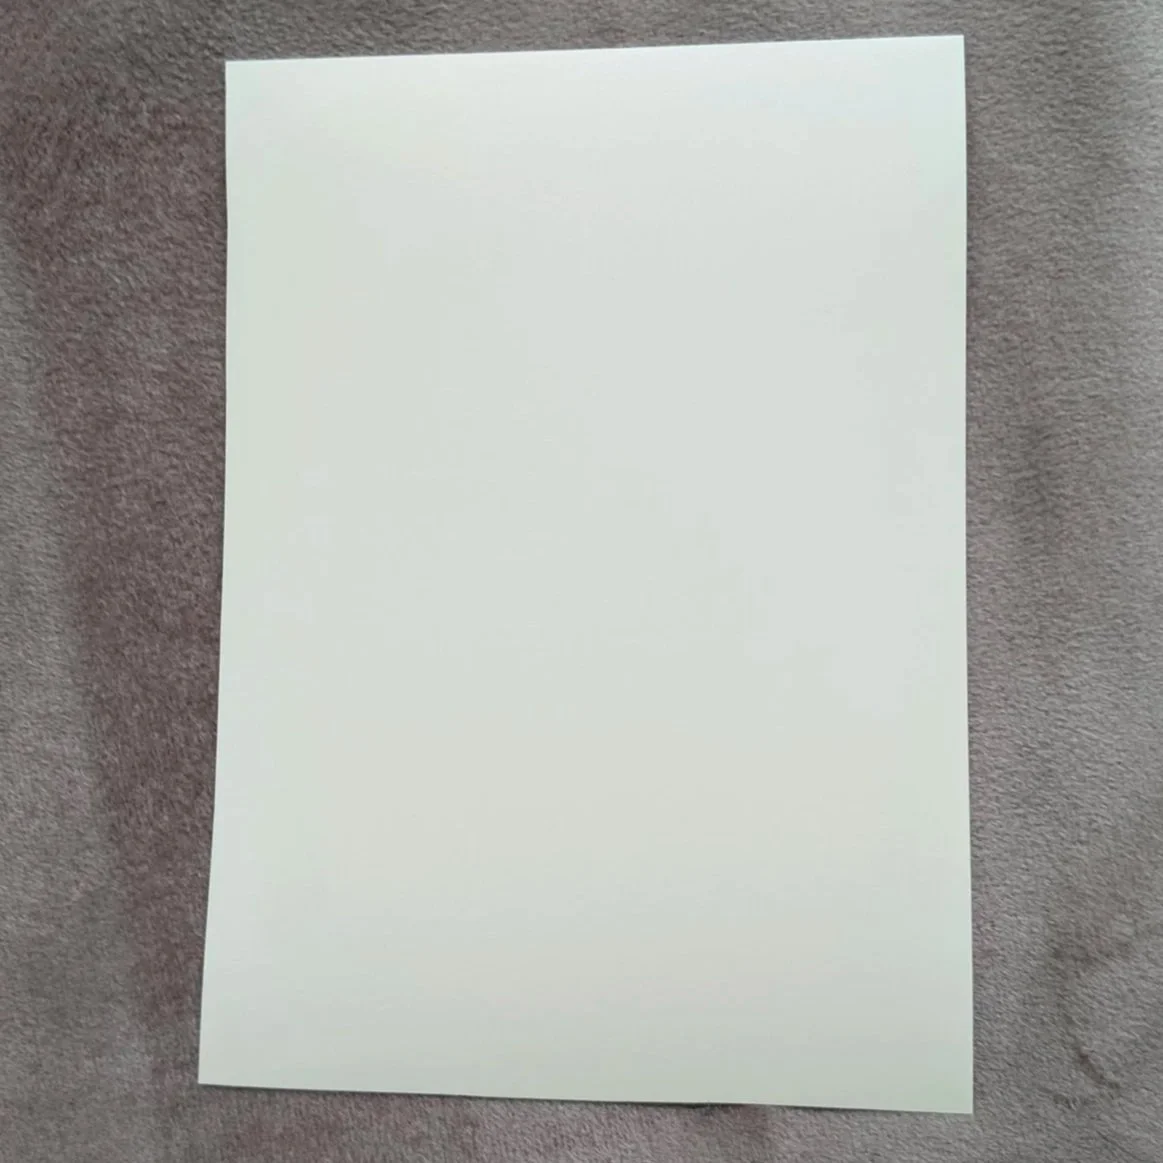
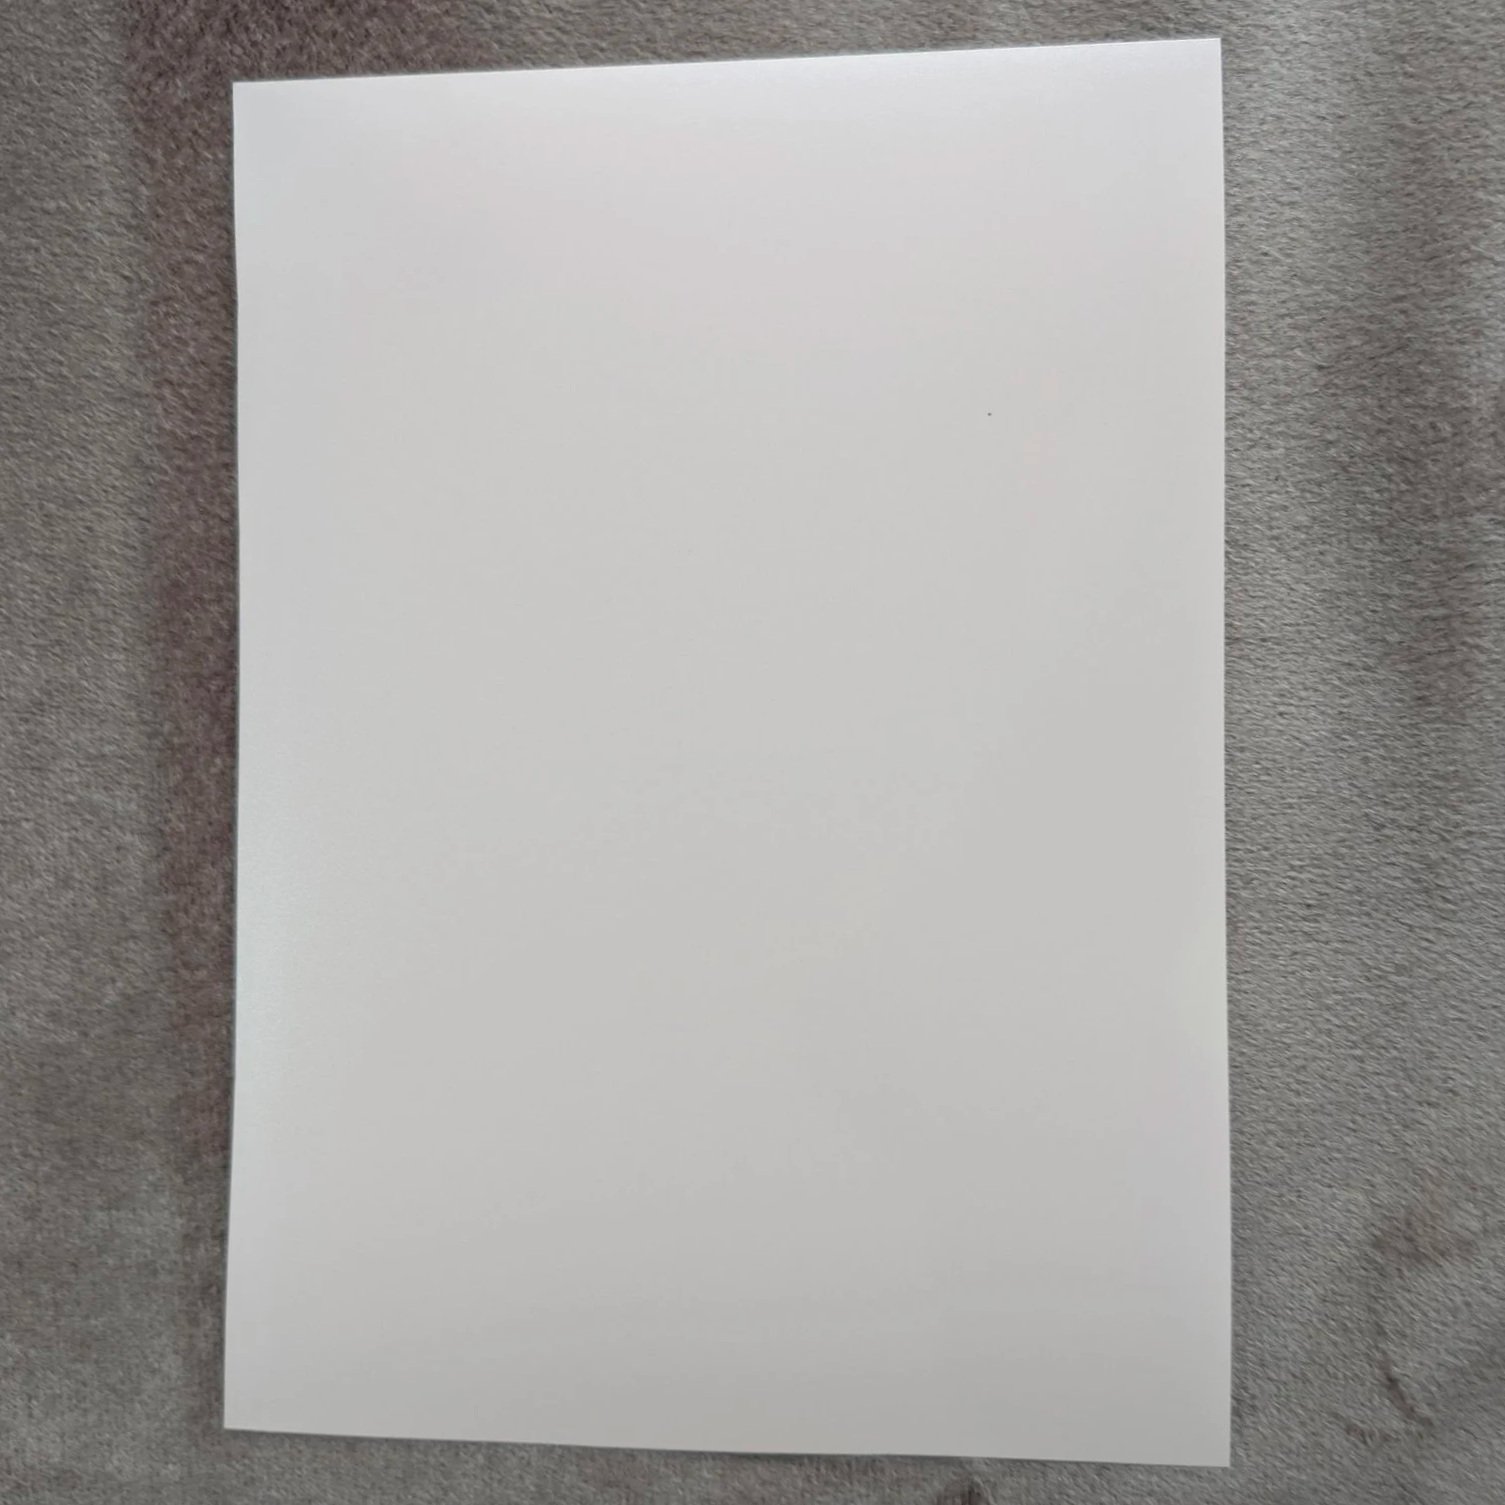
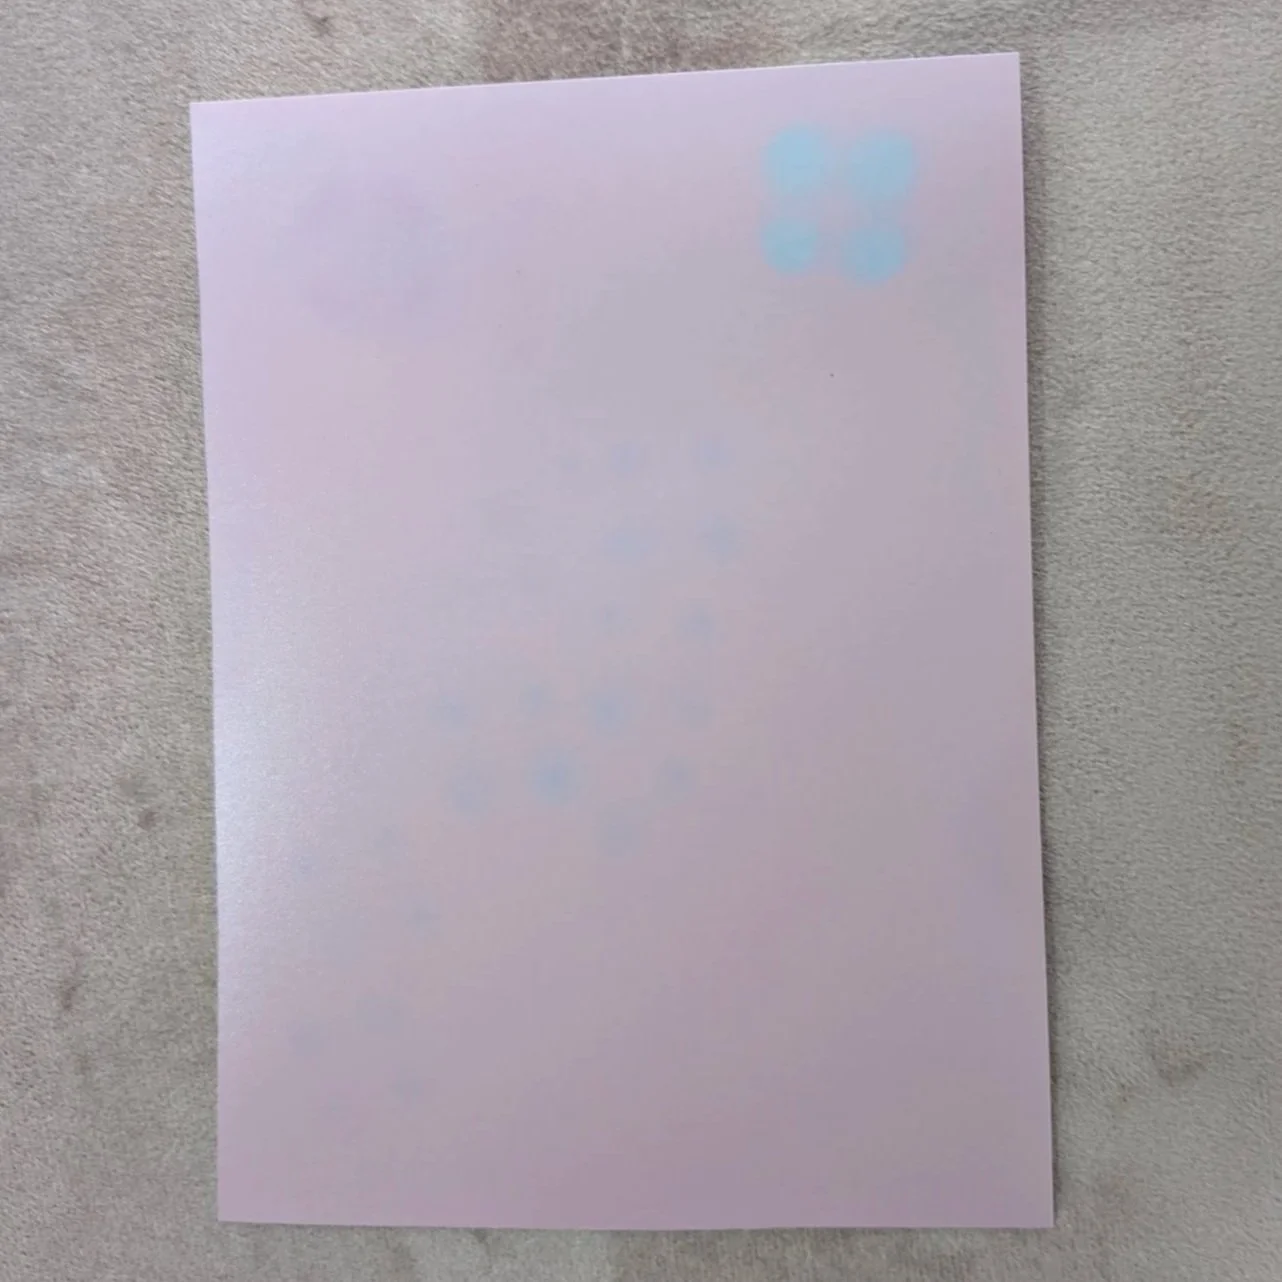
In the images above you can easily see that the longer you wait, the darker the paper becomes. The last image also shows a few spots. The top right one was made by shining UV light there for a few seconds. The top left spot shows the comparison against white light for about the same length of time.
Enter CCD scanners. This is older technology, but far superior for the purpose of scanning solargraphs. Charge-Coupled Device scanners use mirrors to bounce light to a stationary sensor. CCD scanners are preferable to CIS scanners for slightly curled paper because they offer more depth of field.
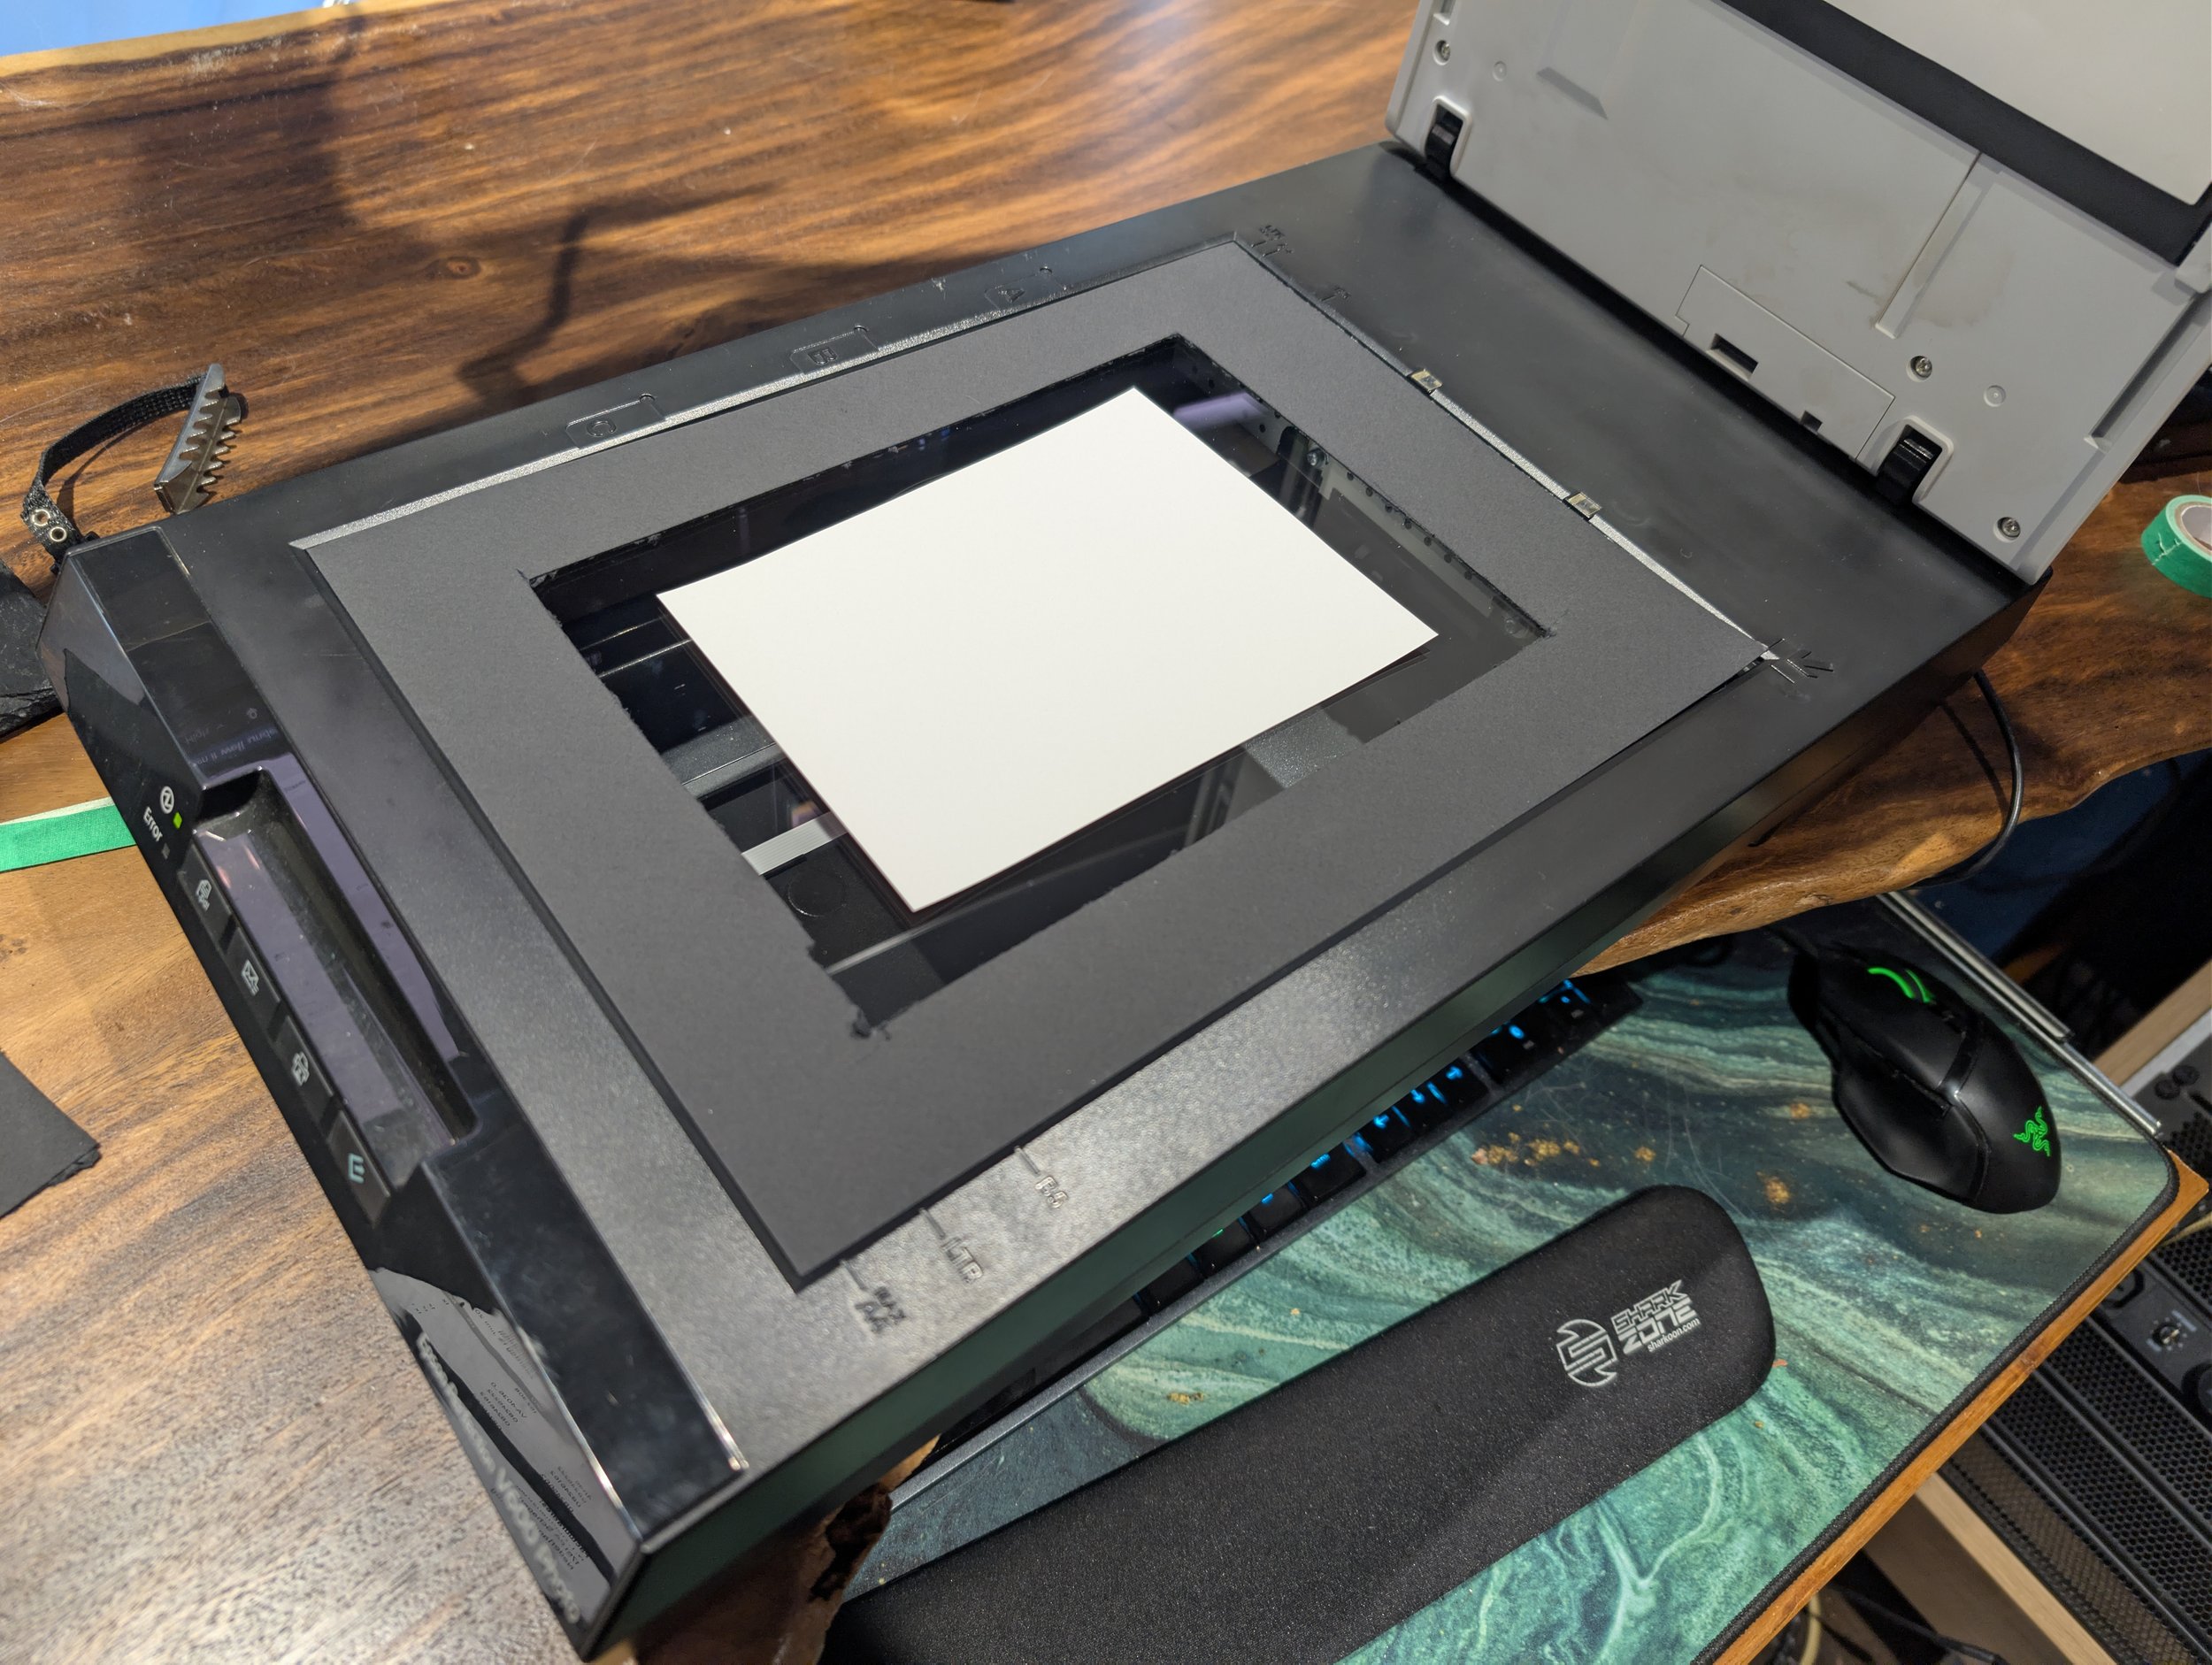
“Rented” from Ebay: the Epson V600 CCD flatbed scanner. I’ve put a matte and the above piece of scrap paper on the scanner to set the scanable area once, then swapped it out for each solargraph.
The best scanner for solargraphs
A CCD scanner like the previously available Epson V600 generally has more tolerance for slight curl and surface unevenness, which matters for paper that was wrapped inside a can. Other scanners that are the best for solargraph scanning include the V700/V750/V800/V850, also from Epson. The real challenge today is finding one, as most aren’t made anymore except the current Epson V850. But when you do, here are my settings for Epson Scan, the software you download. I’m sorry that this screenshot is in Dutch. While I set all my programs to English, this somehow defaulted to Dutch and I could not change the language.
Scanner settings: How to scan solargraphs
The basic idea is to strike a balance between speed and resolution. That’s why I go for 1200 DPI scans for my A6 size solargraphs. Again, here are my settings for either the V600 or V850 scanners in Epson Scan.
Set to Professional Mode to reveal all options.
Document Type: Reflective
Document Source: Document Table
Auto Exposure Type: Photo
Image Type: 48-bit Color
Resolution: 1200 dpi
File type: TIFF, no compression
Preview: Avoid repeated previews; use one preview or use scrap paper to set the crop first
Corrections: turn them all off. Unsharp Mask, Dust Removal, Color Restoration, Backlight Correction, Digital ICE and auto sharpening
Histogram: Manually adjust only enough to avoid clipping shadows/highlights.
Scan count: Scan once, then re-adjust the position of the paper physically.
Be quick and focus on the task.
Here’s how I’ve set the crop and scan area.
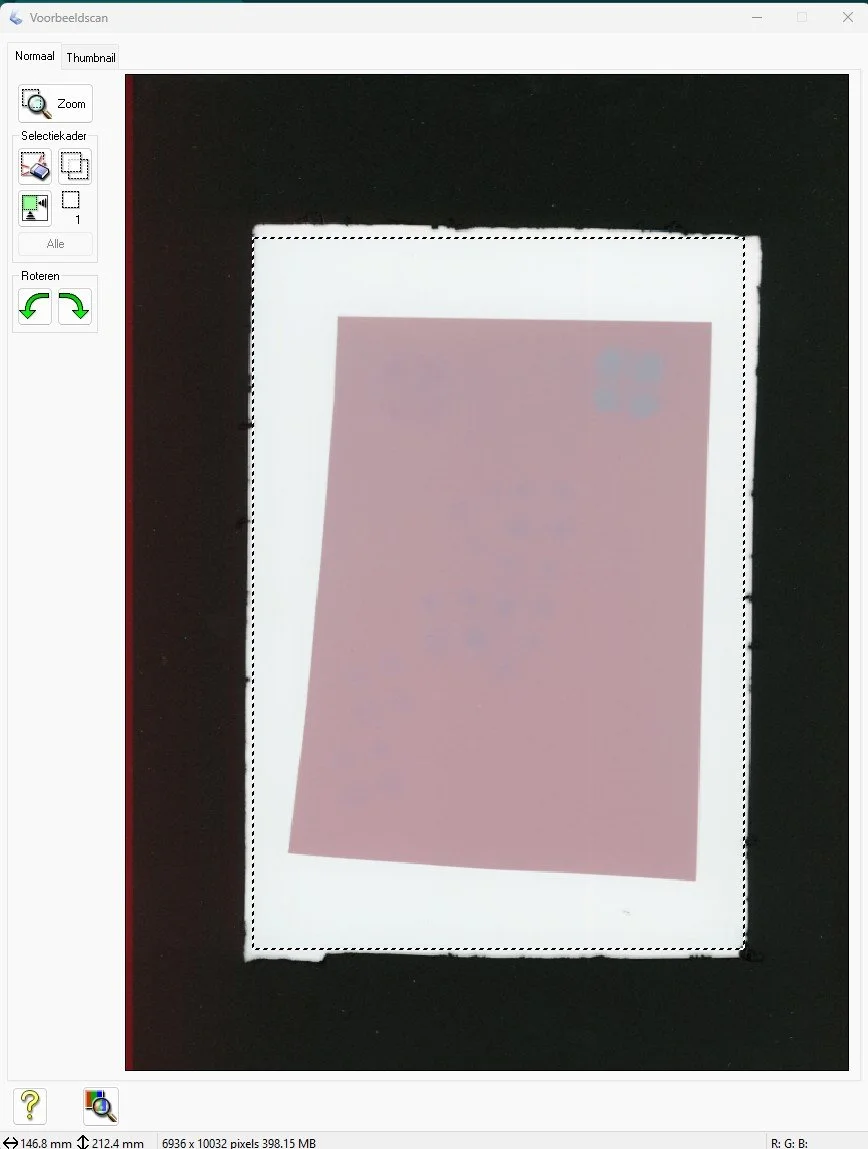
It’s probably called prescan or preview scan. The marching ants rectangle is what will end up in the final Tiff file. Again, you’ll only need to set this once. The matte is just a physical tool to help me feel the center of the scanner in the dark. That’s why I also wipe down the glass after each scan.
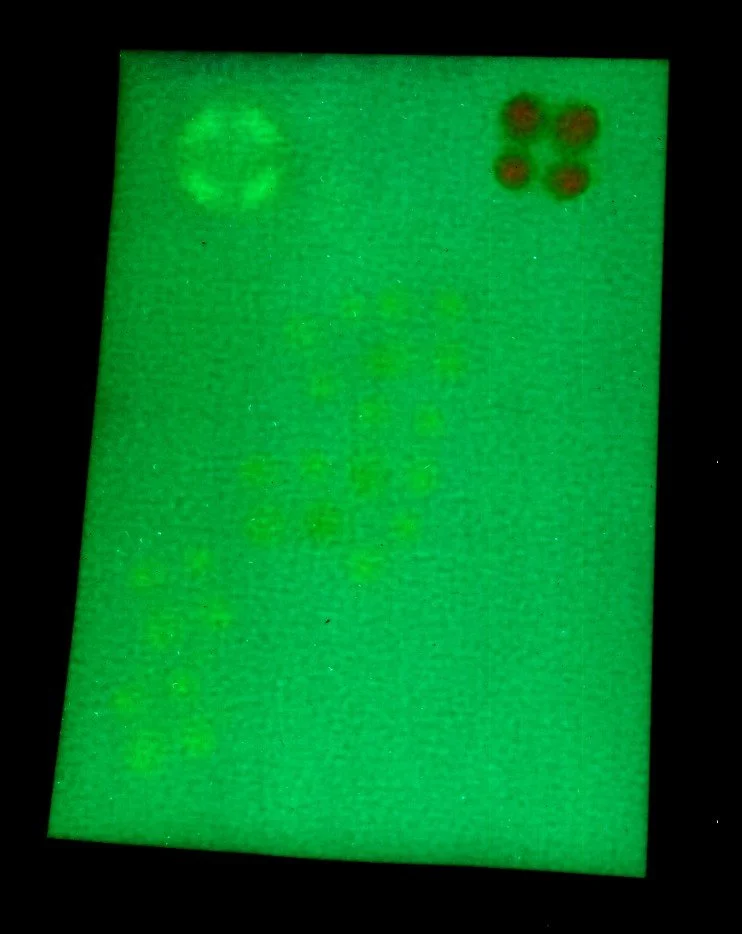
Here’s an extremely enhanced version after inverting the test scrap. As you can see, it is clear of banding (stripes running across or along the solargraph) as a result of the scan head pausing. This is the benefit of using a CCD scanner as opposed to a CIS scanner for solargraphy. The mottled color is just the physical emulsion and the dots are showing how different wavelengths of light affect the final color.
If you wonder about the print size and/or resolution on your screen, here’s what an A6 scan at 1200 DPI looks like. At a customary print resolution of 300 pixels per inch, you can expect to print a 7000 × 10000px digitized solargraph on about 58 by 85 centimeters without enlarging. That’s a 100% crop by the way.
Post-processing your solargraphy scans step-by-step
I promise I’ll do a better job than that green piece of scrap above.
Solargraphs made with this type of paper turn out negative, meaning what’s bright in real-life, will be darker on paper. So at some point, at the very least we need to invert them. In doing so, we will also invert all colors. So a soft magenta solargraph paper will go bright green and a yellow one will go blue.
To make things pretty easy to follow, I process my solargraphs in either Adobe Camera Raw, Lightroom Classic or Camera Raw Filter inside Photoshop. All three use the same engine, have the same settings and can be used interchangeably. That means presets or settings can be imported in all three too.
Solargraphy Presets
I’ve made these presets for you to help you along:
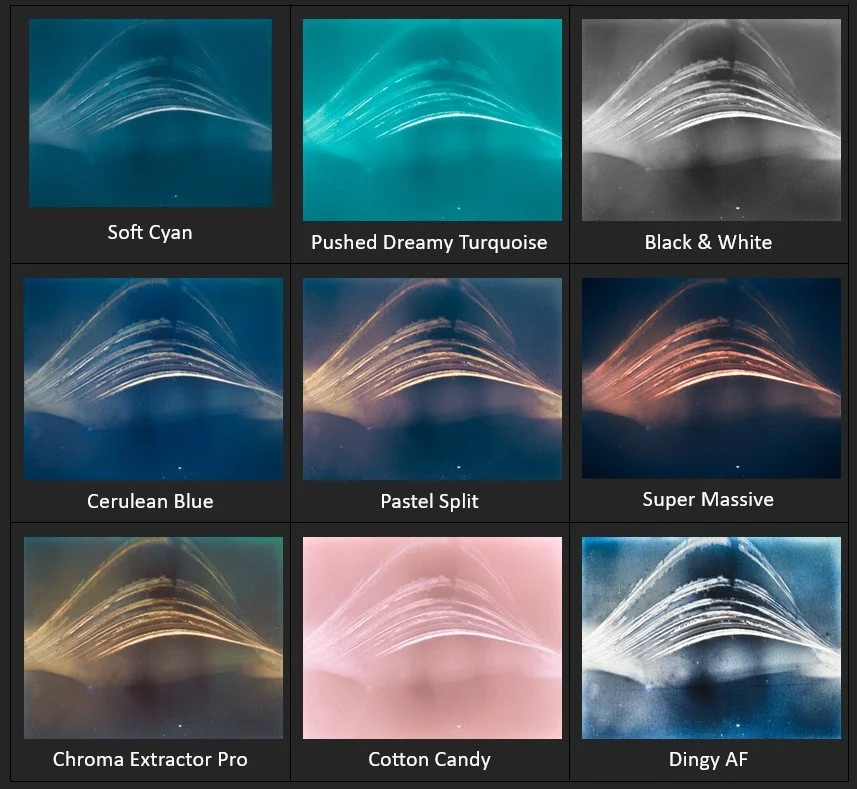
There are 9 presets in this pack, 1 Photoshop action to quickly preview all of them on new layers and a few tools and beginner videos of Photoshop. Oh and I’ve included one last-minute bonus preset not seen here.
To help you achieve better results more quickly after scanning you solargraphs, I’ve created this specialized preset pack that works in Lightroom, Photoshop and in Adobe Camera Raw (the one that opens from Bridge).
This pack includes:
11 Solargraphy presets.
Solargraph Preset Loader Photoshop action.
This readme installation and usage guide containing example images and preset descriptions.
Resize And Sharpen for the Web by Alex Nail, who unfortunately doesn’t offer this free useful tool anymore. Credits to Alex for creating this. I just love using it and recommend you do too.
One 16-bit solargraph scan so you can practice and test these right away*.
One 2,8GB Photoshop file with all named layers present so you can learn from what I’ve done.
Included presets
Super Massive - Personal favorite. Named and inspired after what the Event Horizon Telescope first imaged of M87* in 2017.
Pastel Split - A softer, friendlier version with the same tonality: warmer highlights and cool shadows.
Cerulean Blue - Nearly untouched after inverting, but very slight split toning.
Soft Cyan - A velvety near monochrome version that would look stunning on Hahnemühle Photo Rag.
Pushed Dreamy Turquoise - Similar, but more greens allowed. The exposure has been pushed on this one.
Cotton Candy - My wife’s favorite and inspired by the cherry blossom in our garden that we’re both very fond of. It honors the original hue of the Ilford Multigrade paper as it darkens while being exposed, but not yet inverted after scanning.
Dingy AF - Entering the tool-based presets with this one quite as it increases Texture, Clarity and Dehaze, while balancing Contrast, Sharpening and especially Saturation. It’s the most extremely pushed solargraph preset in this pack for finding luminosity based detail that could be lost over the months. This one especially demands 16-bit scans and preferably with CCD-type scanners.
Chroma Extractor Pro - Think of this preset as the color version of the previous preset. This will find RGB values and attempts to drive them further apart. To me, this and the one before are not the most beautiful presets as is, but are very useful for further processing and/or layering and playing around with blending modes in Photoshop. A tip for additional color definition for Photoshop users: apply a Curves adjustment layer to the result of this preset. Then go to its settings in the 3-line hamburger menu and select Auto Options. Then cycle through the various radio buttons and settle on the one that shows the most variation in color. Set that layer’s blending mode to Color if you don’t like the resulting contrast. I often use this technique to get a wider variety of colors without the image looking too digital (the HSL sliders will do that for you).
Black & White - A good starting point for a black and white version that’s not too processed. Also recommended is combining this with any other preset and putting this one’s blending mode on either Luminosity or Overlay (more extreme) to instantly increase the contrast and saturation of the layer below it.
Bonus: Remember 2016 - This preset is not in the action set, but is included among the presets. I used a wildly different process to develop my solargraphs back then, but this one aims to emulate that 2016 look, while having updated the processing to the new standard. The result is a slightly more saturated, less noisy and more defined image. Hope you like it.
Bonus: Oppenheimer - A very creative interpretation with dominant reds and yellows. I was aiming for the appearance of a nuclear test, while fading the shadows enough to suggest age. I recommend not to clone out too much of the film damage for added character. This is the basis of the Within the Blast Radius project. Just know that a lot more went into those than just a preset, even though the above image is pretty close to the finished work.
May it serve you well as you engage in this fun photography project!
These presets work in Photoshop, Adobe Bridge and Lightroom Classic. Download these solargraphy presets for just a small fee that keeps this website running. Since I’m taking the time to talk about monetizing what I do, all links to products that I’ve used are affiliate links. If you end up wanting to do this yourself, I’d highly appreciate it if you use the links on this page. Doing so will not cost you anything extra, but Amazon will thank me in the form of a small percentage of each sale made there. I have to do these things unfortunately. You know, writing this article alone took me three days. Creating the presets another full day. And I’ve invested countless hours into this solargraphy project in the hope to teach you about how to do this yourself.
All right, let’s get on to editing!
Step 1: Importing in Photoshop
Since I use Bridge to manage my photos and edit them in Photoshop, I’ll just drag my solargraphs in Photoshop. Immediately after, I’ll check the Mode, Depth and Color Profile:
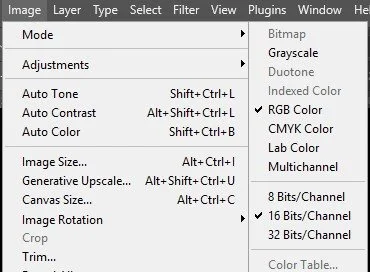
Check that the mode is set to 16 Bits/Channel.
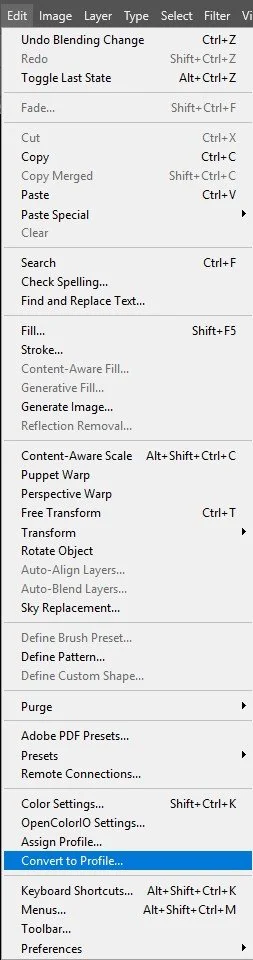
Convert the solargraph to ProPhoto RGB. When you do, set the Engine to Adobe (ACE), and Relative Colorimetric as the Intent. Turn on black point compensation, but turn off the other checkboxes.
Here the scan is still in the scanner’s color space. When I convert it to ProPhoto RGB, 2 things happen. First, it will standardize the image in a wide gamut color space. It’s so wide (how wide is it?), that there is currently no monitor available to show this at all. Naturally this will evoke all sorts of questions about whether we should be using wide gamut color profiles that in the first place. The answer is more complicated than yes or no, but in this case we will be using ProPhoto RGB as the editing color space. It’s important that we have the leeway to edit our solargraphs. The other thing that happens as a result is that your histogram will shift. Actually, the data of the image will look more compressed in the new histogram, even though the appearance of the image should not change too much if at all. The histogram is just proof that there is top- and bottom-end, which will allow us to push the colors more. This is one of the use cases where more color is “more better”.
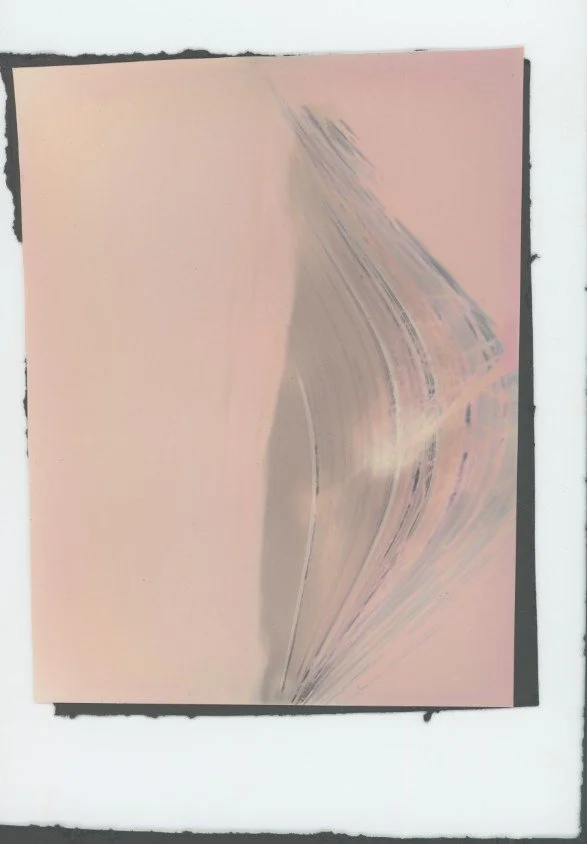
The raw scan.
Step 2: Transform and invert
Next we’ll sort the orientation and the everything outside of the scan. The arcs should be above the horizon, so we’ll know how we need to rotate it. After that, I recommend cropping the image, as it could affect how certain adjustments work in the next steps. Vignetting being one of them.
Rotated and cropped.
Next, you have a choice if you use Photoshop. You can hit Control or Cmd+i depending on your operating system (I use Windows, so from now on I’ll only mention Control, which is Cmd on a Mac and Alt, which is Option on MacOS.
This shortcut will invert the colors, making the sun streaks brighter than the background. Depending on the paper you used, there’s also a good amount of split toning, meaning the streaks will probably have a different color than the darker background, although it would be subtle.
Inverting now will make the sliders in the next steps easier to understand as they will work as expected. But if you’re using Lightroom Classic for example, or straight up open the scan in Camera Raw from Bridge, this doesn’t work.
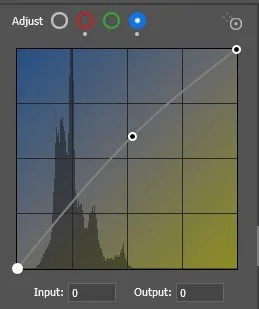
For Photoshop too, the alternative is to not invert the thing right now, but go straight to Filter > Camera Raw Filter. Now scroll to the Curve tab and swap the white and black point in the RGB curve like this:
Notice that the curve is straight and descending from left to right.
This edit will reverse almost every slider, which makes editing solargraphs like this a real head scratcher. Here’s a selection of what will work differently:
Whites now control the blacks, with positive values darkening the darkest areas.
Shadows now control the highlights, with the brighter parts becoming more noticeable if you pull the slider to the left.
Pushing the Temperature slider to the yellow end, will make it more blue and vice versa. The same is true for the Tint slider.
The calibration tab also completely throws you off, as all of these colors will point to opposite sides on the color wheel. Red will change cyan, green will target the magentas and the blue primary hue slider will push the yellows towards the greens or reds depending on the direction.
The vignette will be reversed, so darker corners are achieved by increasing the vignette as opposed to decreasing it.
Step 3: From preset to result
If this is too complicated for you, I fully understand. Maybe you’ve found a way to bypass this limitation, but that’s also why I have created presets for you as creative starting points. So let’s pick one.
I like “Super Massive” as a starting point as it is reminiscent of a black hole image.
It does appear too contrasty for this particular solargraph. And the midtones could use work. I’ll make this one darker and rework the contrast, then lower the vignette intensity, but increase its size, until we reach this:
I like how a branch is sticking in from the top, blocking all the sun’s arcs over the course of the last 6 months.
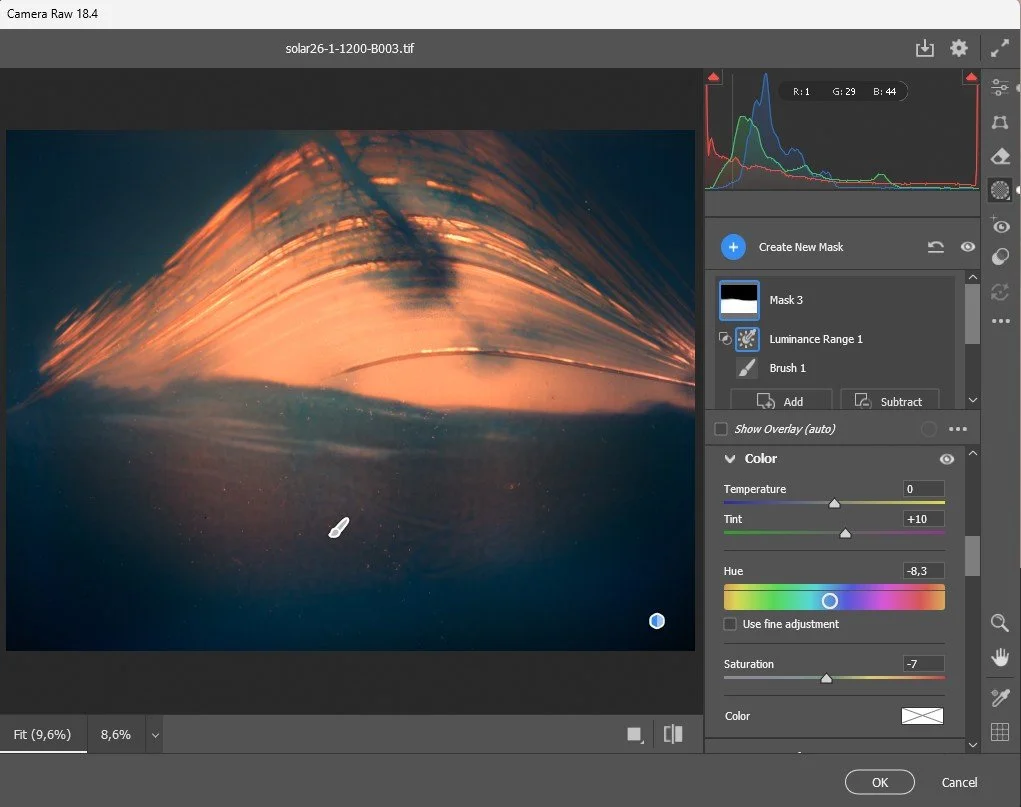
Let’s extract more detail from the foreground. Using a brush in the local adjustments tab, I’ve selected the foreground, then using a luminance range mask, intersected it with the highlights (which are actually the shadows now).
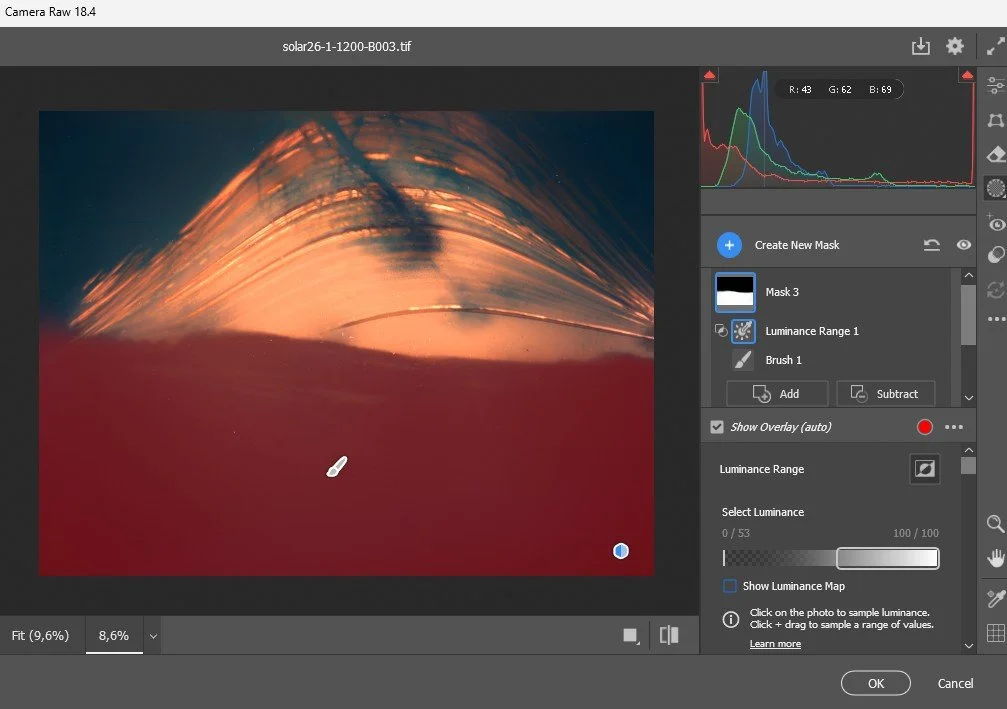
What’s red here is what I’m about to adjust. This is just the selection or mask.
If you’re using TK Actions, I highly recommend creating luminosity masks with it instead because it offers way more control and nicer results. This is just to illustrate how I would approach this if I only had Lightroom for example. Because again, Lightroom uses the same engine under the hood as Camera Raw (Filter) does. So all these settings should translate well.
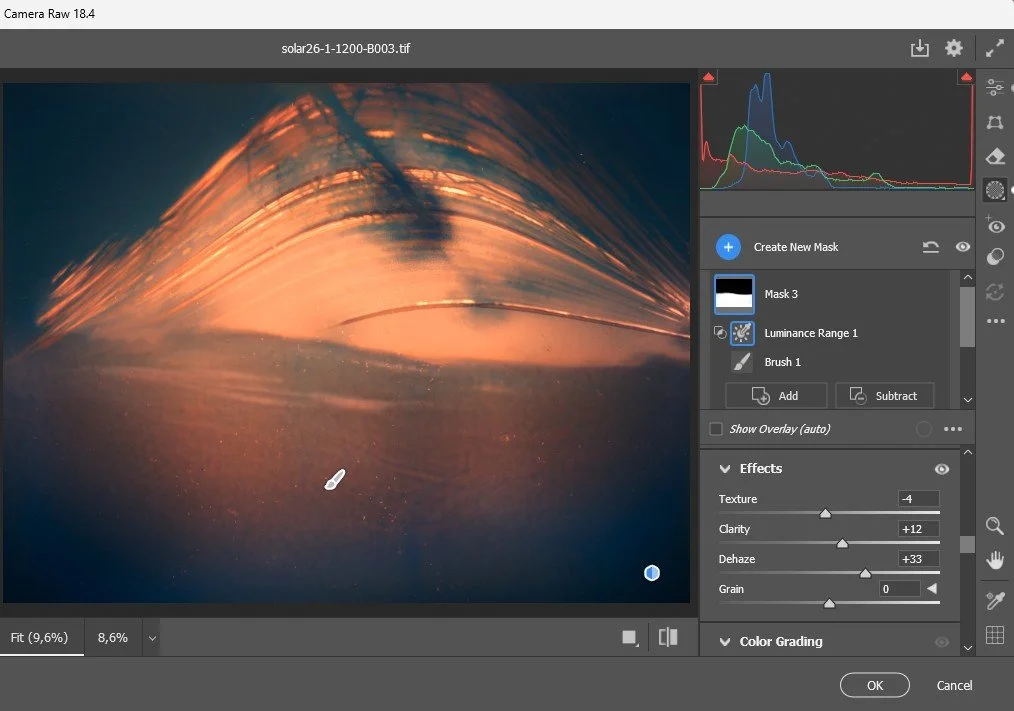
Dehaze and Clarity work wonders to extract more detail, but it will definitely muddy things up. So I recommend lowering Texture to taste and perhaps increase noise reduction here too.
Because of the split toning effects in this preset, the foreground ended up looking too warm. Through a combination of lowering the red midtones and white point and reintroducing blues in the midtones with the color curves, we at least got the hue right again. But we really need to lower its saturation to make it look similar to the rest of the frame. We’re still within the same local adjustment by the way.
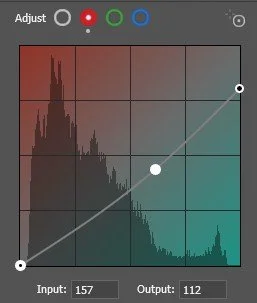
To finish the foreground, I’ve created a new linear gradient and raised the black point, while lowering the exposure. This creates a dark faded effect to equalize the near-black corners to the point where they look similar to the ones in the sky.
Drag it up from outside the frame to control the amount of the fade in of the grad filter.
While every step is optional, this next one surely is. The fact that the photographic paper is rolled up inside a tube and the pinhole camera is tied to a tree that is everything but straight, together created a wild-looking perspective. If you don’t like a solargraph’s shape because the horizon is wonky for example, you could use the transform/geometry tab to attempt a few more corrections.
Since I’m using Photoshop, I would not crop the result at this point, but warp the corners so they fill the frame again.
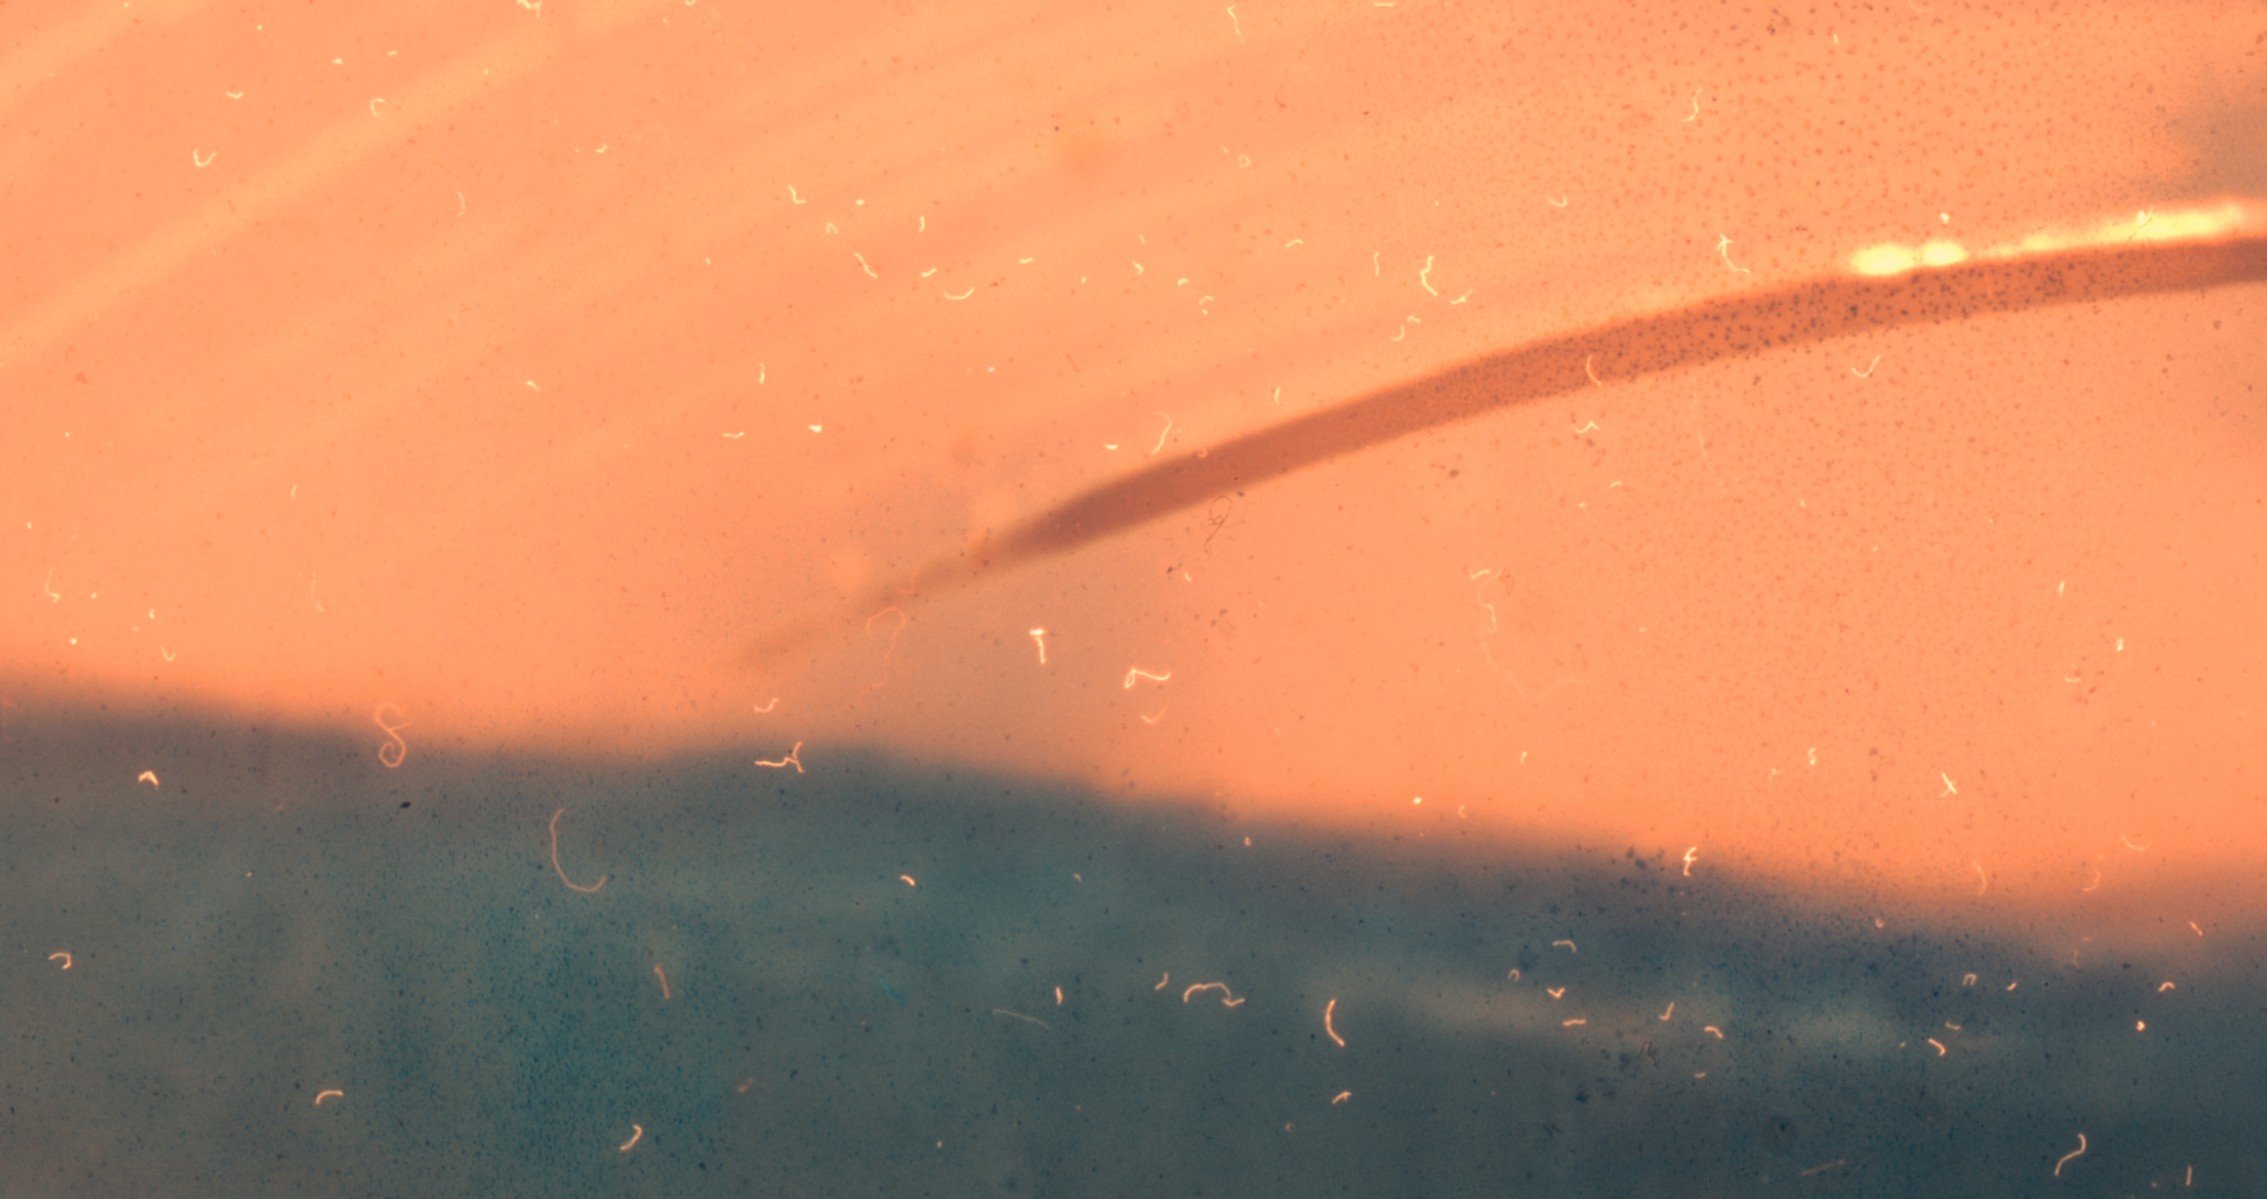
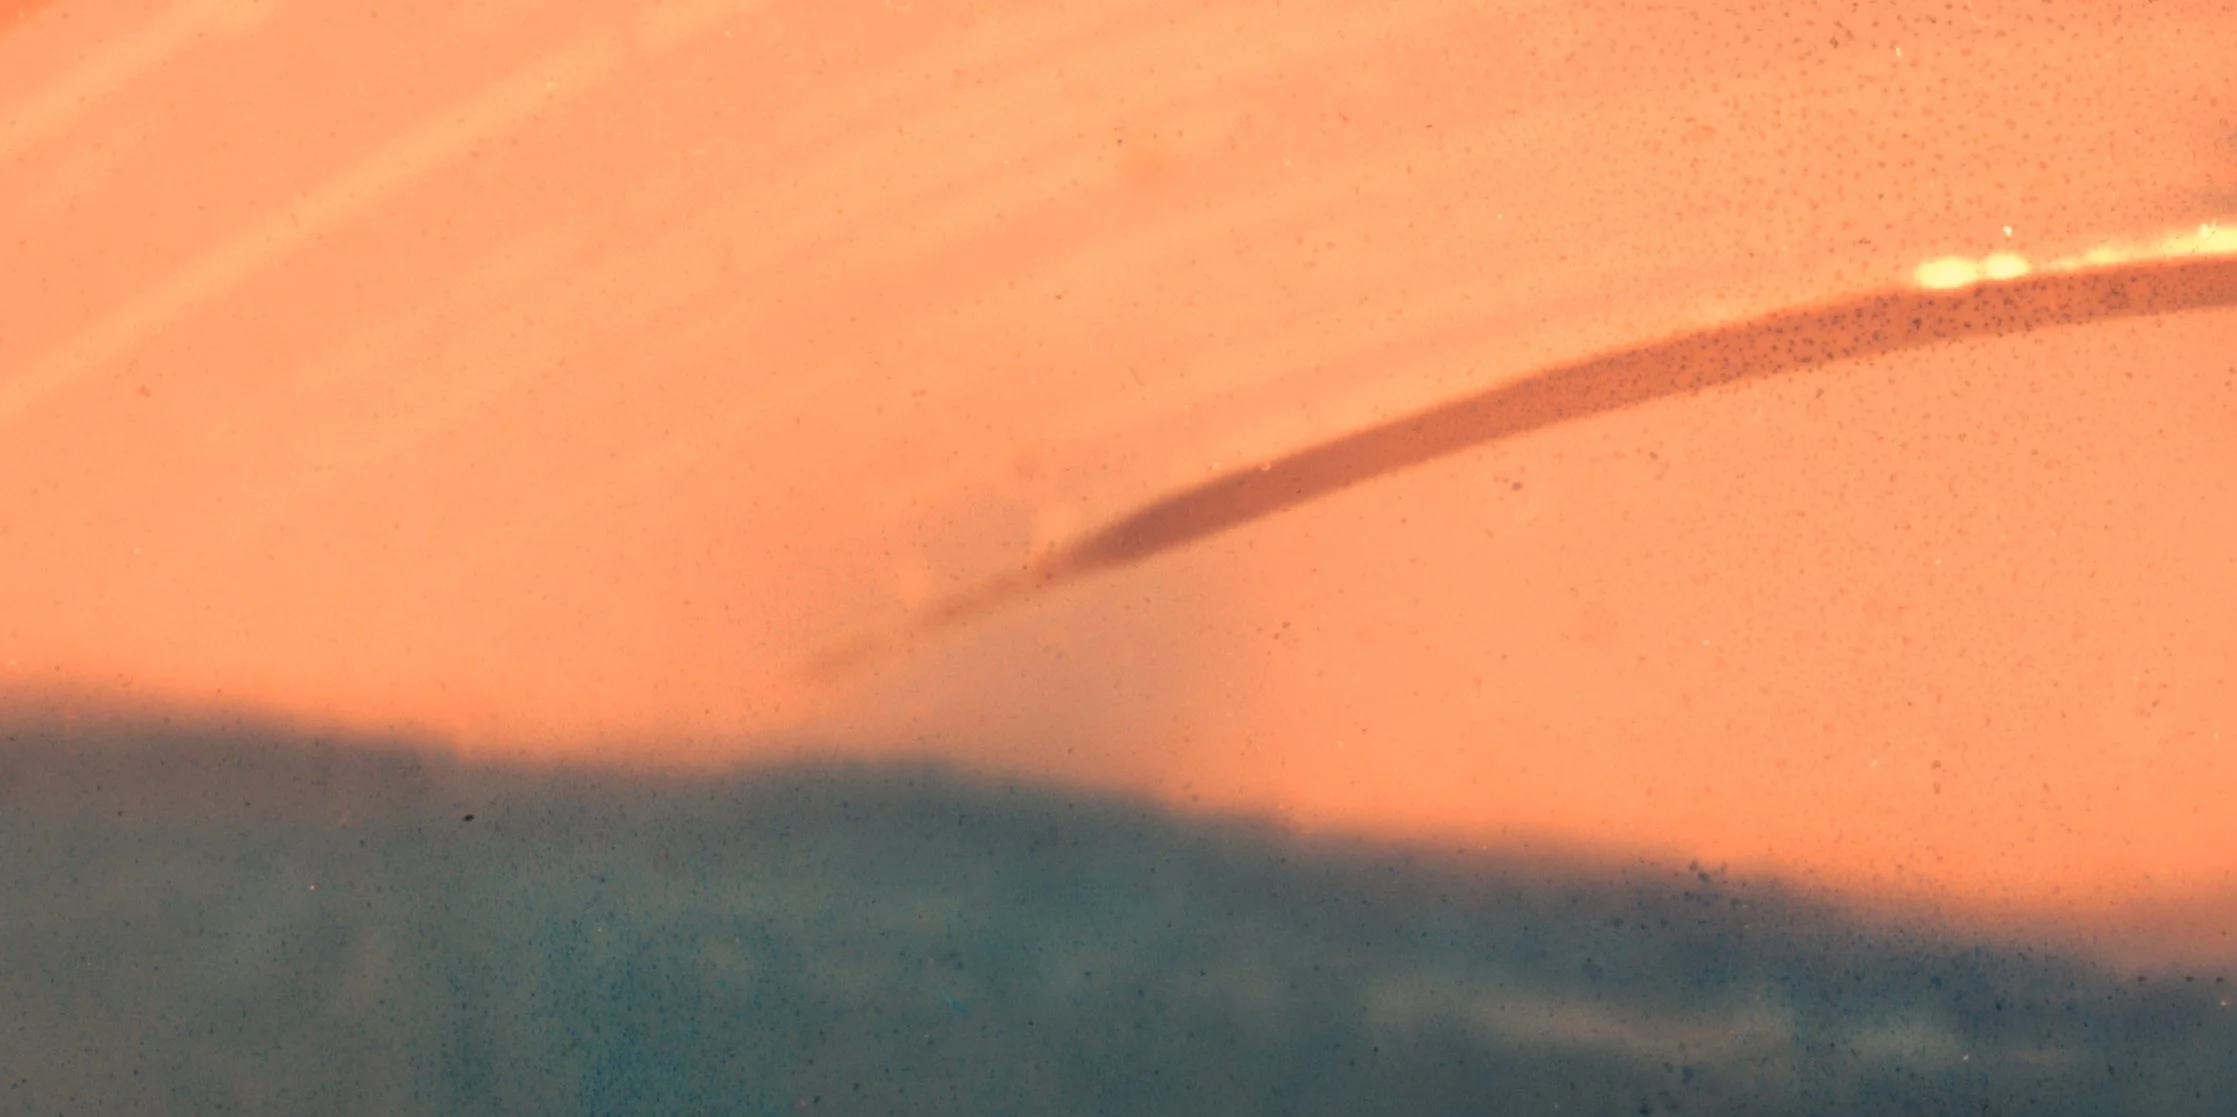
At this point it’s a good idea to clone out major distractions like dust, hair or dents in the glass plate of your scanner. You can do that here or in Photoshop on a new layer. If you do use Photoshop, just make sure that it’s either the very first thing you do after converting the image to ProPhoto RGB or the very last thing you do before exporting, or make sure that any subsequent adjustment is done on all layers. Otherwise the spots will look worse than before.
Step 5: Exporting your solargraphs to share on the web
Here are my settings for all my photos that I share online:
Add watermark logo - Apart from slightly protecting your photos, you also make them look more professional if your watermark looks good.
Resize and sharpen. I still use Alex Nail’s Photoshop Actions. He doesn’t list it on his website anymore, but I include these actions for free in every tutorial I offer, including the Solargraphy Preset Pack and credit Alex for his hard work in developing this. My images are usually 1800px on the long edge if I share them online. Sometimes smaller if there are a lot on a single page on my own website.
In Photoshop I also still do this: File > Export > Save for Web.
Optimized
Embed Color Profile
Convert to sRGB
Quality 80 (if I’m hosting the image myself. Choose 100 for social media as they compress your photos like crazy.
Naming: I use Solar26-1-6-003 as this filename.
“Solar” for what it is.
26 for the year.
-1 for the first series of that year (even though I started the exposures on the 21st of December in ‘25.
-6 for 6 month exposure.
-003 Pinhole camera number 3. Ideally this should correspond to what you have marked on your map, so you know which composition works, which fell down and which ones got removed to keep track of the best locations.
Final result.
Editing tips for more advanced users
Because I’ve been using Photoshop for 30-something years now, I am quite comfortable with more advanced editing techniques. If you are not afraid to learn a few new tricks, here’s what I would do next.
Aligning multiple scans
One way to get a cleaner result from a solargraph is to scan the same image more than once and combine the scans afterward. This can help reduce scanner noise, dust, glare and small scan artifacts. For example, I got a used Epson v600 scanner from Ebay, and the glass plate has seen better days. Those tiny scratches will show up, but to be fair - solargraphs are all beat up anyway. So these steps are truly for that last 10% and perfectionists.
The first scan is usually the most important, because each later scan may be slightly darker and lower in contrast as the scanner light continues to expose or fade the paper.
For the best result, align the scans carefully before blending them. Use Auto-Align Layers or a combination of Difference mode alignment and manual transforms. Even sub-pixel misalignment will soften the sun trails and fine paper texture.
Then adjust the later scans with Levels or Curves so they match the brightness and contrast of the first scan as closely as possible.
Stack modes
Once aligned and balanced, try stacking the scans using different stack modes.
In Photoshop select the layers you’d like to stack.
Got to Layer > Smart Objects > Convert to Smart Object.
Then Layer > Smart Objects > Stack Mode > Median.
Median is usually the safest stack mode for solargraph scans because it rejects outliers better than averaging. Median is especially useful because it tends to remove small differences between scans, such as dust specks, streaks and random noise, while keeping the main image intact.
If you have more than two scans and Median looks too harsh, try Mean stacking instead. At 2 scans, they will look identical because of the math involved. Mean stacks can give smoother tones and gradients, although it may not remove dust and glare as well. A good approach is to compare both versions and blend them together if needed. Keep the earliest scan - the one before stacking.
Lastly, you could try to manually averaging scans by adjusting each layer’s opacity. For manual layer blending, use Normal mode. Other modes change tonal relationships and can damage the solargraph’s subtle density and color. Save those for the actual post-processing later.
2 scans: set the bottom layer to 100% and the top layer to 50%.
3 scans: bottom one to 100%, then 50% and the top layer to 33%.
4 scans: same as above, but set the 4th layer to 25%.
With 5 scans or more, it will become progressively harder, but the number for the fifth scan is 20% opacity for the top layer and so on. The formula is 100 divided by the number of layers, rounded to the closest full number.
After stacking, make your final adjustments gently. A small Curves adjustment can improve contrast without crushing the delicate tones of the solargraph. Avoid heavy blending modes such as Multiply, Overlay, or Hard Light for the main stack, as they can quickly make the image look muddy or artificial. Used carefully, this method can produce a cleaner, richer solargraph while preserving the unpredictable character that makes the process interesting.
Results
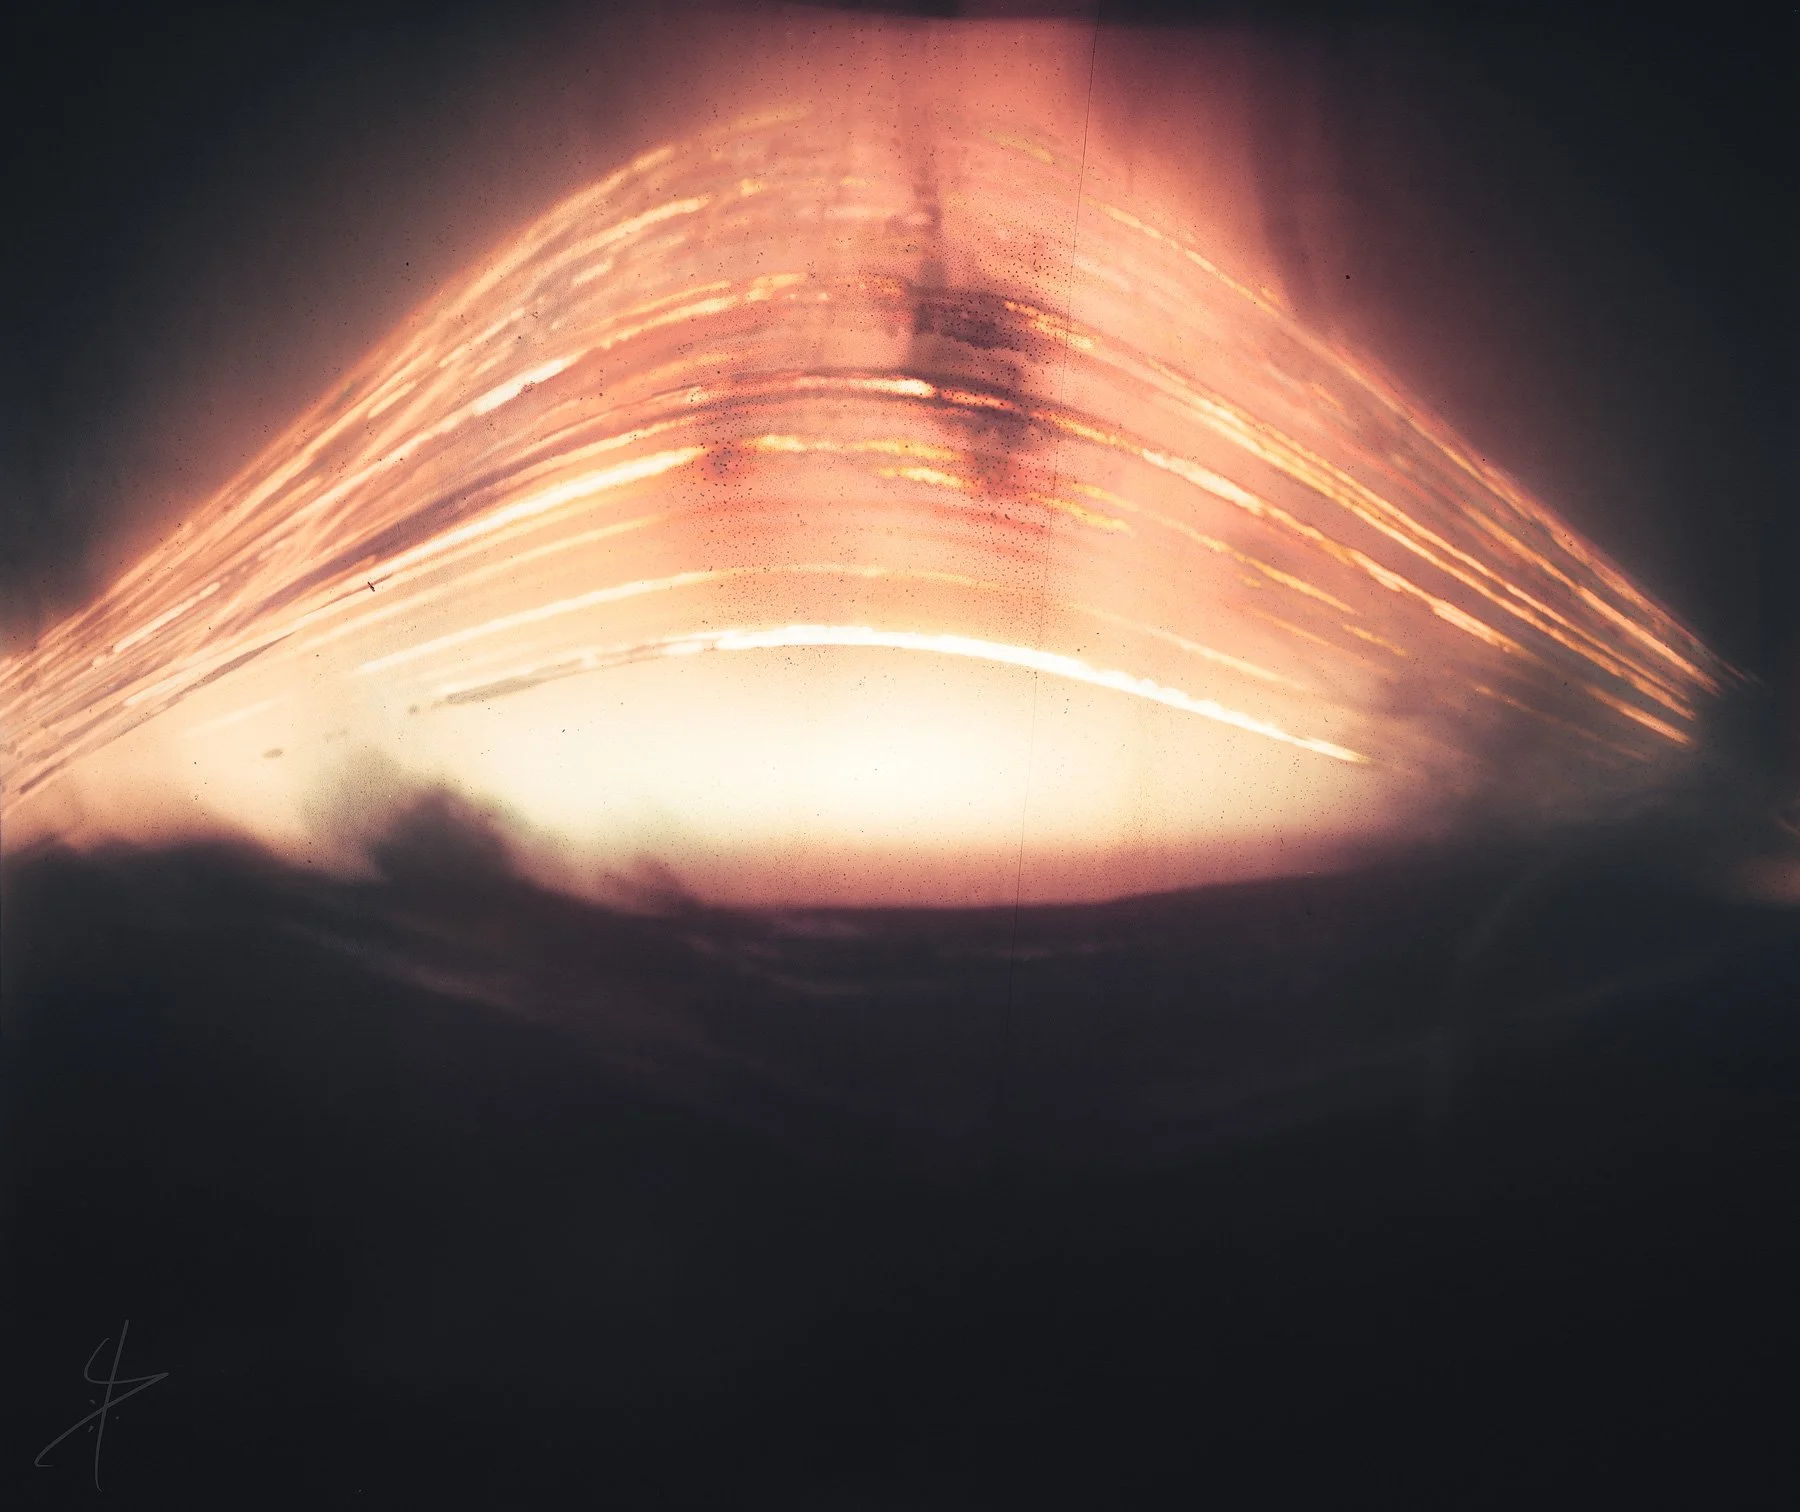
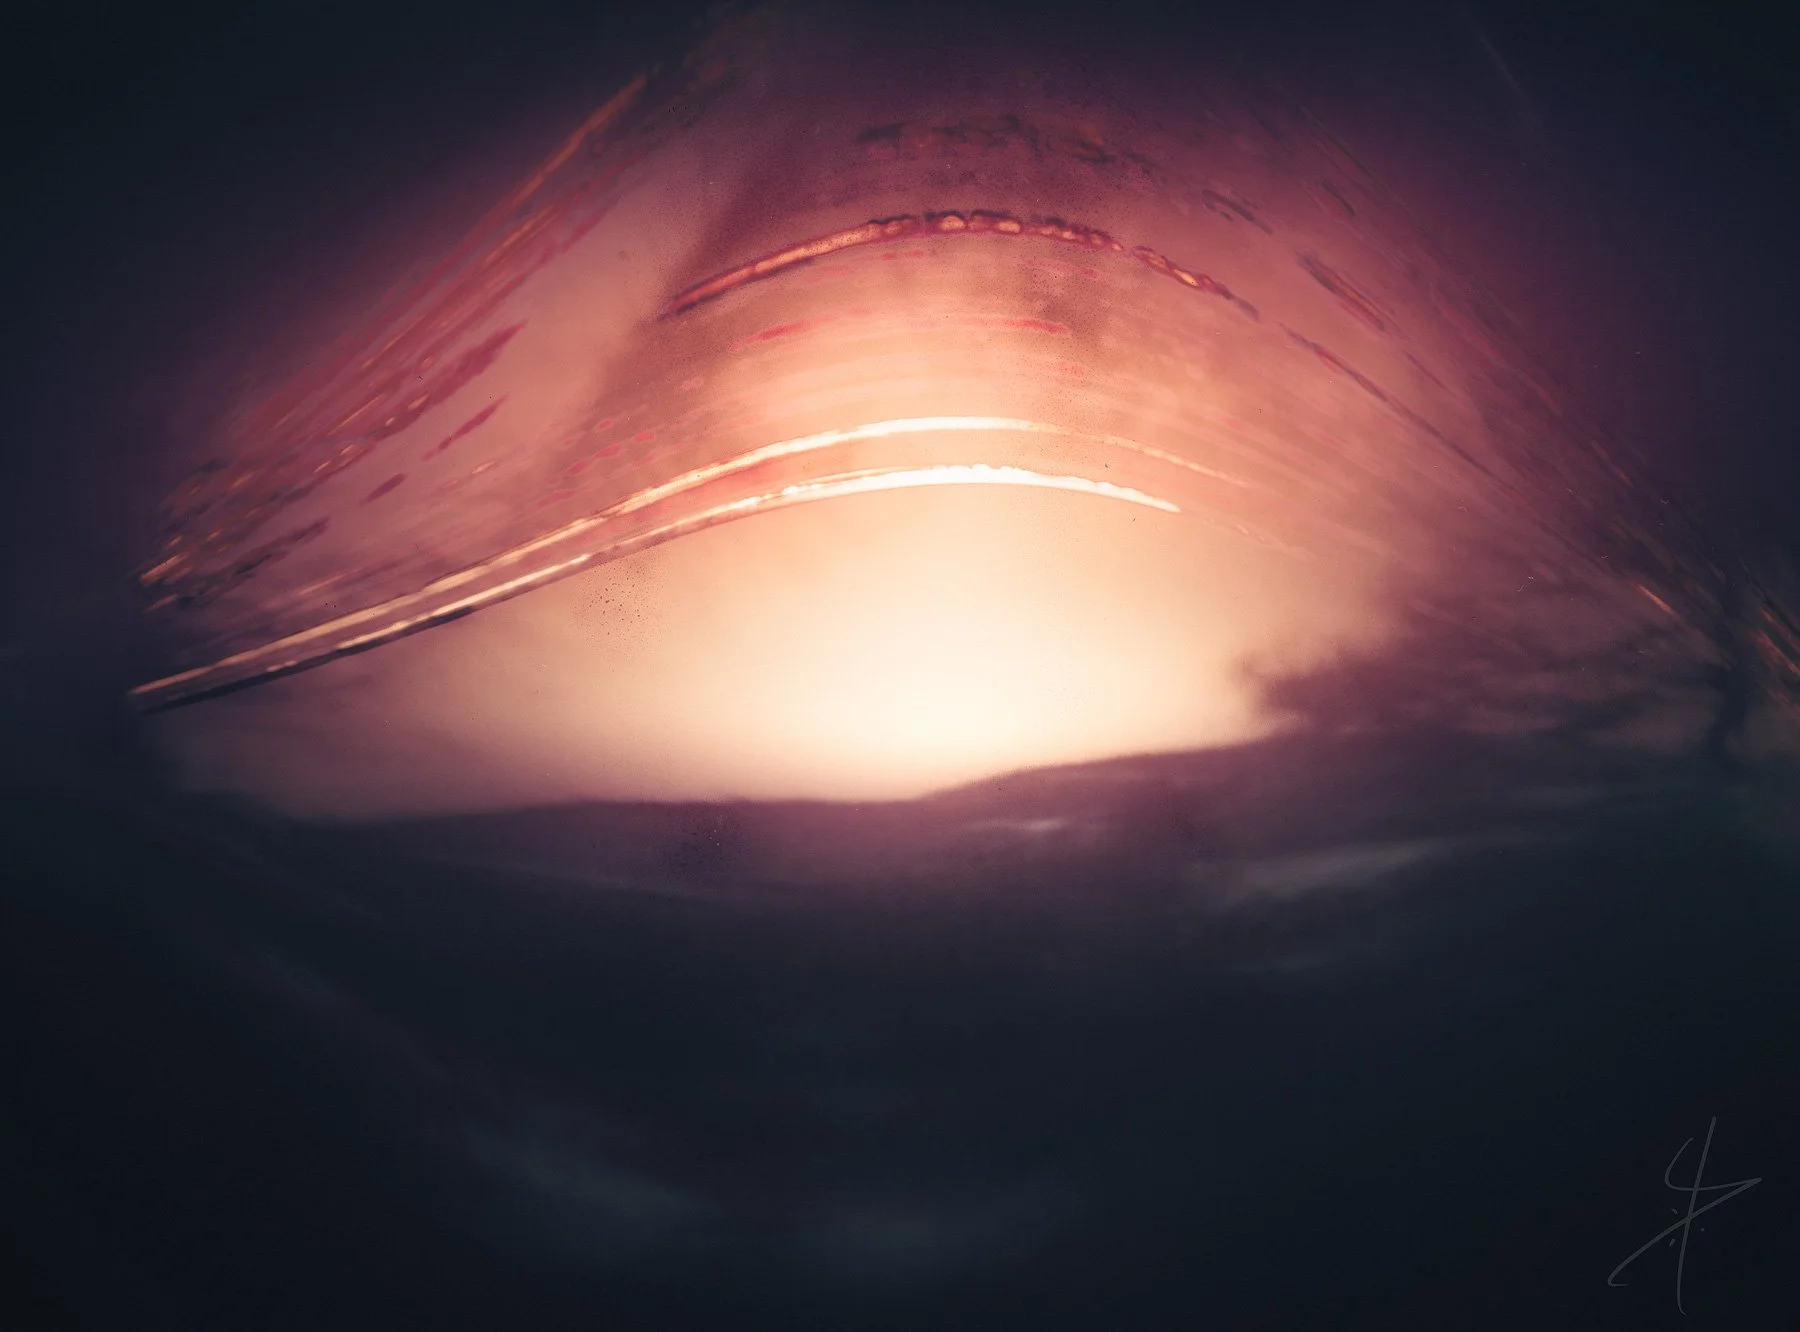
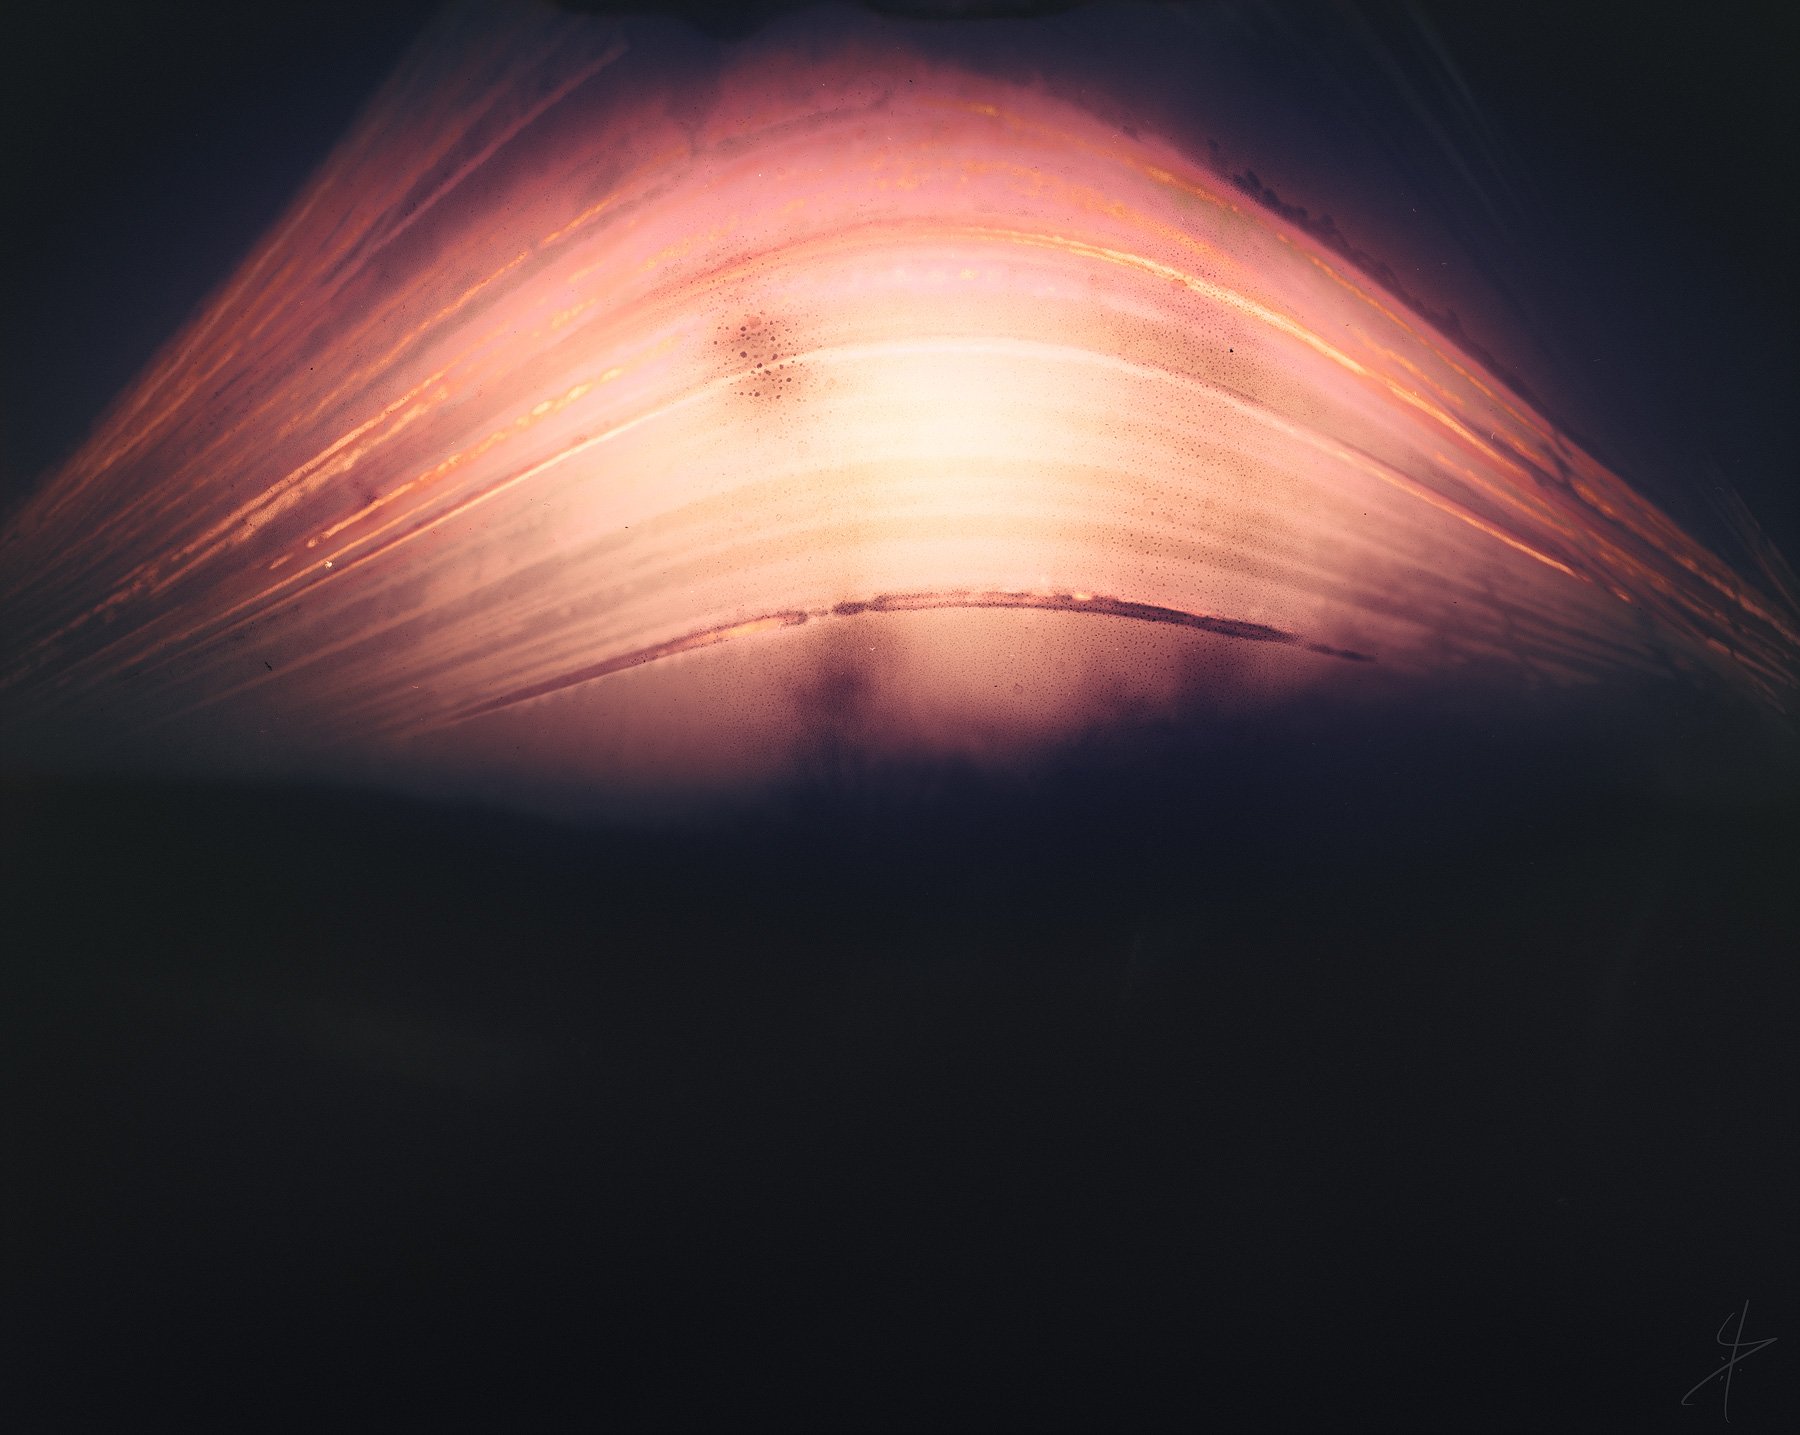
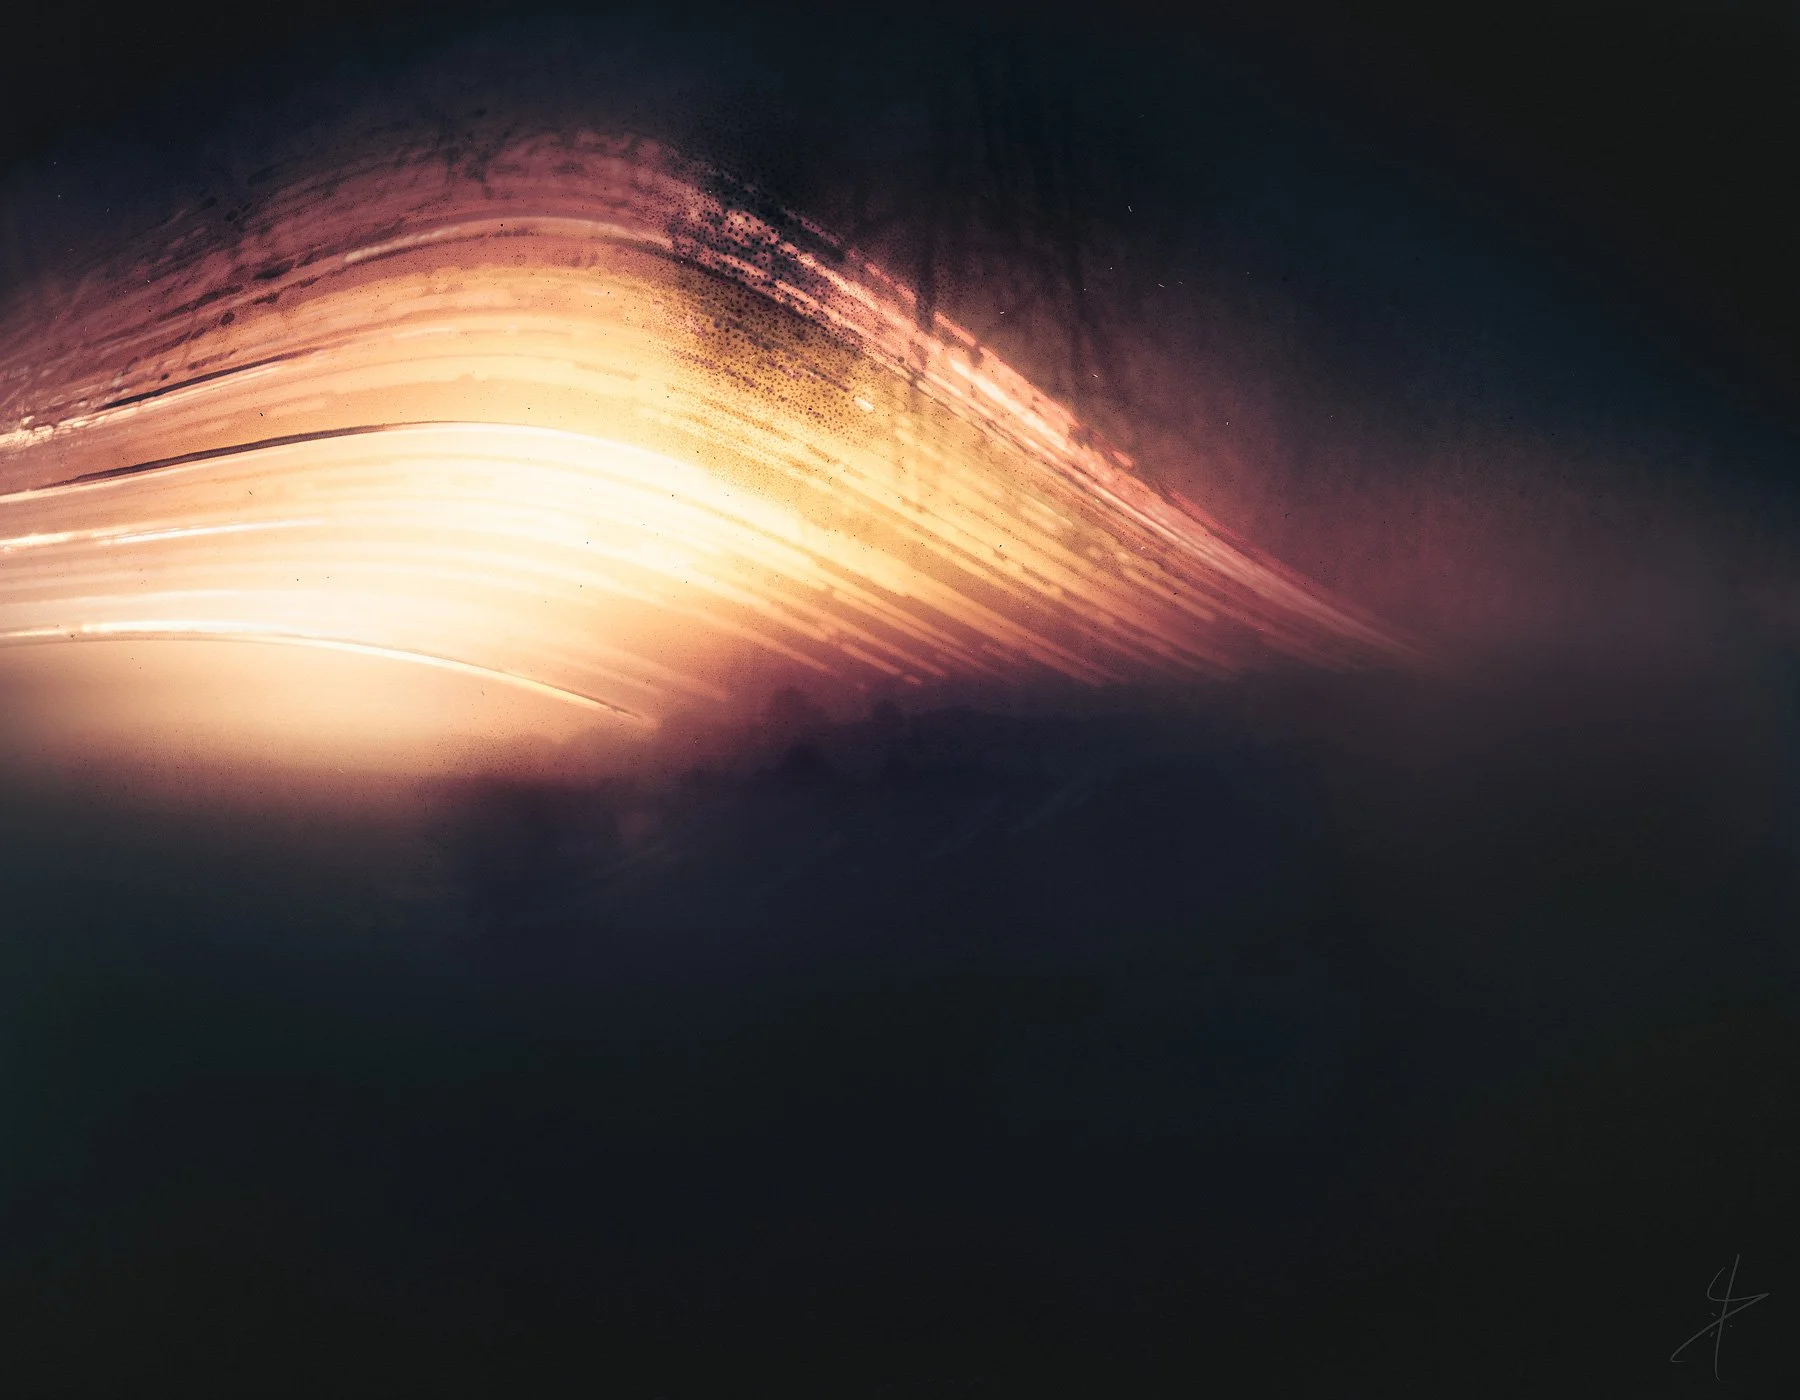
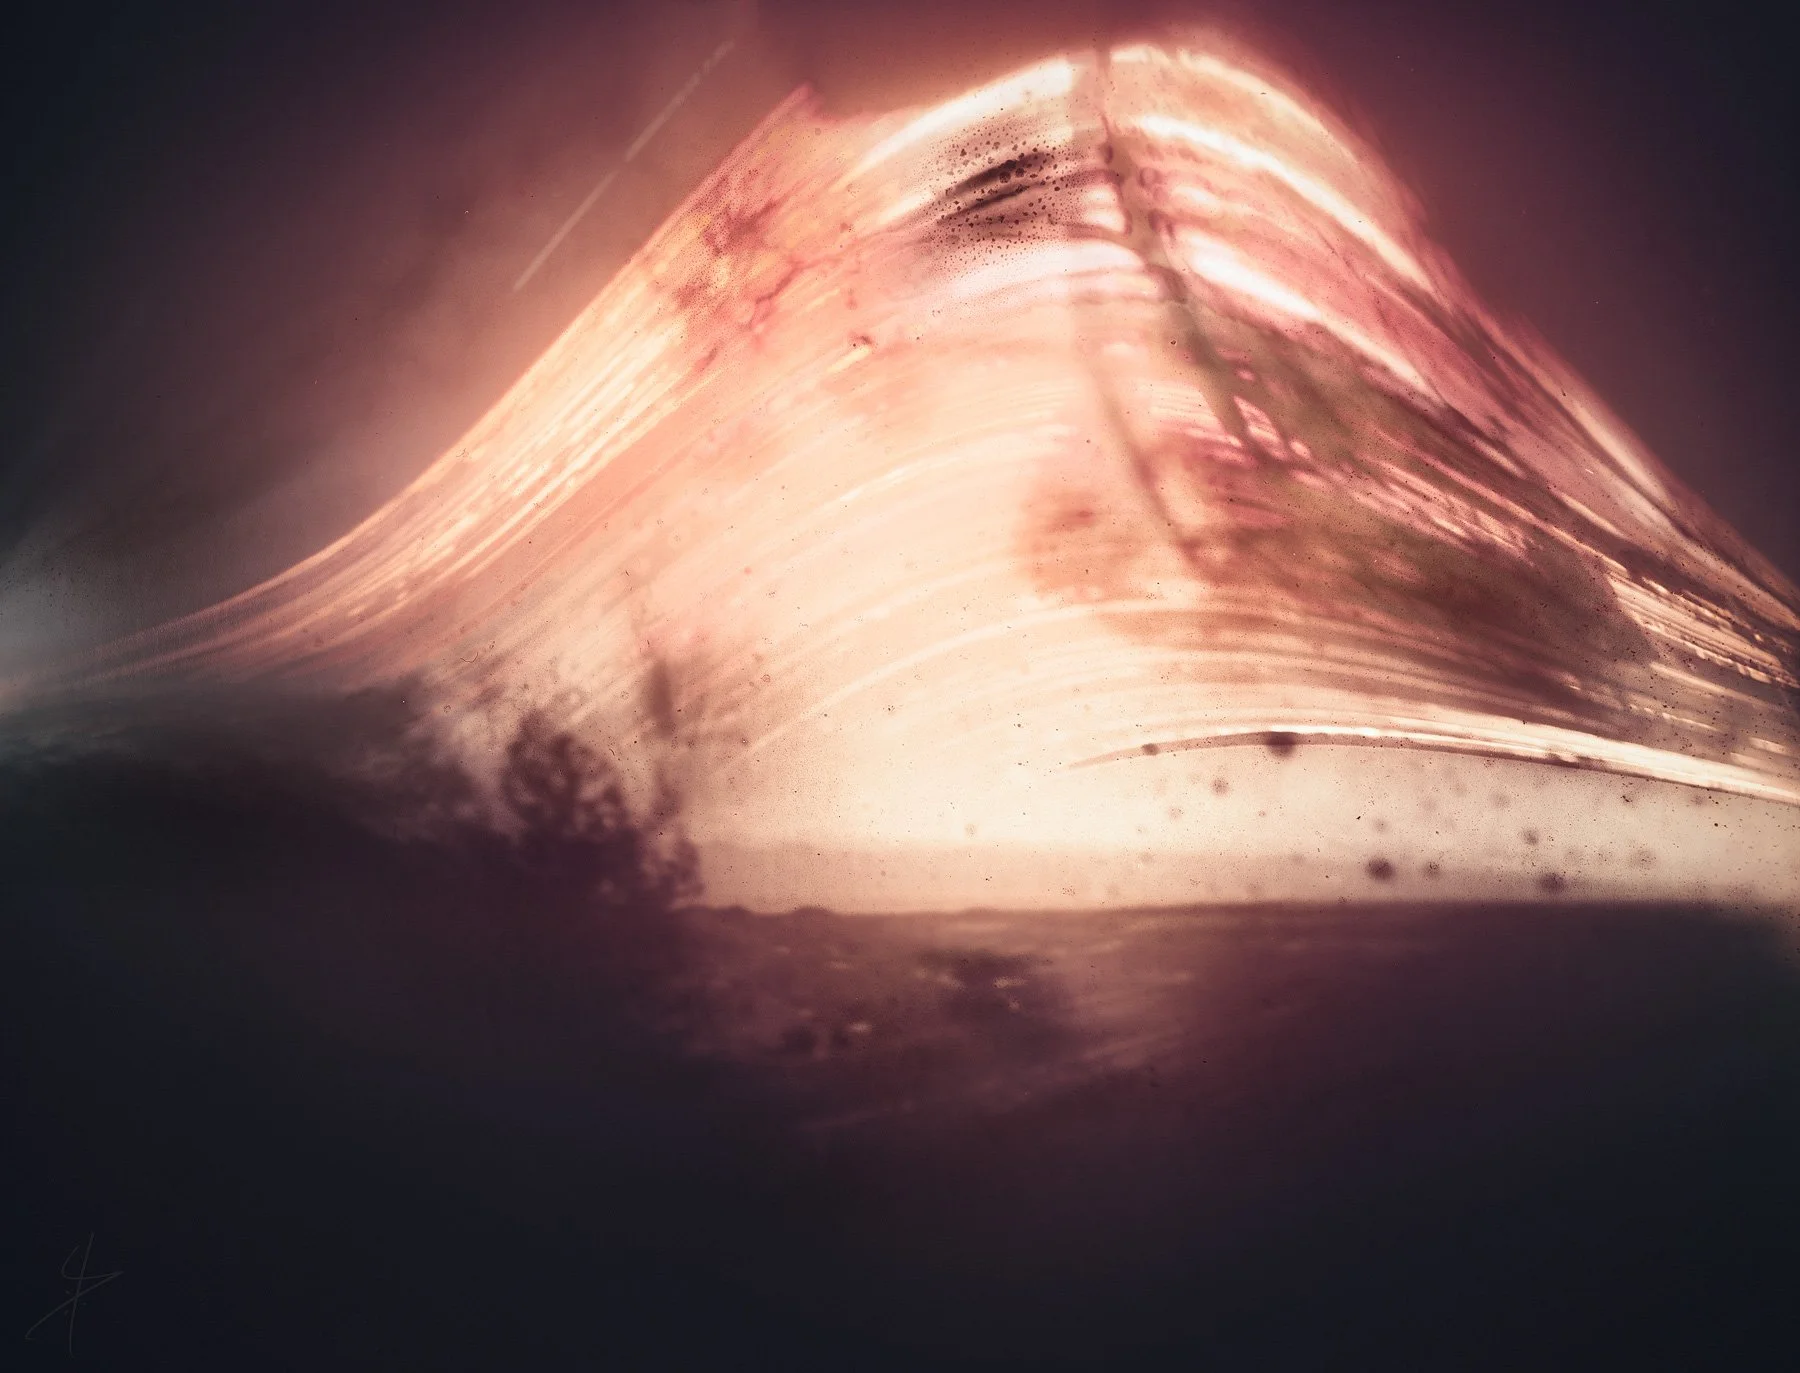
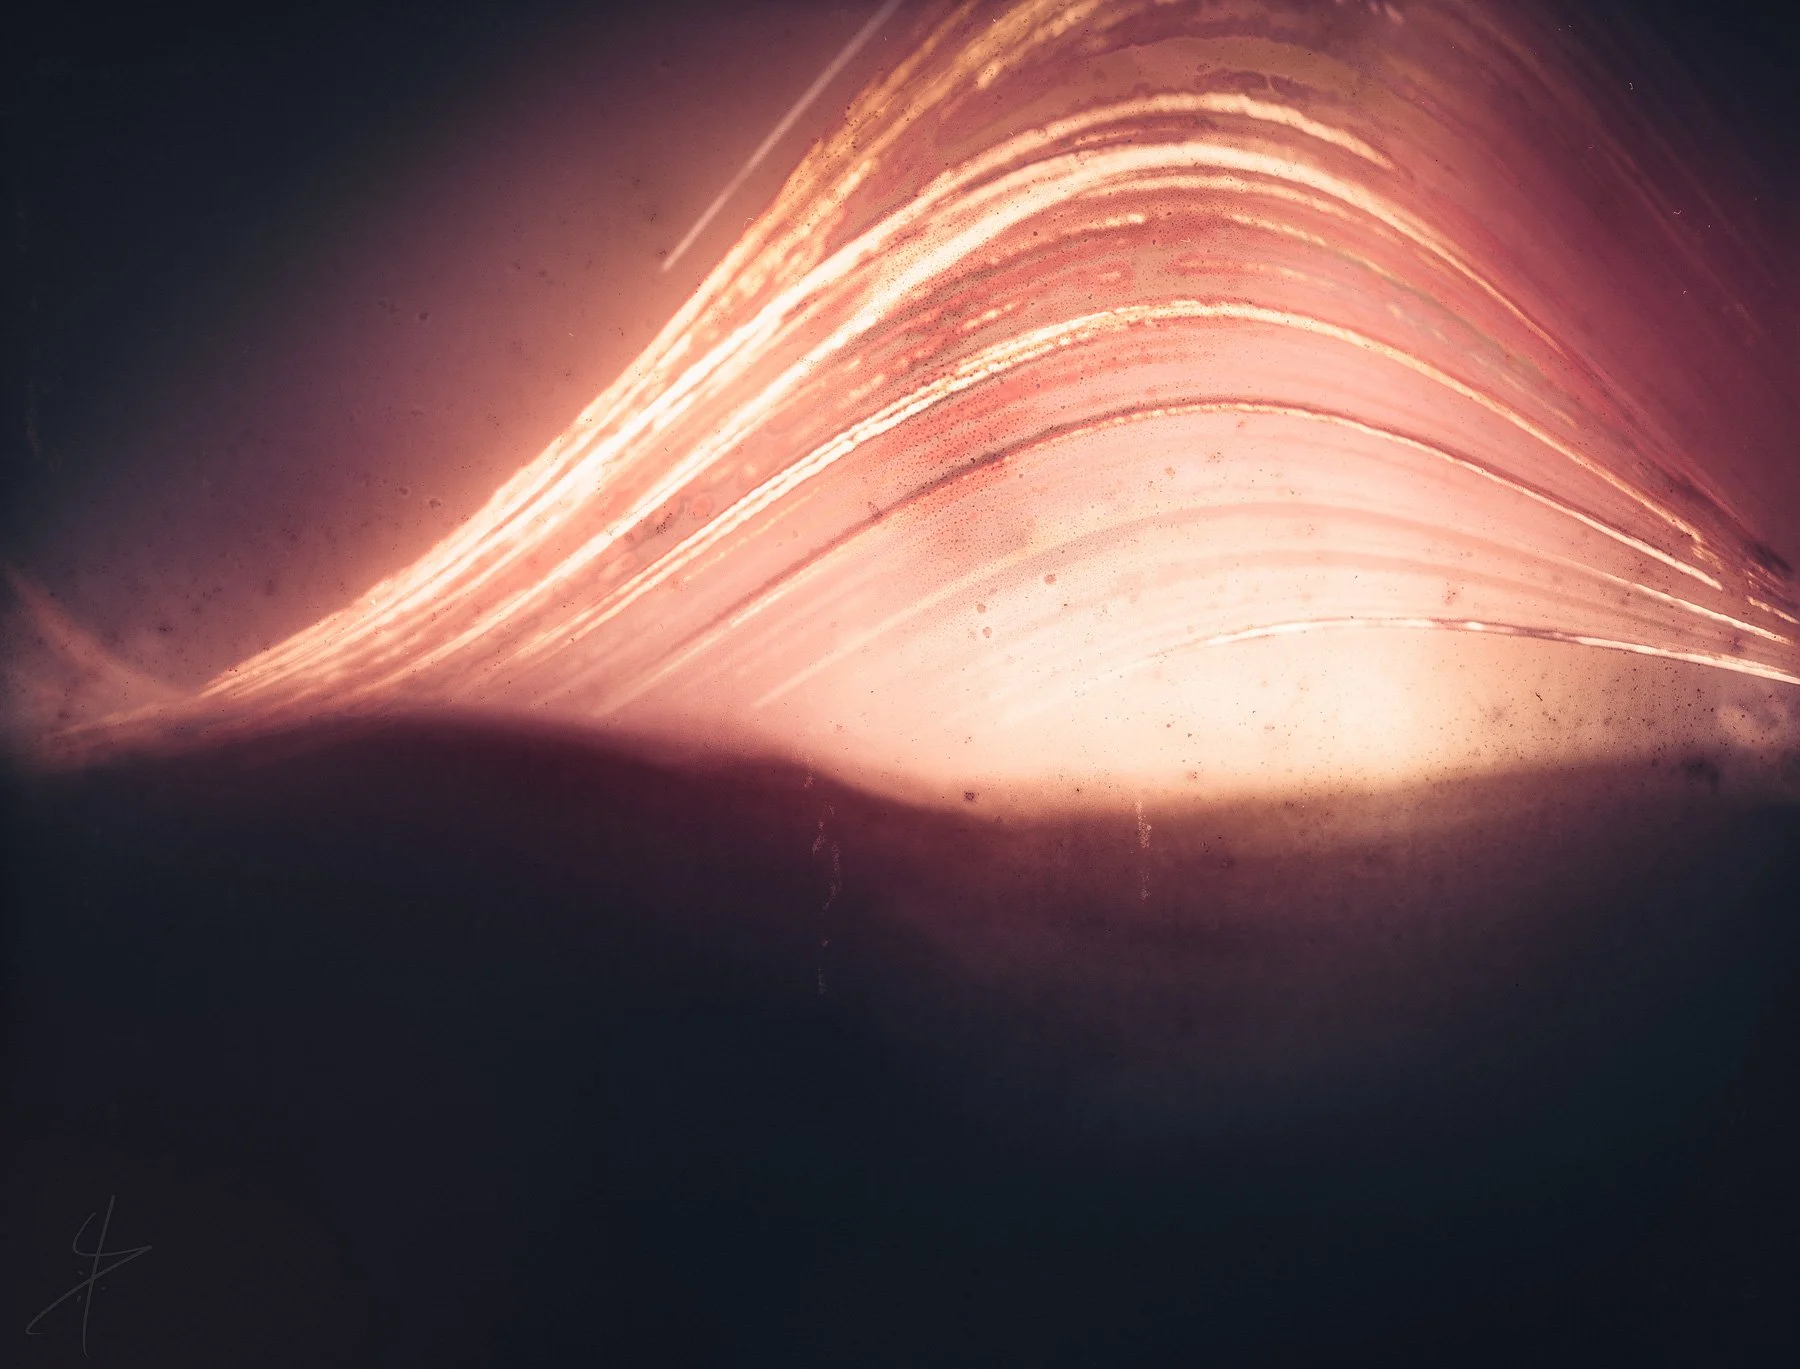
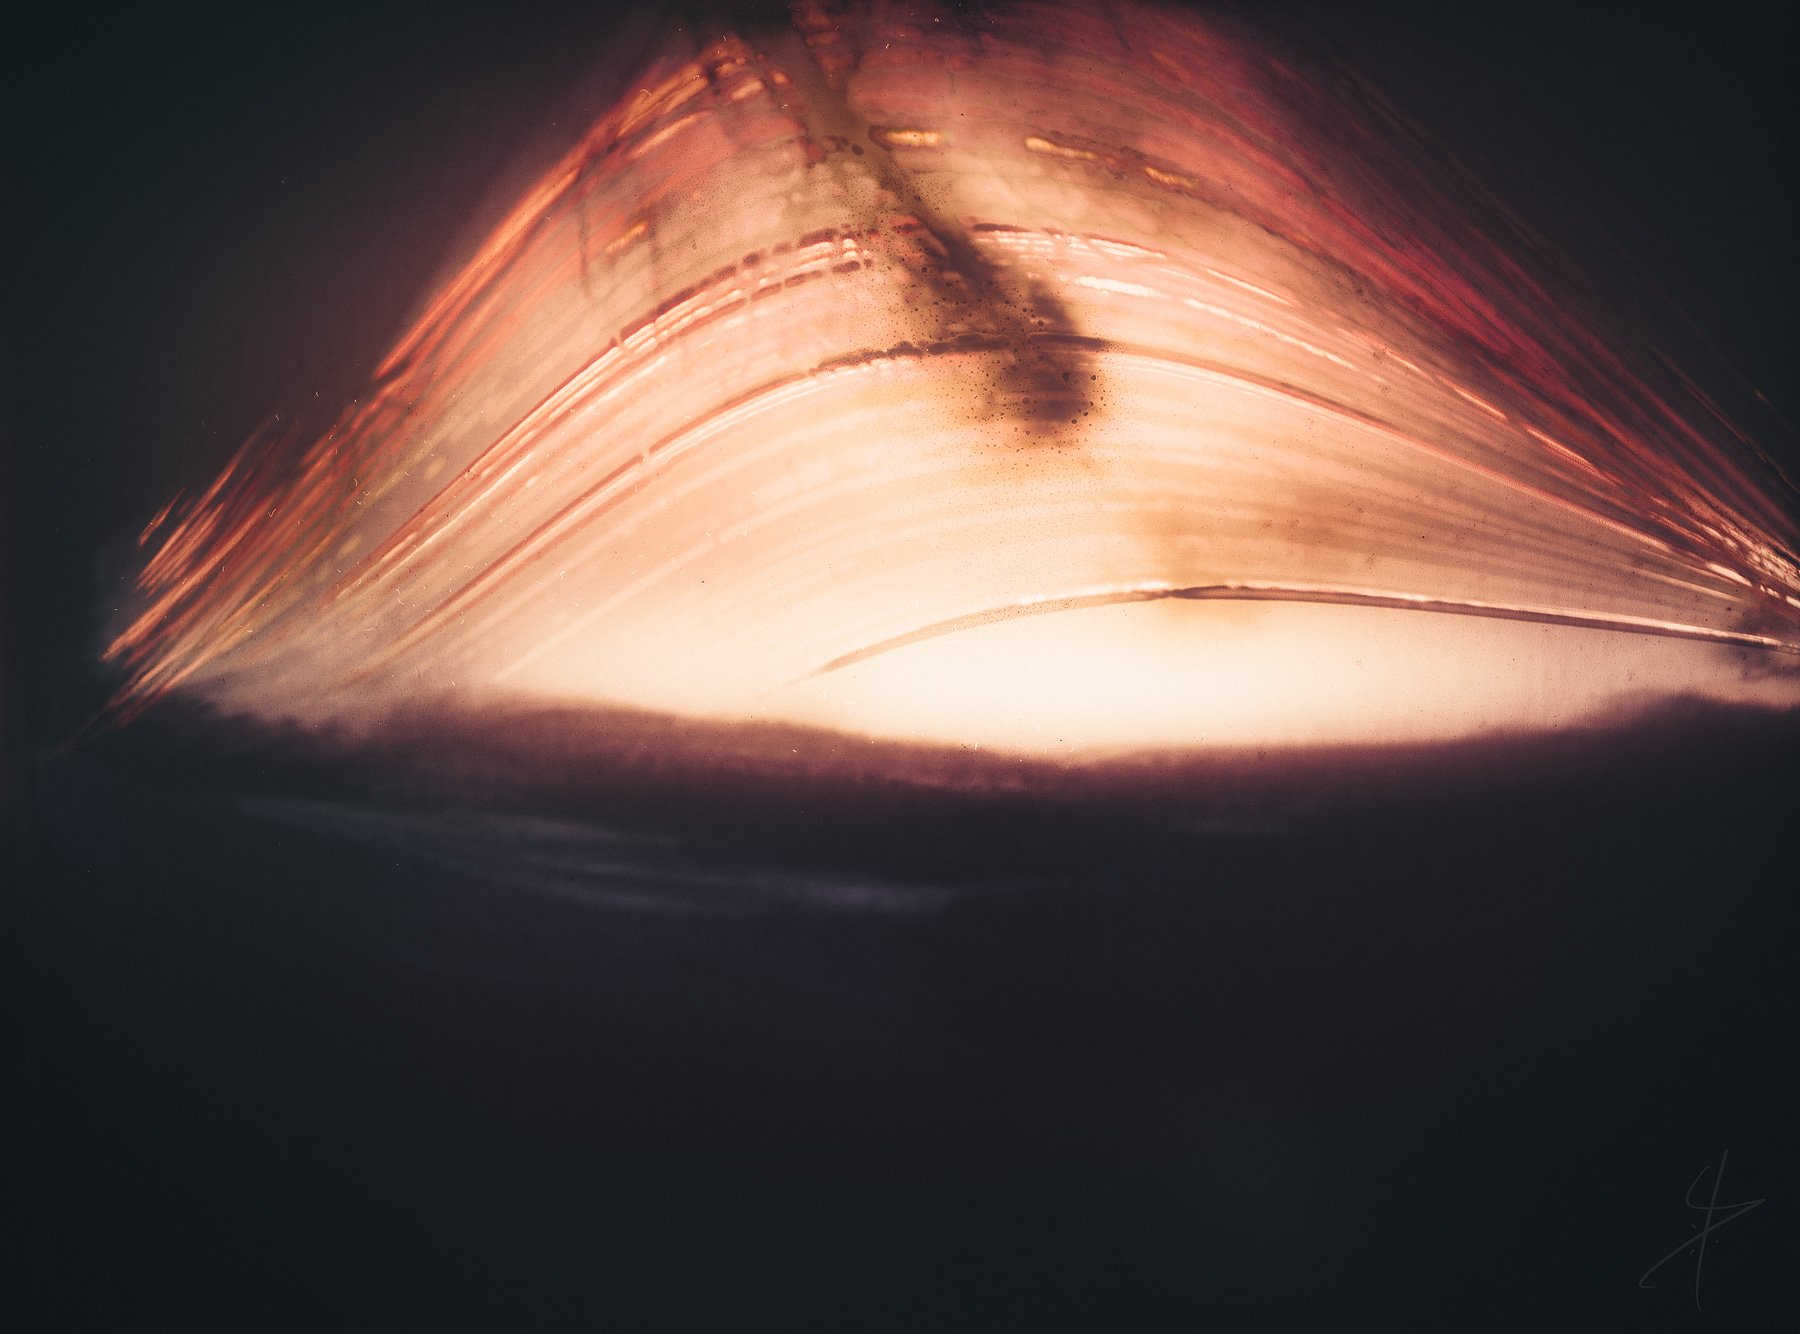
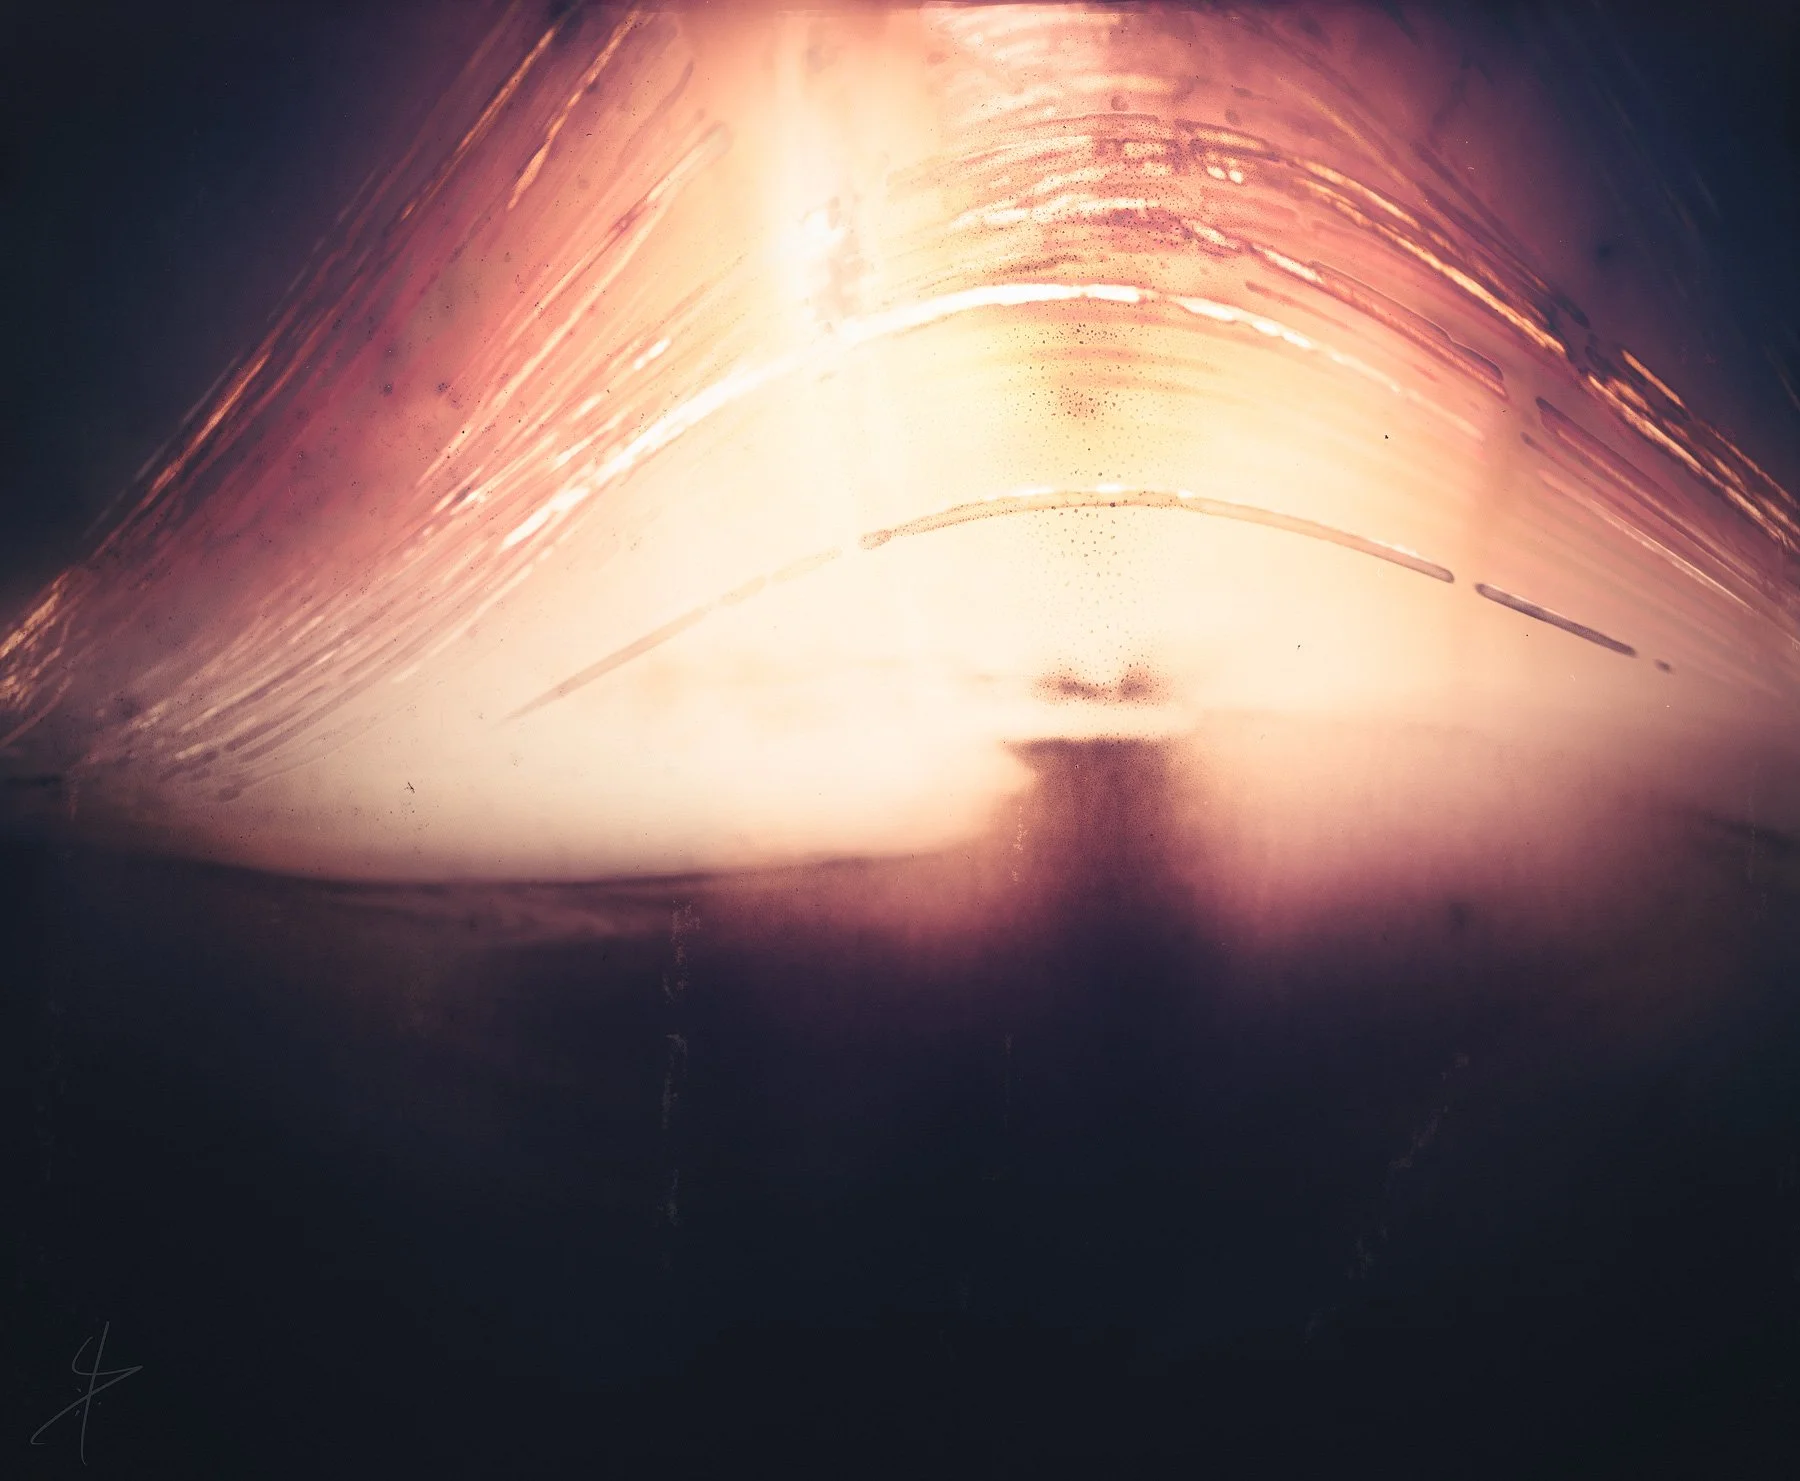
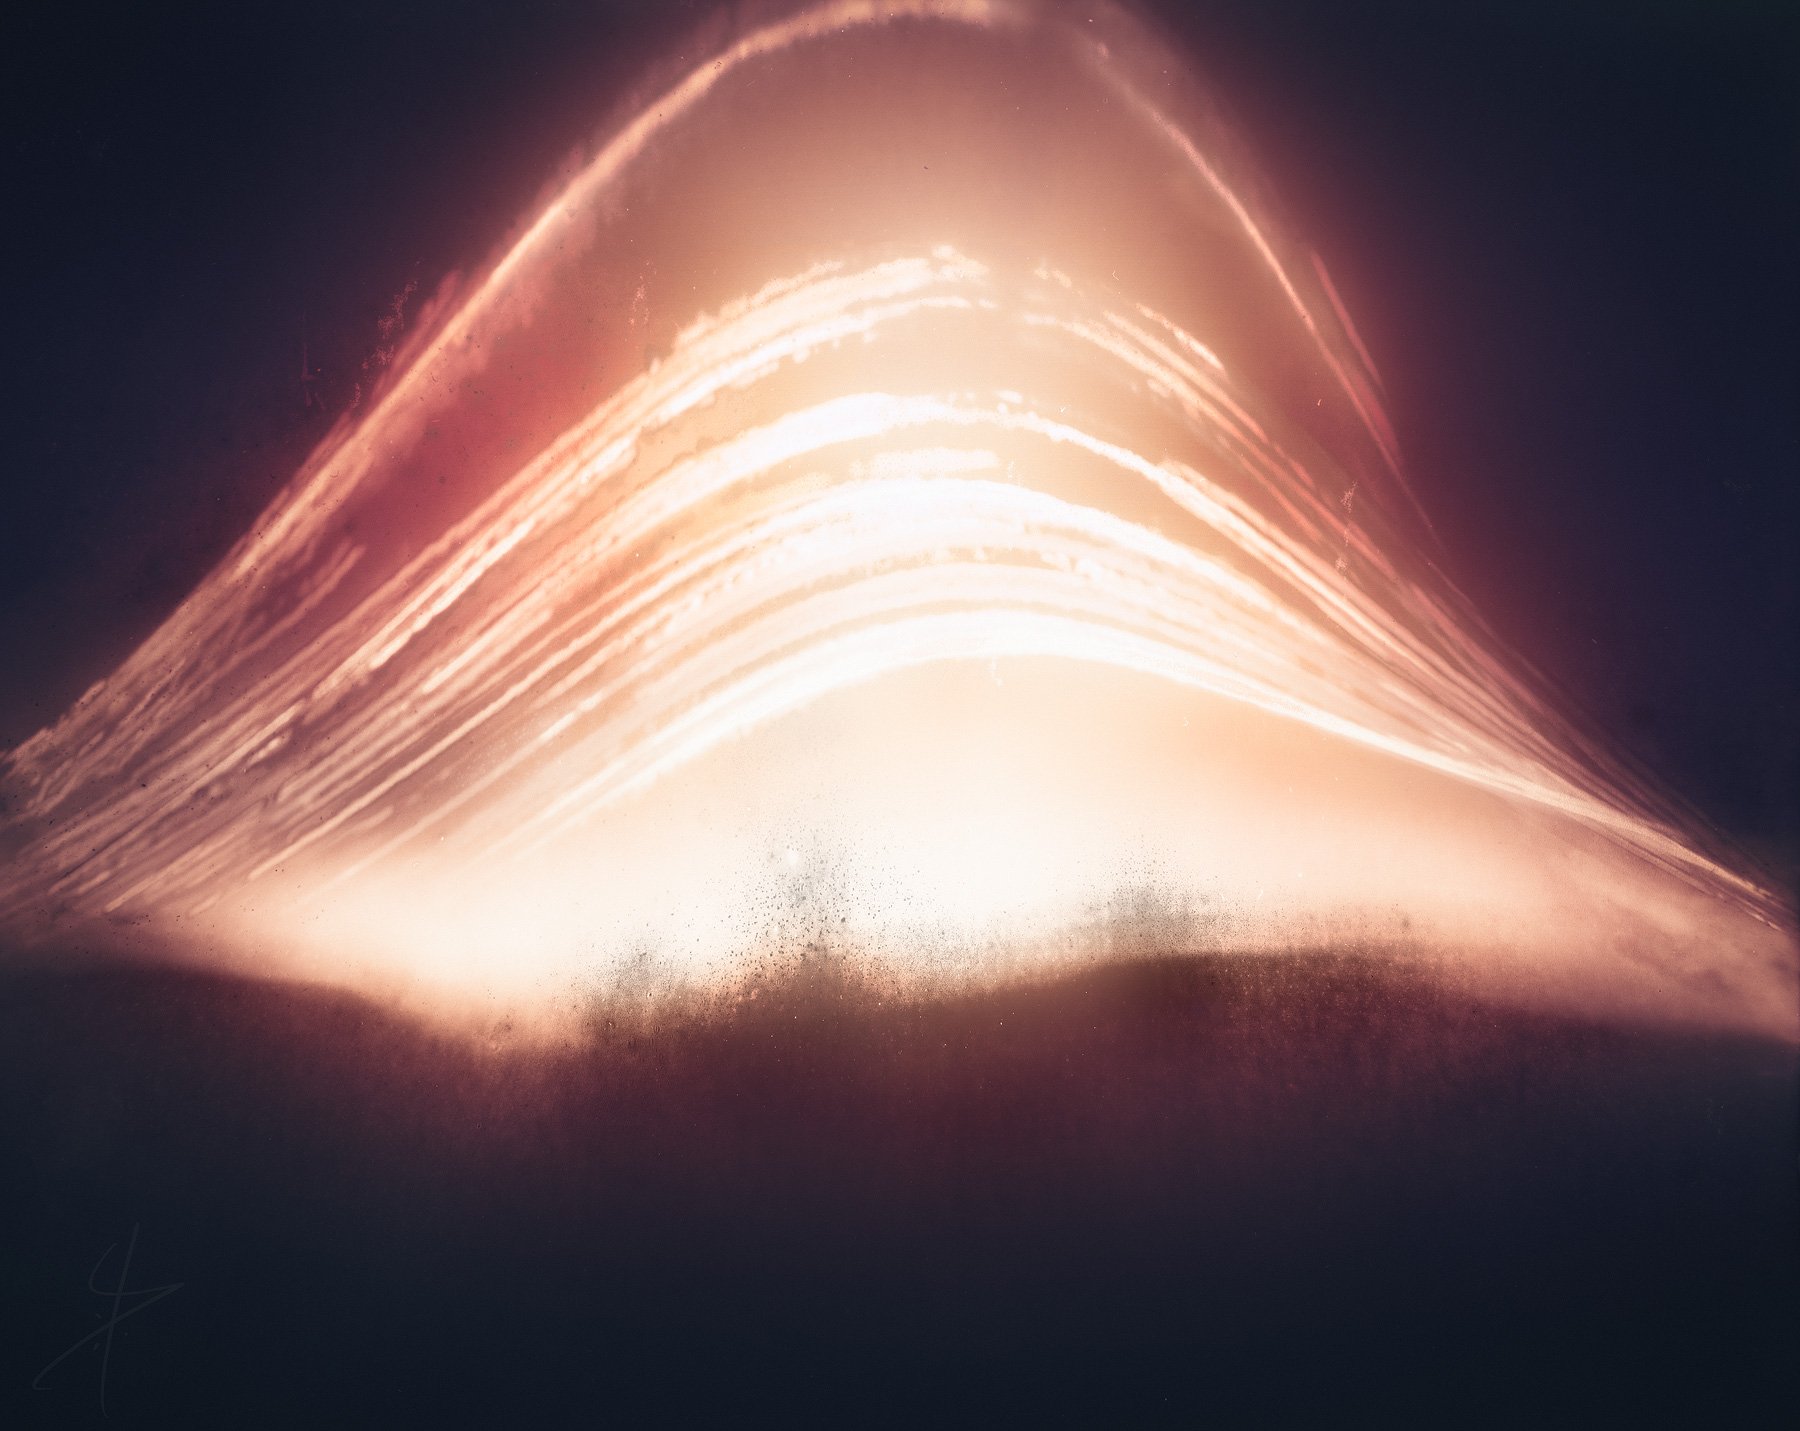
I’ve dubbed this series "Within the Blast Radius” as I very much embraced experimentation of color, light and dreaminess that suggests intensity. With the harsh contrast between light and dark, it’s as if the exposure has been adjusted to correctly image the incoming wall of fire. All the dust, heat damage and distorted shadows already worked with this concept.
Solargraphy tips from experience
So we’ve come at the end of the article. But I haven’t found the right place to put the more in-depth tips. Here’s exactly what I’ve learned about this process over the years.
Solargraphy tips: What I’ve learned from year long pinhole photography
Almost to the day, it’s been exactly ten years since I first recovered my first successful solargraphs. Before that I got a couple of duds, missing cans and fallen pinhole cameras. The rest I would put under the category “more or less character”. There are a few factors that go into great vs. failed solargraphy.
Can size and photographic paper sheets
Buying larger sheets and cutting them in the dark is considerably cheaper than buying sheets that exactly fit your cans of choice. Just realize that cutting them to size in the dark is frustrating, because you will leave fingerprints on the emulsion side of the paper unnecessarily and you will end up with solargraphs that are anything but rectangular.
What I ended up deciding was buy 500ml cans, 24x30.5 cm (10×12”) sheets and cut them into 4 more or less equal pieces. This will leave about a centimeter of vertical wiggle room in these cans and 2-3 cm horizontally around your pinhole once the cut paper sheet is rolled up in there. I recognize it might be tough to find metric sized cans where the imperial system is used, so here’s what you could do:
Ilford RC Multigrade Deluxe 3.5 × 5.5 inches is the closest non-trimmed option available. Placed with the 3.5-inch side vertical:
Paper height: 89 mm, suitable for the straight section.
A standard 355 ml can has a 66 mm diameter, which is a circumference of approximately 207 mm.
Paper length around the can: 140 mm.
Uncovered gap: approximately 68 mm, or 2.66 inches.
More on paper choice
I would have hoped it would be easier to source various photographic paper. But this kind of photography is about as niche as they come. Especially today. Which is exactly why I love doing this and why I have written down my train of thought at the very end of this article.
Ilford Multigrade RC alone comes in three different flavors as far as I know:
Glossy paper - Stay away unless you know what you’re doing. This stuff bounces light around inside the shiny inside of the metal cans. I would coat the inside with a velvety, vanta-like black and/or make a pinhole camera from more light absorbing material to begin with.
Satin paper - This one is the best for the reason above, but I’ve found it’s less resistant to moisture and heat. Satin has less texture than the one below, which is why there are less artifacts that show up when really push the contrast and especially dehaze.
Pearl - Sits in between the two. Relatively easy to tell the two sides apart in the dark by touch. Not glossy enough to cause problems, though contrast is kind of low when put inside a shiny can. I’ve had no water / condensation damage nor heat damage over the course of 6 month exposures in any of the cans I had recovered.
On other papers tested by others
Because I liked the Ilford one the best, I stayed with that one. In searching for those sources that prompted me to choose Multigrade over others I’ve found the following tests. I wouldn’t want my pictures to go on other peoples websites without their consent, so you’d have to open these to see the results yourself. External links open in new tabs:
The late Gregg Kemp tested these papers in 2009:
Ilford Multigrade IV RC Deluxe (MGD.44M), pearl finish.
Oriental Seagull F-2, glossy finish, pure black tone.
Foma Fomatone MG Classic, warm tone.
Kentmere Fineprint Variable Contrast F.G. warmtone.
Tarja Trygg did a test too back in 2009 around the same time as Gregg, but her website isn’t maintained since 2011 and it seems that the results of that test aren’t on there anymore.
Diego López Calvín tested these papers in 2015:
Ilford Multigrade RC Warm Tone.
Kentmere Select Variable Contrast Medium Weight Warm Tone.
Kodak Polymax FD Fine-Art Baryta, glossy.
AGFA MGP PRV (couldn’t find where the abbreviations stand for, but I suspect Multigrade Pearl).
Ilford Multigrade IV RC Deluxe (MGD.44M), probably pearl finish too judging by the texture, the same as the paper tested in 2009 by Kemp.
There are more tests on Flickr, but all I got was this after visiting Diego’s page once…

Pinhole Height
The height where you prick your pinhole on the can will determine how and where the paper will get exposed. All else being equal, especially the angle of the pinhole camera, higher pinholes will allow more space above the horizon and lower pinholes will show more of the foreground. If you’ve ever worked with a tilt/shift lens or bellows, think of this as shifting the lens vertically.
Pinhole and marking in the vertical middle of the can with the top cut off.
To waterproof or not to waterproof?
You could consider making the can waterproof. I’ve done that last time, but I don’t know which result I like better. The rusty, cracked and beat up solargraphs from an attempt I did 10 years ago have a lot of character, while the waterproofed cans create nice and clean results. Waterproofing is kind of simple, but usually requires an additional item on the shopping list, which I’ll mark for you later.
Pinhole camera with a cap and “professional shutter mechanism”.
Support your pinhole camera
Always place the pinhole cameras on some sort of support at the base. This is the number one reason pinhole cameras do not survive a storm. If you tie them around a tree like I do most of the time, then place the camera on top of a branch.
Natural tripod.
Solargraphy composition ideas
I’m a bit of a n00b when it comes to solargraphy. My images usually just show some streaks across the sky, while having a solid object in there could really add interest. Last time, I tried to image trees, dunes, lines in the countryside and roads. I had considered placing the pinhole cameras in populated areas, but I was reminded of missing pinhole cameras that I’ve put in more frequented areas last time. My todo list to inspire you: church, cemetery, barn, large ancient tree, rusty old car that’s been forgotten, crashed plane (Iceland?), mountain, rock formation, guy posing everyday in exactly the same pose (kidding).
I’ve seen this at workshops I ran for Milky Way or northern lights photography, where people are usually very happy to get any image of these celestial subjects without putting much thought into compositional aspects. It’s not until later we start being open to tips on foregrounds, composition and framing. Solargraphy too is still a form of photography, so the rules that make a great image apply here too. The technique is fun at first and you should definitely try it, but as soon as you get the hang of it, try to imagine what it might look like if you point the opening in your beer can towards a manmade or otherwise more permanent subject.
This could be an amazing location for solargraphy. All these hard edges would work well for definition. But be careful including street lights unless you want them to be prominently featured in your year-long exposures. Especially the ones facing the camera. It’s too bad I haven’t found a good spot for this, as this is facing East-South-East. So be aware of the direction, even on overcast days like this. Use Photopills or Sun Surveyor to determine the arc of the sun’s path before commiting the camera to a direction.
Choose a firm area where you can place the pinhole camera
If you can choose between two trees, take the larger one. Larger trunks and branches are more solid and sway less in the wind, resulting in sharper images.
Learn to feel the difference between the front and back of the solargraphy paper
This sounds pretty straight forward, but let me explain with this story.
Solargraphy Stories: Epic Fail
Imagine you finding your pinhole cameras after a year long exposure still in the same place. Enthused, you cut it down, put it in your bag and rush home. You turn off the lights, cut off the sandy duct tape and fumble around in the dark with your fingers around razor sharp aluminum as you search for the paper inside the rusty old can. Avoiding tetanus by sheer luck, you pull out the curled up paper as you press it on the scanner. The image rolls in as you await the result with bated breath. At last, your 12 month long exposure appears on the screen. Right? A white rectangle appears. Crap, you say to yourself. You must have put the solargraph upside down on the scanner in the dark. You now realize you should have bought that red light after all, but it’s a little late for that now. Worried that you might have ruined it already, you reverse and rescan the solargraph. But the same thing happens, only the bare rectangle is slightly darker…
This is exactly what happened to me with 2 pinhole cameras when I first tried solargraphy. What happened was that I accidentally put the backside of the paper toward the pinhole. Yeah, that will probably not expose your solargraphs as intended. As you feel the edge of unexposed paper for solargraphy, you can barely feel a difference. And it depends a lot on the type of paper that you will pick out. Make sure you learn to feel the difference by blind testing it with a piece of paper reserved for testing purposes so this doesn’t happen to you. And while you’re at it, learn to feel where the pinhole is inside the can, so you will not block it with your sheet of photographic paper.
Digital solargraphy
So if you were to put a pinhole in a spare bodycap or buy one of those laser engraved bodycaps that would fit your DSLR or mirrorless, could you do this digitally?
Some people have. But by own admission, Corine Hörmann isn’t the most patient photographer. So she started moving the camera as it was exposing the landscape after about two minutes. While I assume she does it with film judging by her work and writing, you could very well do this with digital cameras too. Think of it as intentional camera movement combined with a double exposure. Instead of actually layering exposures, you could do this in one shot. Expose for the landscape with a pinhole bodycap for 2 minutes, then move the camera slowly and deliberately toward a single direction for a straight line of the sun. This technically nor isn’t the same and it certainly doesn’t yield similar results, but it’s another creative avenue to explore.
The problem with digital is that heat created by running current through the image sensor will always generate thermal noise in the results.
One project I did back in the day was shoot an 8 hour long exposure self-portrait of me laying asleep to capture my twisting and turning through the night. Well that didn’t pan out. The image was just purple noise and nothing could be made out whatsoever.
A similar problem occurs when shooting star trails. Long exposure star trails also create thermal noise. Astrophotographers could use a star tracker and slew (move/rotate) the tracker along the Earth’s north-south axis to fake the trails or you could shoot hundreds of 30-60 second exposures and stack them together, but you will end up with visual gaps that somehow need fixing.
Those gaps are also a problem during the day for digital solargraphy. But that’s not all. To get a good exposure of the foreground, you will really overexpose the sky. So much so, that the sun is completely invisible in a wash of white. To the modern digital landscape photographer, this is a fairly simple limitation that can be overcome by exposure bracketing. You shoot one exposure for the foreground and one for the sun’s path at 15 stops darker to just see the sun’s disc, but not the glare surrounding it. I don’t remember of any camera I have used over the years that could bracket 2 photos 15 stops apart… And to my knowledge, 15 stop ND filters are a niche yet to be filled. Then you need to combine hundreds of bracketed image pairs and take care of the gaps.
Long story short, digital solargraphy has been attempted by many and only the most technically skilled photographers have had decent results. But I think you need more patience sat at the NASA-spec computer to merge a few hundred 50 Megapixel raw files than dedicating one day to creating pinhole cameras and setting them up and another day to pick them up and scan them.
In closing: Why Solargraphs now?
This wouldn’t be a Laanscapes blog item if there wasn’t some sort of philosophy or psychology involved. And I have a couple of personal reasons for wanting to dable in “analog photography” like this. Eventhough saying that is kind of cringy. There’s been a movement on the internet over the last decade or so that makes people want to engage with the physical world again more. I certainly count myself among those as I feel a strong love/hate relationship with technology. Let me explain.
The more advanced and the more automated technology becomes, the less I feel in control of the creative process that is used to translate my vision into physical art. Especially nowadays, with AI-generated images becoming ubiquitous on social media, I’ve felt a strong urge to step away from all that.
I’m not against AI, not at all. One example I use AI tools is in music production. I’m a one-man band as well and the way I write music nowadays is to record my guitar track, add a few drums and pull it through AI a few times until I hear something that I like. I then play the AI stuff as I noodle with different instruments over it. And sometimes I land on a melody or riff that works well. I then create a full track from that. So there’s actually no AI at all in the recording, it’s just a tool I use somewhere along the way to expand upon ideas or narrow them down.
In photography editing, generative expand and spot healing are pretty useful. And so is generative upscaling to create larger prints. My point is that AI definitely has its use in more than one area. Man, I’ve created complete web apps while only being fluent in HTML and CSS. My wife is an actual programmer and uses it to test out new ideas, troubleshoot bugs and what not…
There’s the other side too. The dark side of AI is perhaps more known since you’re reading this on a photography website. But I’ve written about AI ad nauseam by now.
I like going on YouTube. A little too much perhaps, judging by the hours spent on there per week. It’s the weekly dose of news you don’t see anywhere else. It’s the way incredibly talented people film and tell stories. But I absolutely hate it when those stories and podcasts have AI-generated images and movies to support YouTube videos. To be fair, cheap stock footage that you start to recognize isn’t much better, but at least it depicts some form of the actual world. I’m sure you’re familiar with the moment they mention “scientists” and you see a couple nodding people looking all serious in white coats in some sort of lab doing absolutely nothing that relates to the subject.
There’s a growing hunger to physical media and ownership as well. Even when I ran workshops with Kai Hornung, we talked about our vinyl collection, record players and all that and since then, I’ve slowly expanded my bookcase that is now starting to whisper that it needs support from the weight of it all. With streaming services left, right and center, there are more subscription options than ever and along the way, consumers accepted this as the new normal. But what happens when Apple TV quits? What happens to the movies you bought on it, YouTube or Amazon Prime in addition to your subscription fee, when the rights to those movies expire or get sold to the highest bidder?
There are playlists that I’ve created on Tidal and on Spotify before that, that have grayed out songs. More often now, that’s because artists are fed up with how they are getting ripped off by those streaming services. Did you know that, as of this writing, Spotify and Tidal do not pay artists a fixed fee per listen? They pay royalties to rightsholders, then artists get paid according to their label, distributor, publishing and split agreements. Which seems fair and entirely legal, but know this. Spotify’s commonly reported 2026 estimate is about $0.003 to $0.005 per stream, but the actual amount varies by country, subscription type, ad revenue, distributor cuts, and the rights deal. Spotify also requires tracks to hit at least 1,000 streams in the previous 12 months to generate recorded royalties. Tidal is generally estimated higher, around $0.008 to $0.013 per stream. That means the payout is about 3,000 to 13,000 bucks per million streams, which then must be divided according to whatever the artist has signed. In short, I’m under no illusion that I’ll ever see any money from what I’ve recorded over the last year, which is also why I’ll opt for self-releasing on physical media i.e. vinyl.
Then there is the debacle of false copyright claims for independent artists, where some fella makes a claim through Spotify let’s say, on a song that isn’t his to begin with. I like to edit photos to Martin Stürtzer’s home concerts. But this happened to him a while ago. And there was nothing he could do about it, as he has prove enough that the tracks are indeed his, but there’s no way to contact an actual person at Spotify, nor indie publisher Distrokid, as these helpdesks are all AI. And the number of people working there is declining. As is the case at every major tech company around the world.
By now we’ve drifted so much off-topic that it must be clear to you that all this is worrysome to me. And so I’m steering the monologue back to why solargraphy is one of the ways I completely forget my worries about the rise of technology this graying 41-year old millenial no longer fully understands.
Whether it’s cropping sheets of photosensitive paper in the dark, cutting stinky beer cans open or climbing trees, there’s a real visceral experience to solargraphy. It can be touched, smelled, felt and a few days ago, I could have sworn I tasted a new flavor that might have been the emulsion coming off as I handled 10 solargraphs and forgot to wash my hands amid the enthusiasm. And those beer cans have to emptied somehow, right?
Storytime in the Dutch dunes as we “prepare for solargraphs”, with a legendary quote from the underrated second movie of the trilogy: The Matrix: Reloaded.
I’ve revisited solargraphy after 10 years because making pinhole cameras is just a real fun photography project. One that I thought didn’t force me to sit hours at the computer staring at a screen. But here we are, writing this gigantic article and still having to process the other 7 solargraphs. Thanks for listening what I have to say about this wonderful hands-on niche of landscape astrophotography. Oh, speaking of which, have you read my DLSR and mirrorless lens test for that?
If you like what you’ve read, consider checking out my e-book “Musings of a Landscape Photographer” which contains many more essays on photography, art, life and philosophy.
Laanscapes Solargraphy Portfolio Box Within the Blast Radius
If you’ve found my solargraphs to be absolutely fantastic, maybe tell your spouse or friends about this unique gift: the Within the Blast Radius solargraphy Portfolio Box - all 10 printed with archival inks on A4 cotton fibre paper.
The first ten sold will include one original signed solargraph of this set.
In addition, the first 20 will also include a print of a 2016 original solargraph. But there’s only a stock of 50. No reprints.
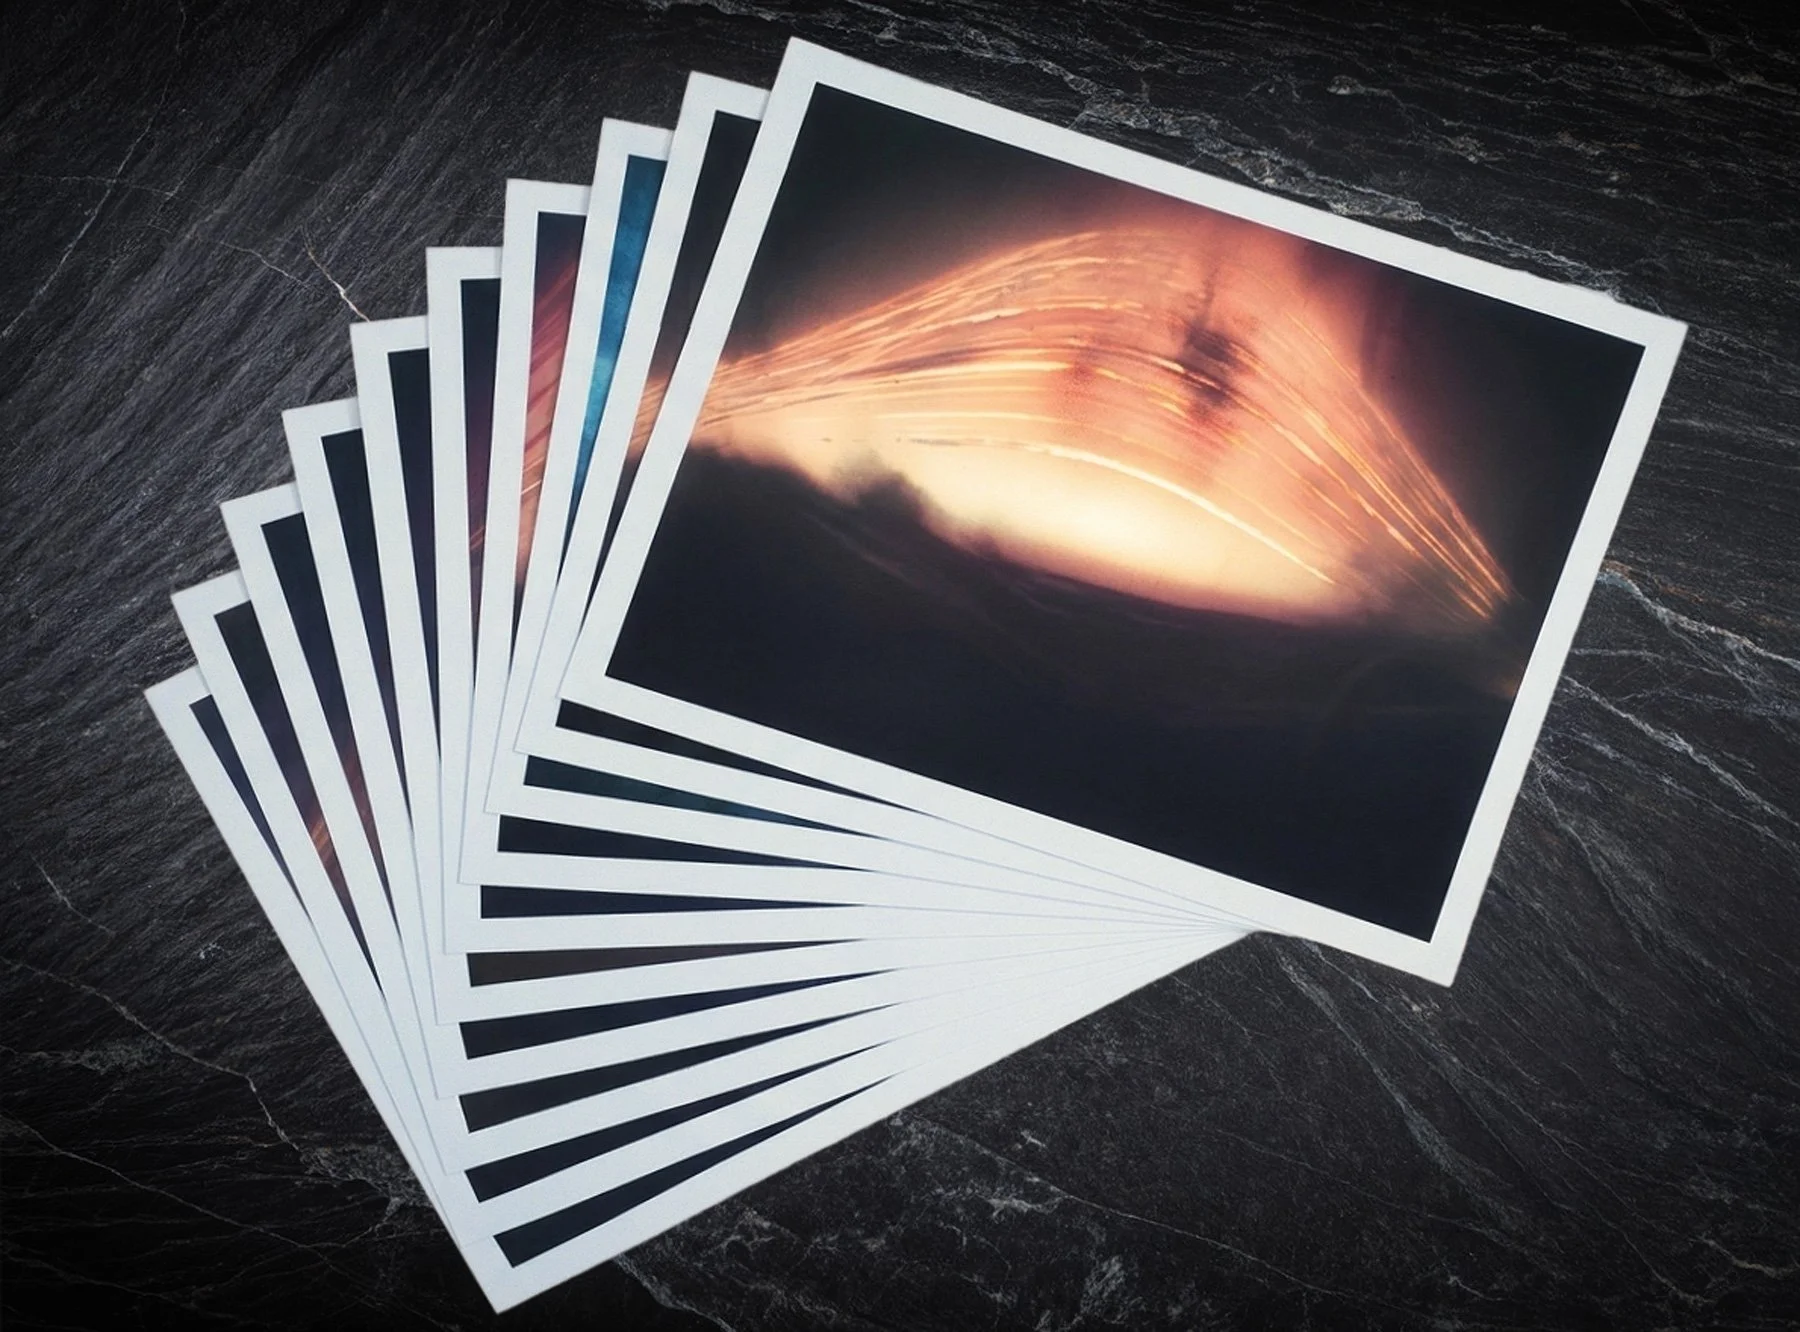
Recorded using homemade pinhole cameras with photographic paper from the winter solstice in 2025 to the summer solstice of 2026, these solargraphs depict very intentionally an interpretation that resembles various detonations of nuclear devices.
With global tensions rising every day for the past few years now, it's harder and harder to predict whether or not we will have a future that's not reset by catastrophe. This is a bitter pill to swallow, especially since we like to enjoy art rather than being reminded of the mortality of entire civilizations. But life isn't always fun and positive.
To me personally, that is a very difficult concept to come to grips with as I've struggled with depression during the time these photos were recorded. With fun, empathy and compassion among my core values, the realization that even the outcome of these can be messed with by the powers that be is part of a healing process that I am still very aware of. For as long as I can remember, I have infrequent, but scarily visual dreams of me standing witness to a nuclear explosion. Especially given the hopefully not prophetic nature of those nightmares I keep having. Perhaps I saw something on TV at a young age I shouldn’t have. In more ways than one, these one of a kind photos serve as a milestone moment to remind at least myself that there are mechanisms at play that we have no control over and so we should be more considerate of the present moment and our immediate surroundings. One of the ways I quietly manage my mental health, is to go out often and spend time walking in nature, away from digital media. At one point, I was reminded of what I created in 2016 and how excited about photography I felt back then. What if I were to combine my love for that stretch of nature, my knowledge of all the nooks and crannies that provided south-facing vistas and longing for simpler times that were even a slight amount more “analog”? There is hope that creating this solargraphy series is cathartic and these dreams stop occurring.
About the Location
These prints are of photos taken of the sun’s path over the Dutch landscape. All 2026 solargraphs were captured for half a year in The Schoorl Dunes, about 20 minutes from my home. The Schoorlse Duinen (Dutch) is a dynamic coastal natural reserve in the province of North Holland in the Netherlands, spanning approximately 1,875 hectares (roughly 4,633 acres) and managed by the Dutch forestry agency Staatsbosbeheer. Geographically and topographically, it is famed as the widest and highest dune system in the Netherlands, reaching a maximum width of five kilometers and peaking at an elevation of over 55 meters above sea level. This unique landscape is a key component of the European-wide Natura 2000 network and historically represents a transition zone within the Younger Dunes system, which began forming relatively recently in geological terms around the 10th to 12th century AD, capping older, flatter Pleistocene and early Holocene sandy layers. Historically, the entire area was a barren, constantly shifting desert of sand that threatened to bury adjacent inland villages. In a massive man-made intervention around 1900, Staatsbosbeheer systematically stabilized the sand drifts by planting marram grass (Ammophila arenaria) and vast expanses of non-native maritime and Scots pine forests. Many solargraph feature shadows of these pines. The 2016 solargraphs were captured about 29 kilometers north in a similar looking place called the Grafelijkheidsduinen where I used to live relatively close to back then.
Within the Blast Radius is a record of sunlight, landscape and time, but it is also a reminder that permanence may be little more than a story you tell yourself for reassurance. The sun continued moving. The trees continued growing. Cameras fell from branches. The world remained unstable.
For half a year, photographic paper quietly recorded all of it. Now you can hold that record in your hands.
The first ten orders include one original solargraph of your choice. First come, first serve.
Lastly, let me share this touching solargraphy gallery by Heather Palecek. She uses all sorts of techniques to create solargraphs to mark days that are important to her.